User Settings and Access Management
Manage users in your Planir workspace, assign them the right roles, and control which company entities they can access. This ensures every team member only sees the financial data they are responsible for.
Why this matters
Planir is designed for accountants, CFOs, and finance teams who often manage multiple companies. Proper access control keeps workspaces organized, protects sensitive financial data, and helps teams collaborate efficiently across clients or business units. Setting up roles and access correctly from the start avoids tricky access cleanups later.
When to use this
- When onboarding new staff into your accounting firm or finance team
- When granting access to specific client companies
- When adjusting permissions as roles change
- When controlling visibility of financial data across multiple entities
- When removing access for someone who has left the team
Before You Start
Make sure you have:
- The full name and email address of the person you want to invite
- A clear view of which role they should hold (Account Admin, Finance Lead, Finance Manager, or Viewer)
- A list of the companies they should be able to access
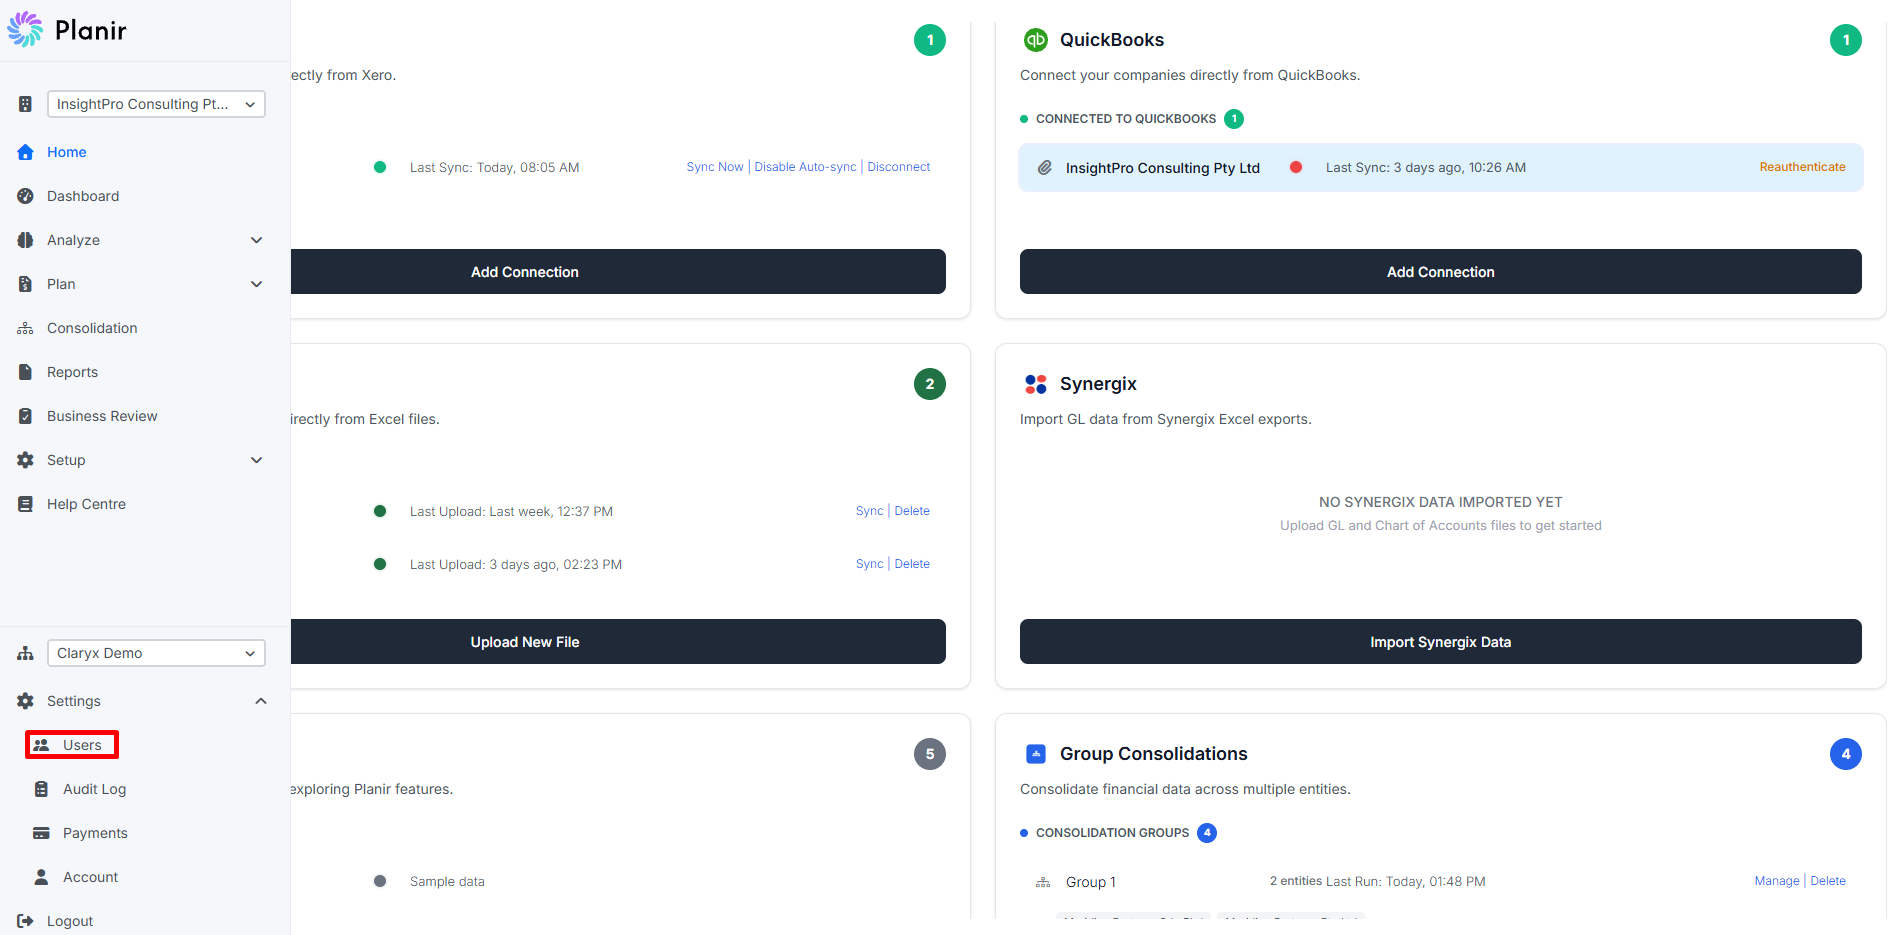
Step 1. Open User Settings
- From the bottom of the sidebar, expand Settings.
- Click Users.
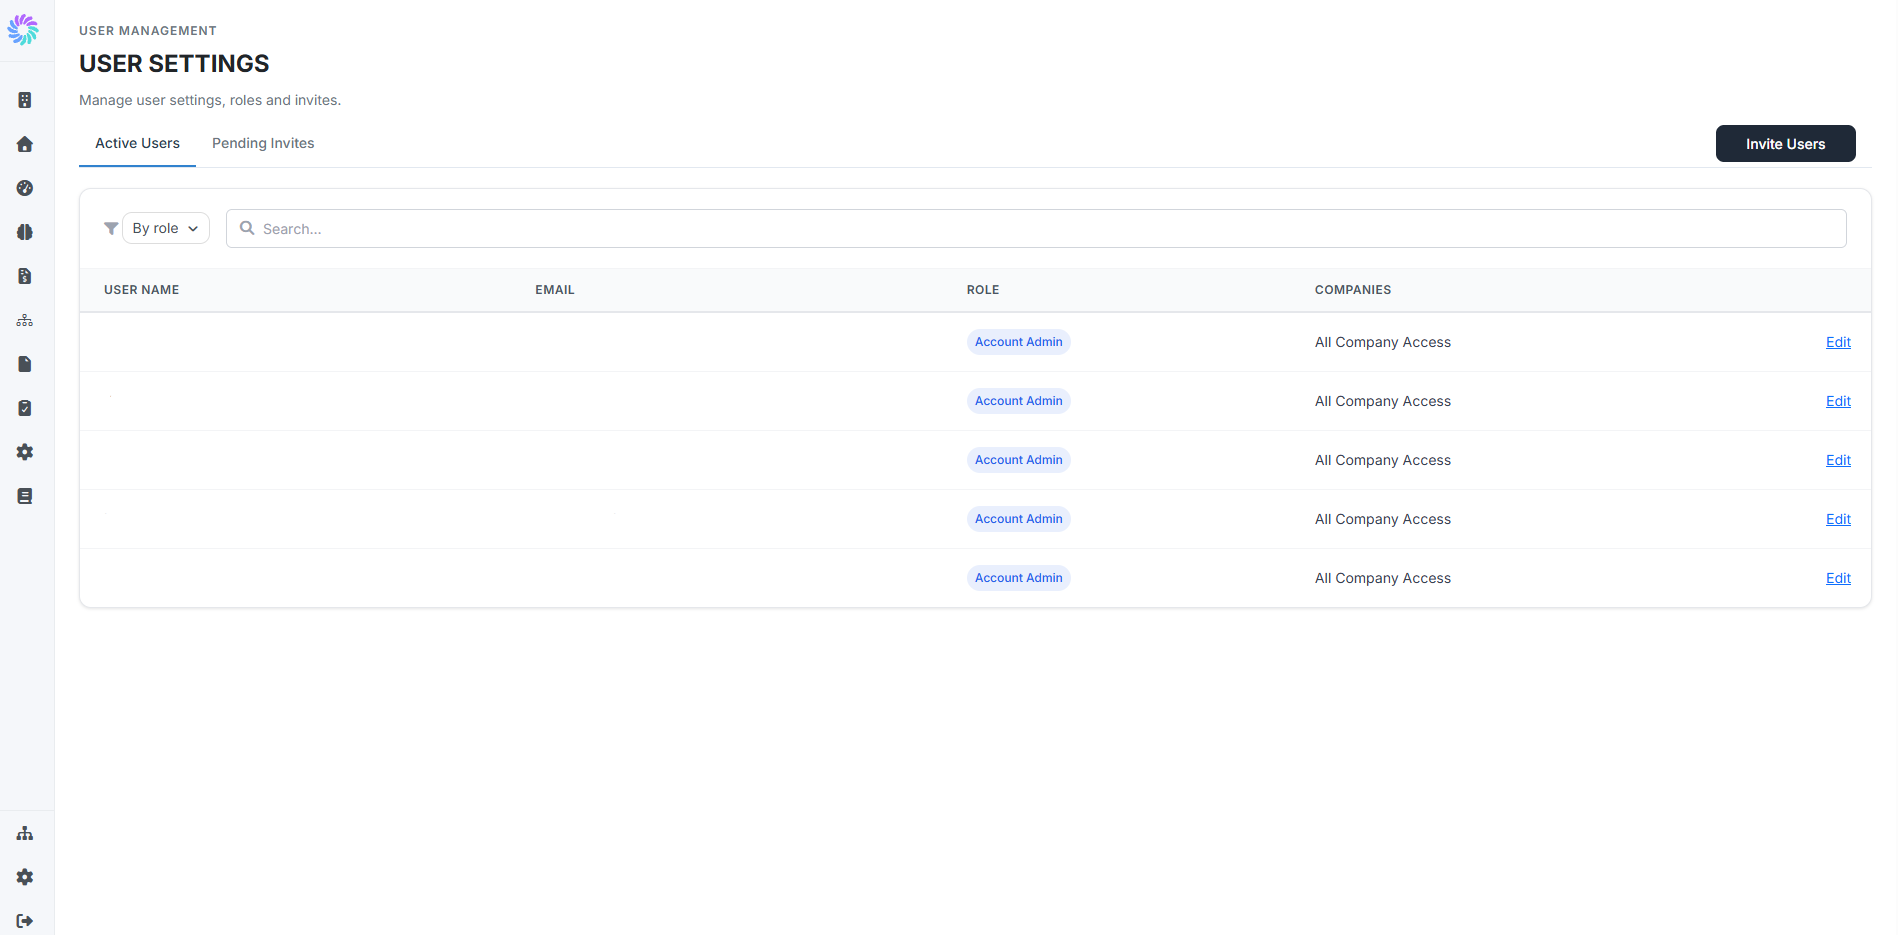
The User Settings page opens with two tabs across the top: Active Users and Pending Invites. The Active Users tab lists every current user, their role, and the companies they have access to.
You can filter the list By role using the dropdown, or search by name or email using the search box.
Step 2. Understand the Four Roles
Planir has four built-in roles, each with a different permission scope:
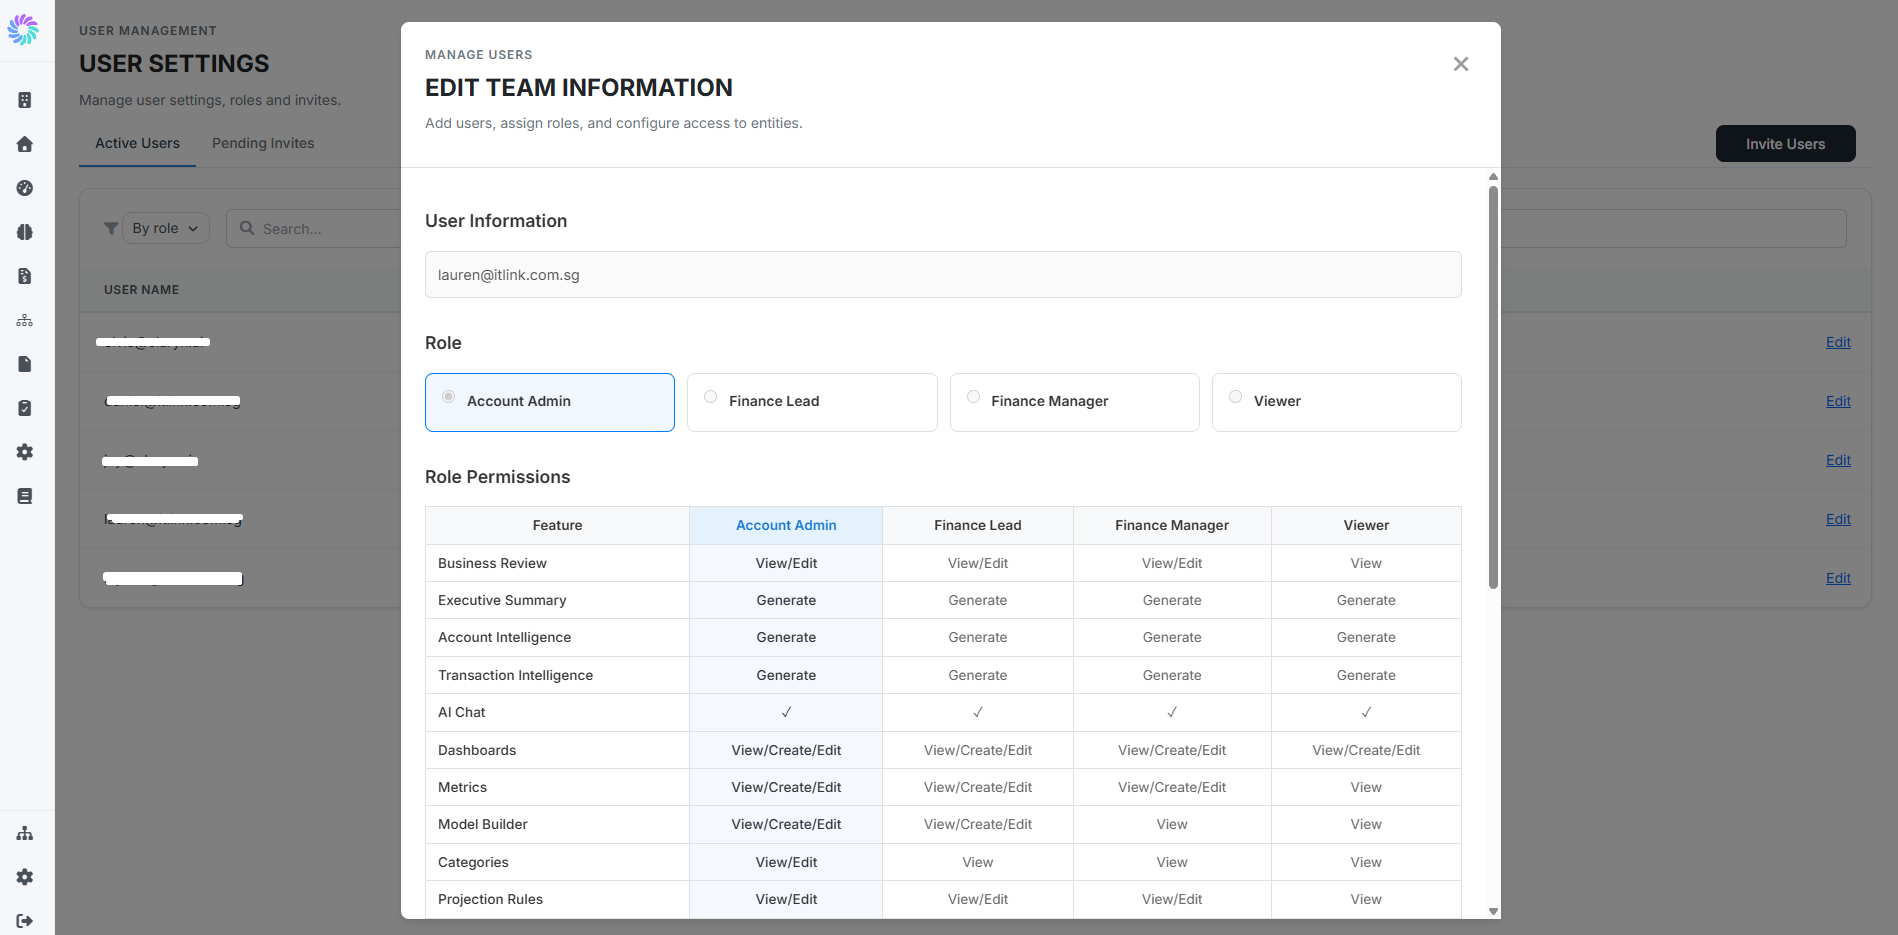
- Account Admin: Full access to everything in the workspace, including User Management, Role Management, Company Settings, and Accounting Connections.
- Finance Lead: Broad access to financial features (Business Review, Dashboards, Metrics, Model Builder, Categories, Projection Rules, Chart of Accounts, Accounting Connections) but cannot manage users or company settings.
- Finance Manager: View and edit access to most reporting and analysis features. Can sync (but not manage) accounting connections, and cannot edit Categories, Projection Rules, or Company Settings.
- Viewer: Read-only access across the workspace. Can view Business Review, Dashboards, Metrics, Chart of Accounts, and the Intelligence Suite, but cannot create or edit content.
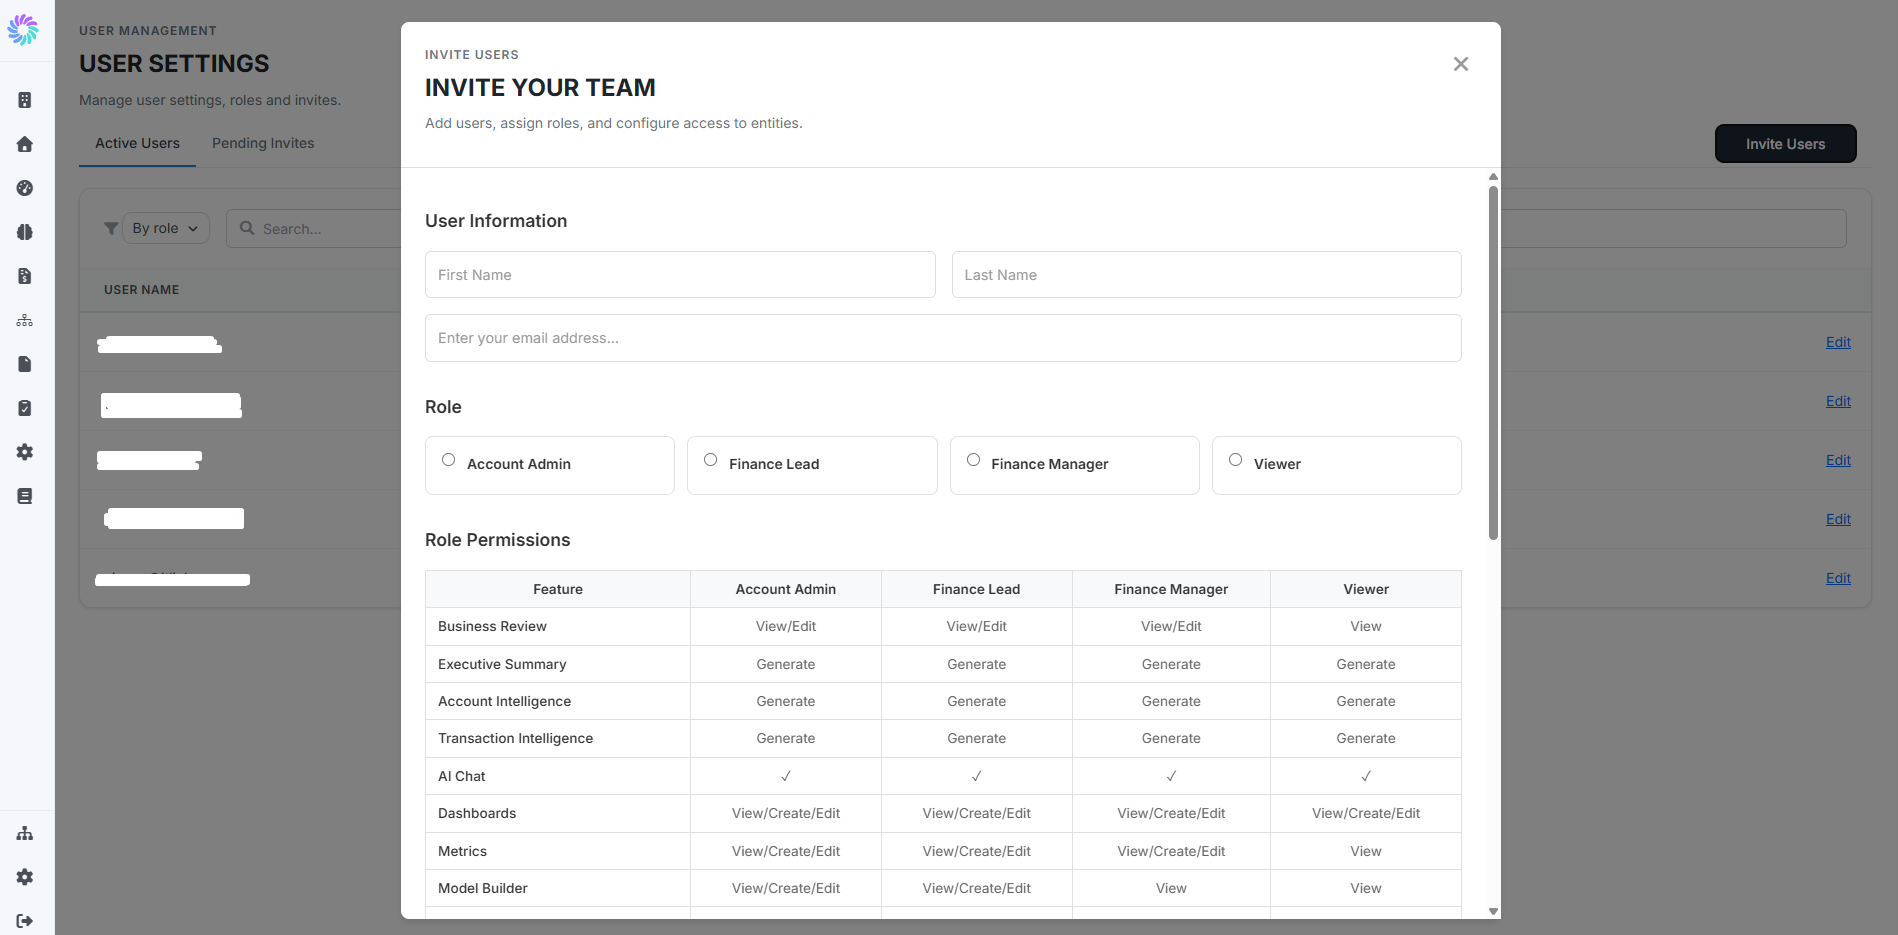
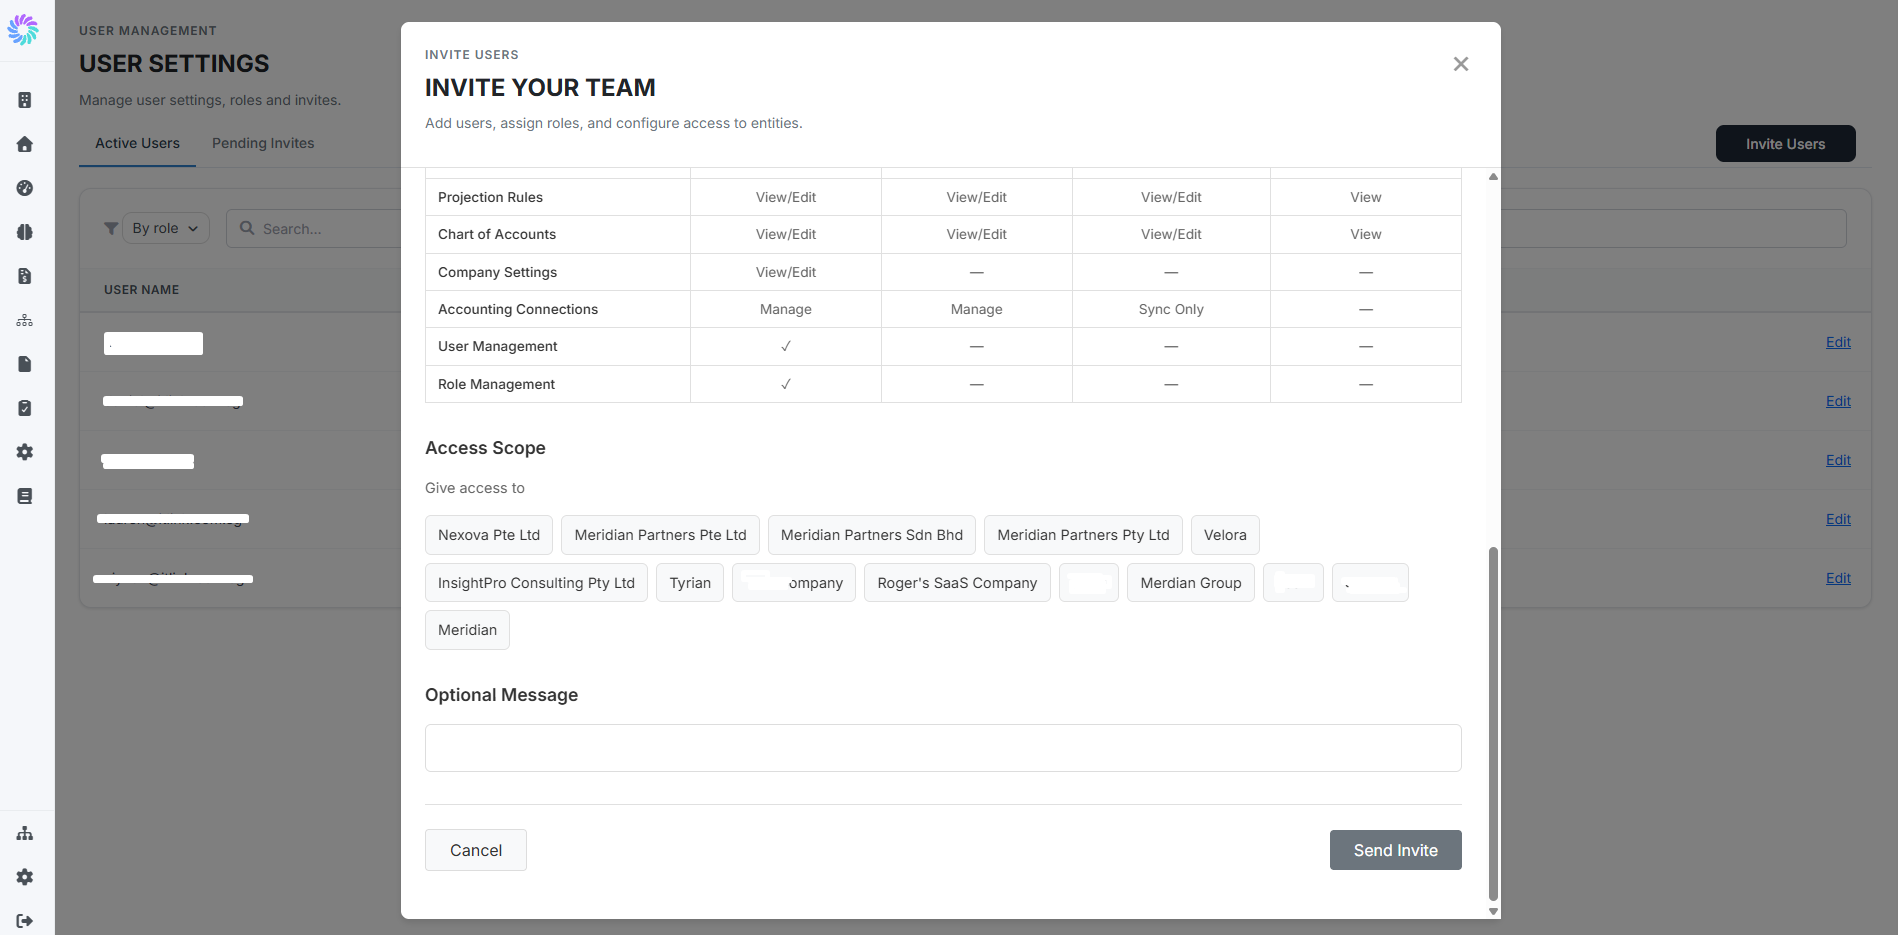
The full role-by-feature permissions matrix is displayed inside the Invite Users modal (covered in Step 3) so you can see exactly what each role can do before you assign it.
Step 3. Invite a New User
- From the Active Users tab, click Invite Users in the top right.
- The Invite Your Team modal opens.
- Under User Information, enter the new user's first name, last name, and email address.
- Under Role, select one of the four roles (Account Admin, Finance Lead, Finance Manager, Viewer). The Role Permissions table below updates to highlight the selected role's permissions across every feature.
- Scroll down to Access Scope.
- Click the company chips to select which companies the user should have access to. Account Admin and Finance Lead automatically have access to all companies; Finance Manager and Viewer can be scoped to specific companies.
- (Optional) Add a personal message in the Optional Message field. This is included in the invite email.
- Click Send Invite.
The user will receive an email to join your Planir workspace. They appear in the Pending Invites tab until they accept.
Step 4. Edit an Existing User
To change a user's role or company access:
- On the Active Users list, click Edit next to the user's row.
- Update their Role, Access Scope, or other details as needed.
- Click Save to apply.
To remove a user from the workspace:
- Click Edit on the user.
- Select Remove From Organization.
- Confirm the removal.
This revokes the user's access immediately. Any work or settings they created (dashboards, metrics, custom models) remain in the workspace.
Step 5. Manage Pending Invites
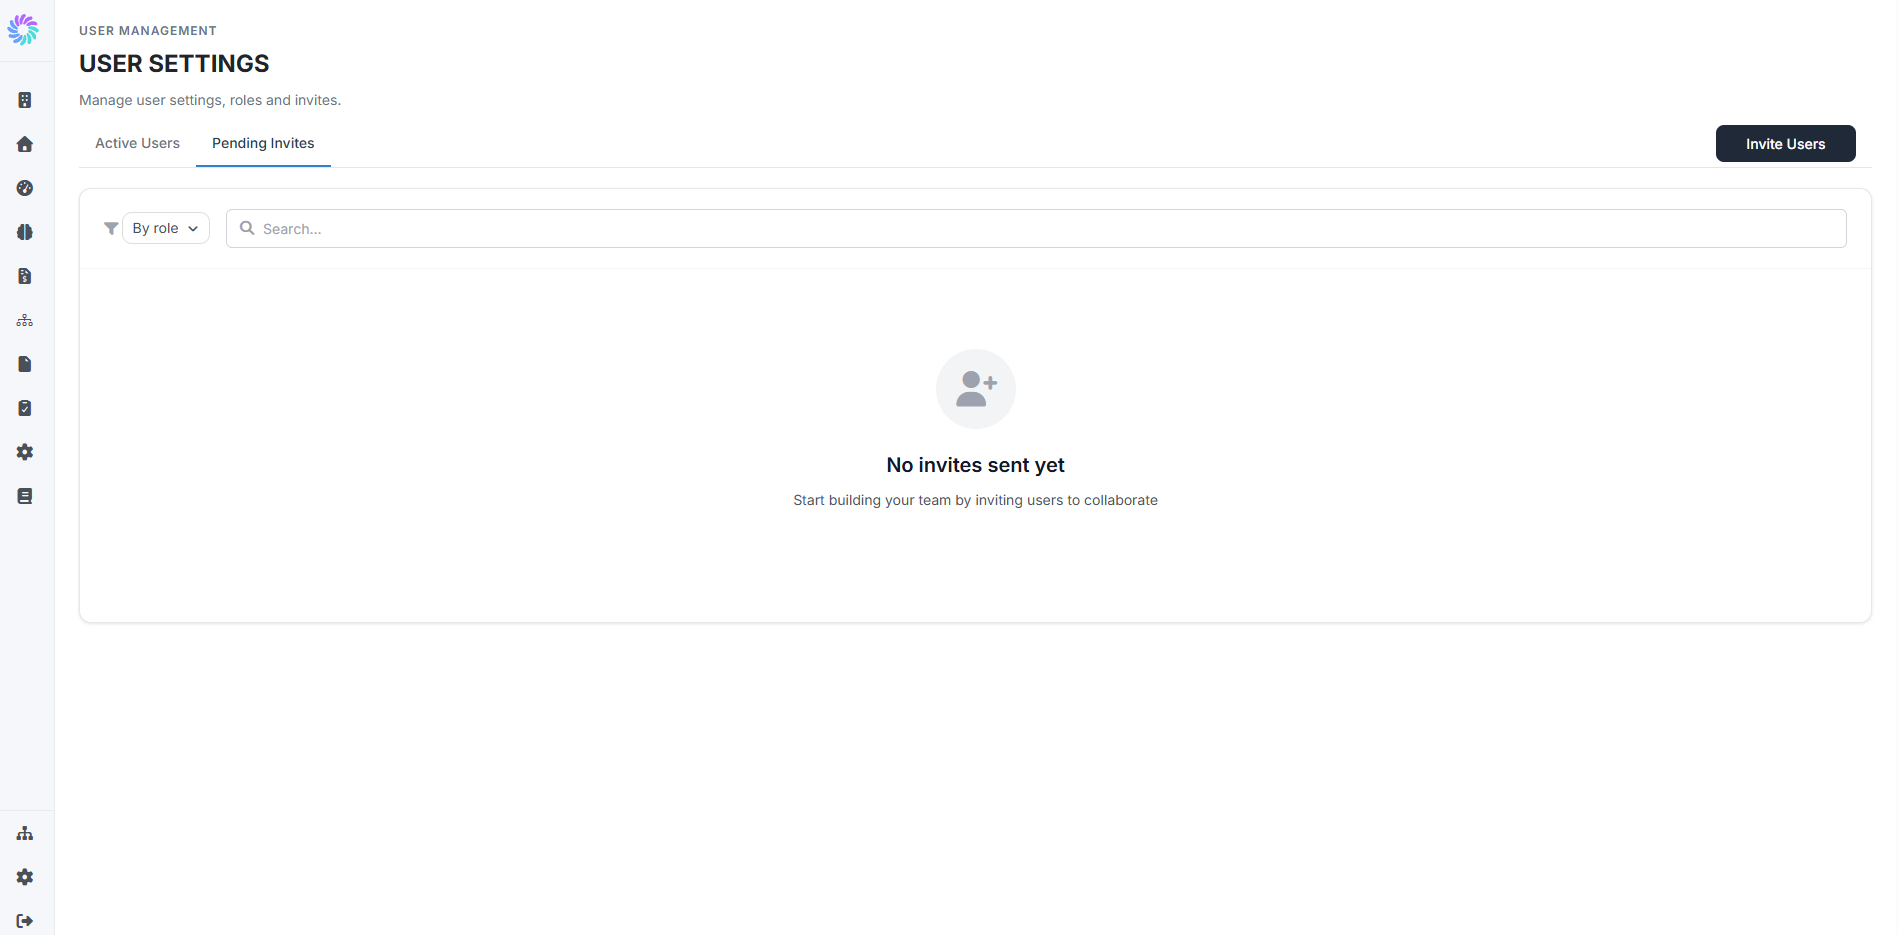
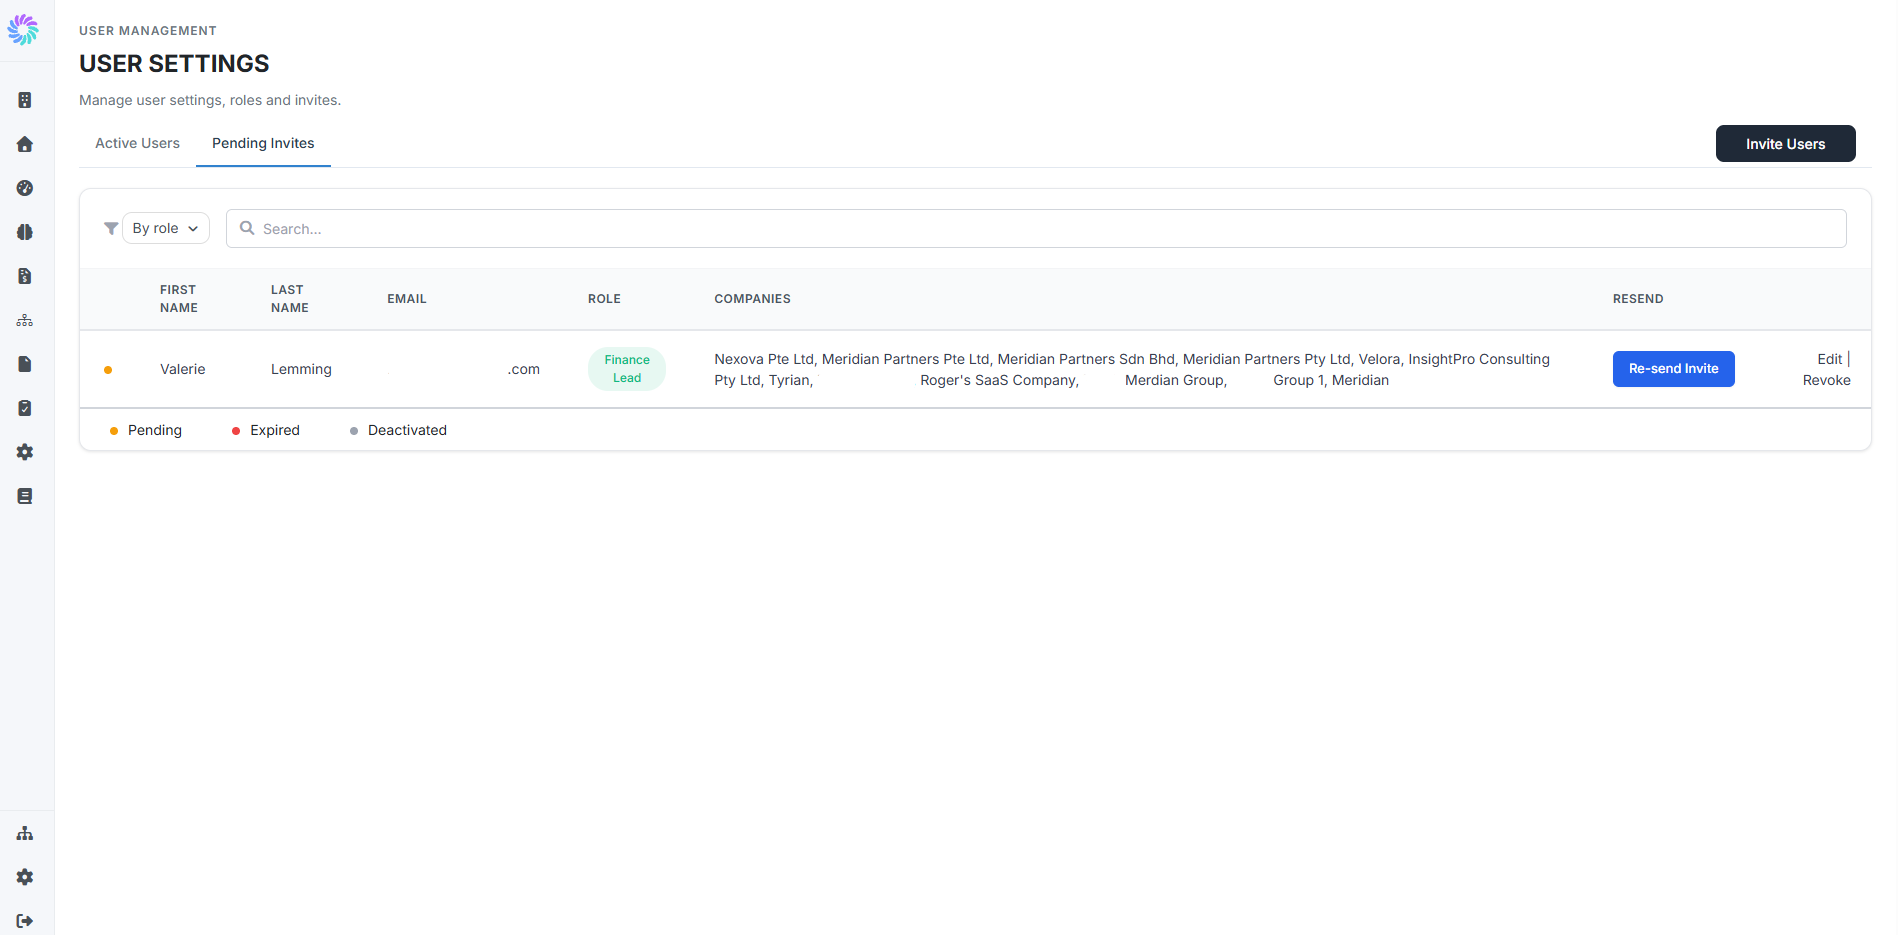
The Pending Invites tab lists users who have been invited but have not yet accepted.
Each pending invite shows:
- First and last name
- Email address
- Assigned role
- Assigned company access
- Invite status (Pending, Expired, or Deactivated)
Resend an invite
If a user has not joined yet or the invite has expired, click Re-send Invite to deliver the email again instantly.
Edit a pending invite
Before the user accepts, you can still change their role or company access:
- Click Edit on the invite.
- Adjust the role or access scope.
- Click Save.
The updated permissions apply once the user accepts the invite.