Upload Financials via Excel
Upload your financial data into Planir directly from Excel files. This is the most flexible way to load data when you don't use Xero or QuickBooks, or when you want to bring in dimensional data alongside your accounts.
Why this matters
Excel upload lets you bring in a complete data set Trial Balance, Chart of Accounts, and General Ledger for any company, regardless of which accounting system it lives in. Because the upload supports up to five custom category columns, you can also slice your data by department, region, project, or any other dimension you track.
When to use this
- When your accounting system isn't supported by a direct connection
- When you want to upload historical data for a closed period
Before You Start
Make sure you have:
- Three files ready: a Trial Balance, a Chart of Accounts, and a General Ledger
- The Trial Balance saved as
.xlsx(max 10MB) - The Chart of Accounts saved as
.xlsx(max 10MB) - The General Ledger saved as
.xlsx(max 50MB) - A clear view of which month your Trial Balance opening balances are anchored to
If you're not sure how to format these files, you can download a sample of each one from inside the upload wizard.
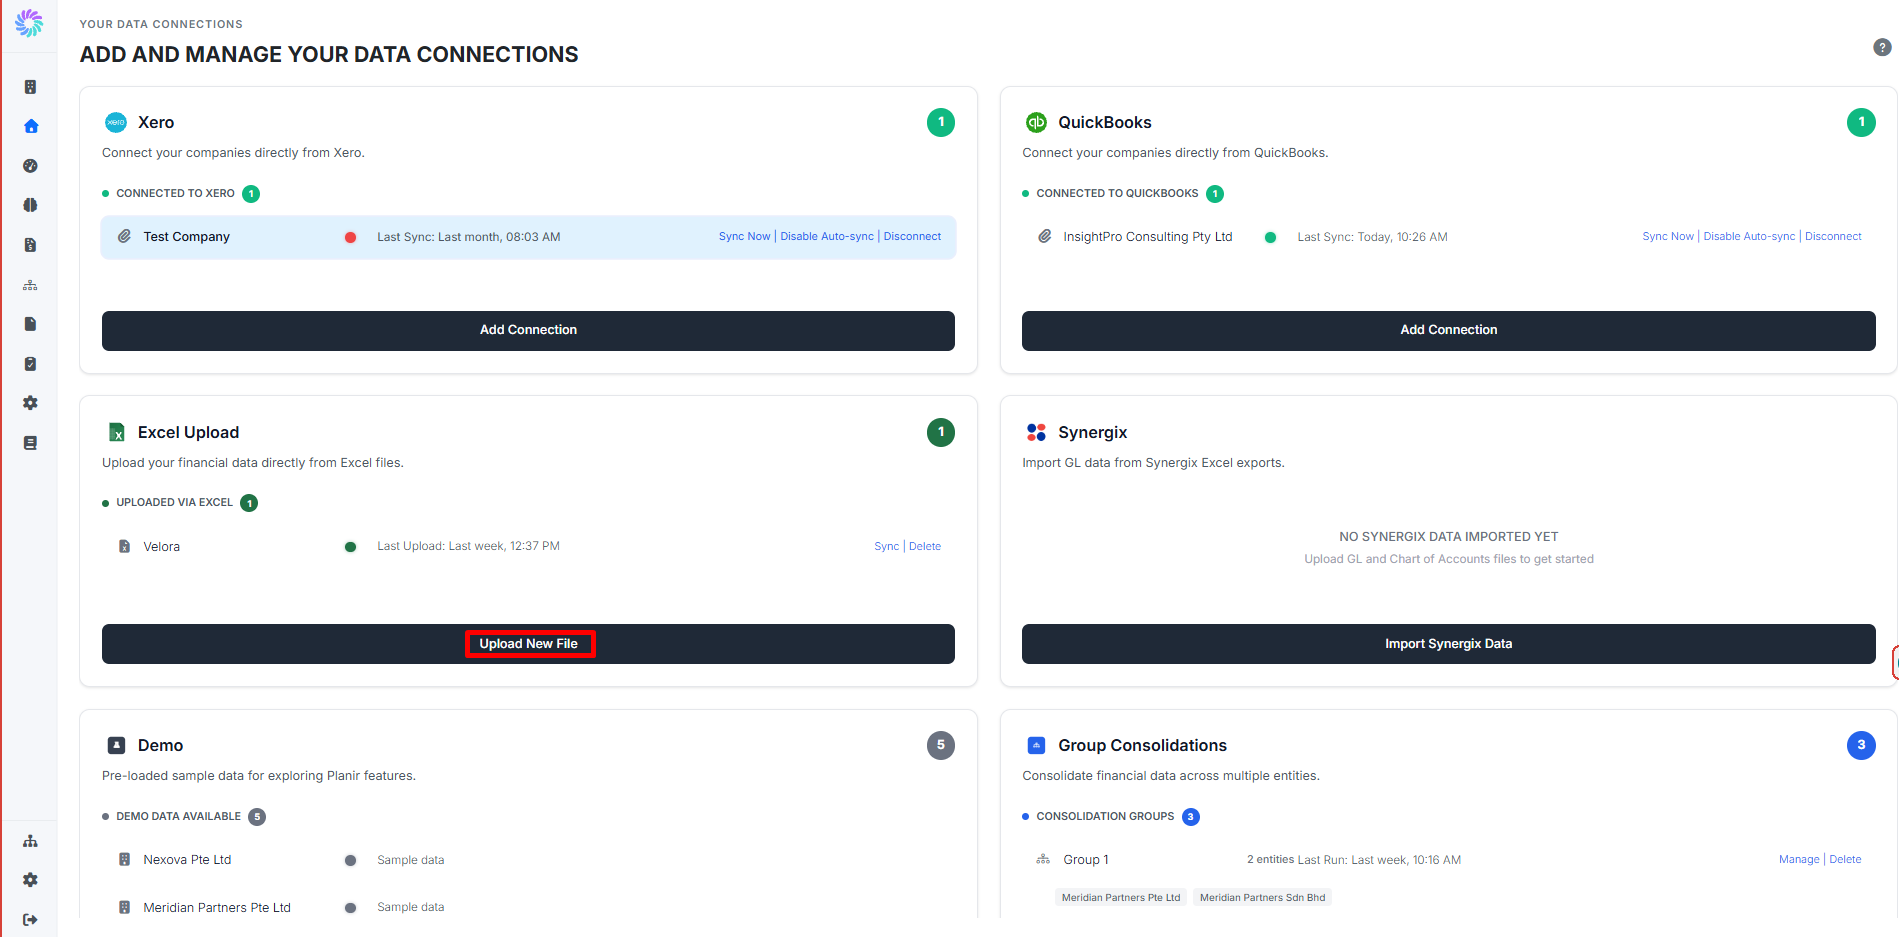
Step 1. Open the Excel Upload Wizard
- From the sidebar, go to Home to open the Add and Manage Your Data Connections page.
- Locate the Excel Upload card.
- Choose Detail of Uploaded Data
- Click Upload Excel File.
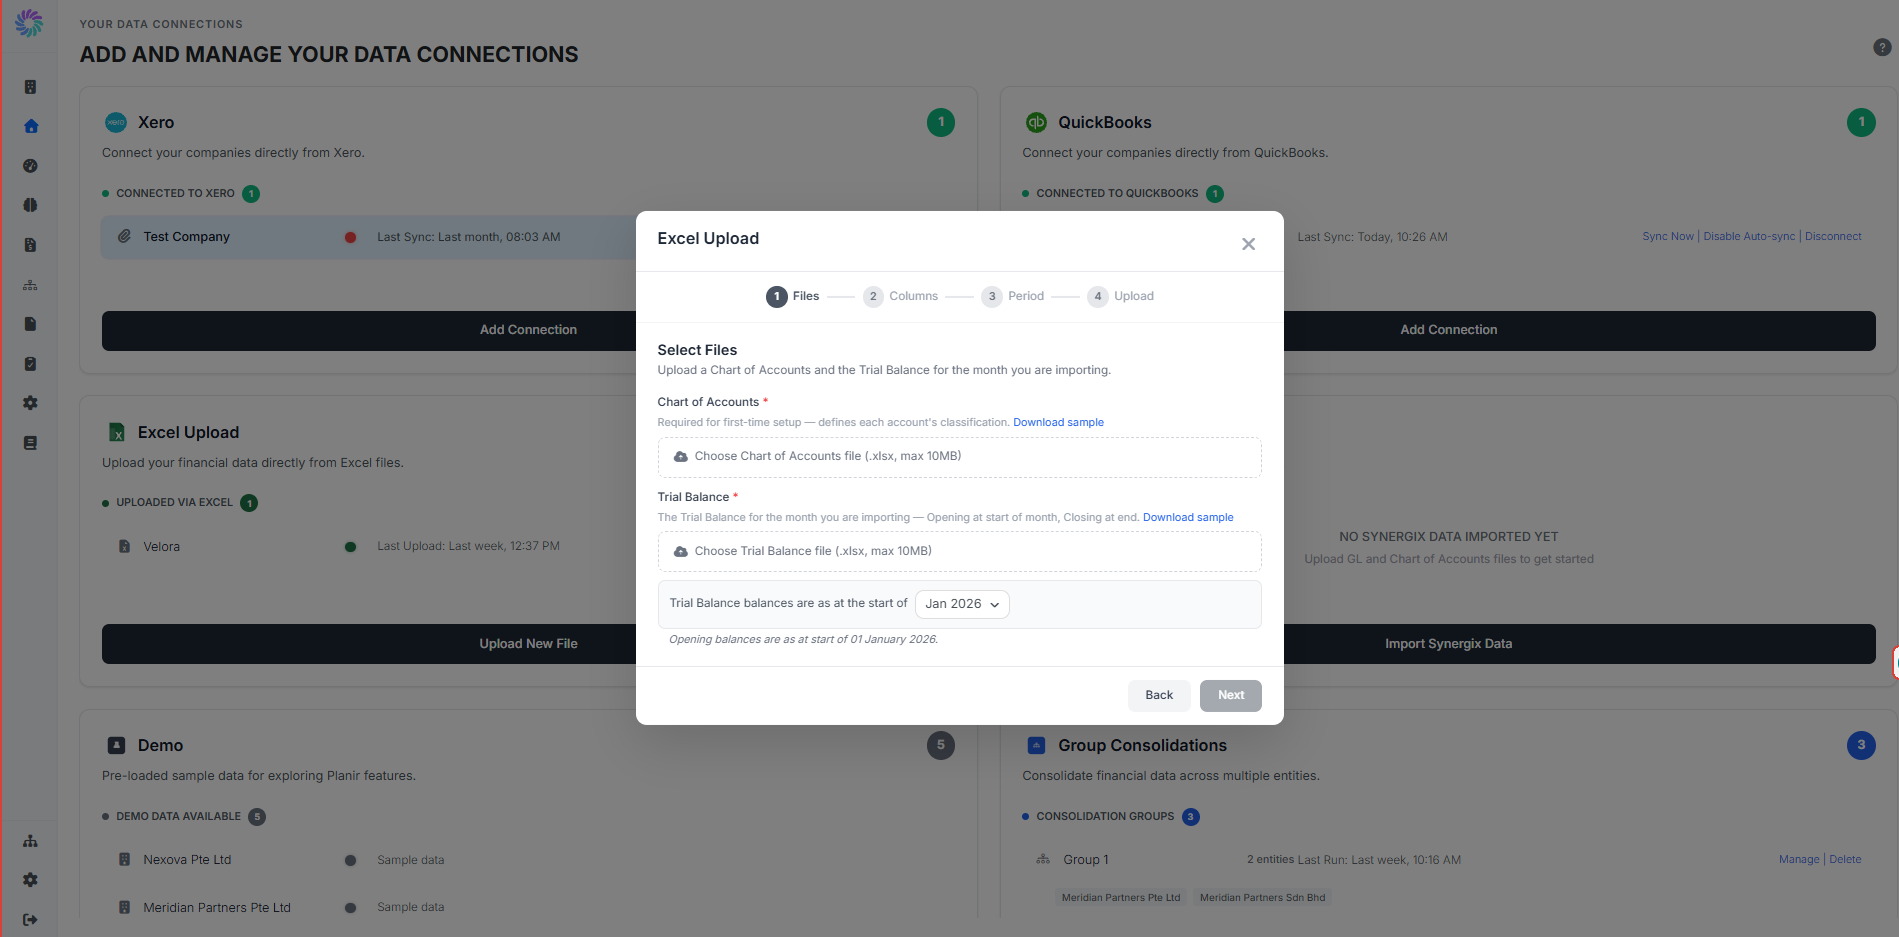
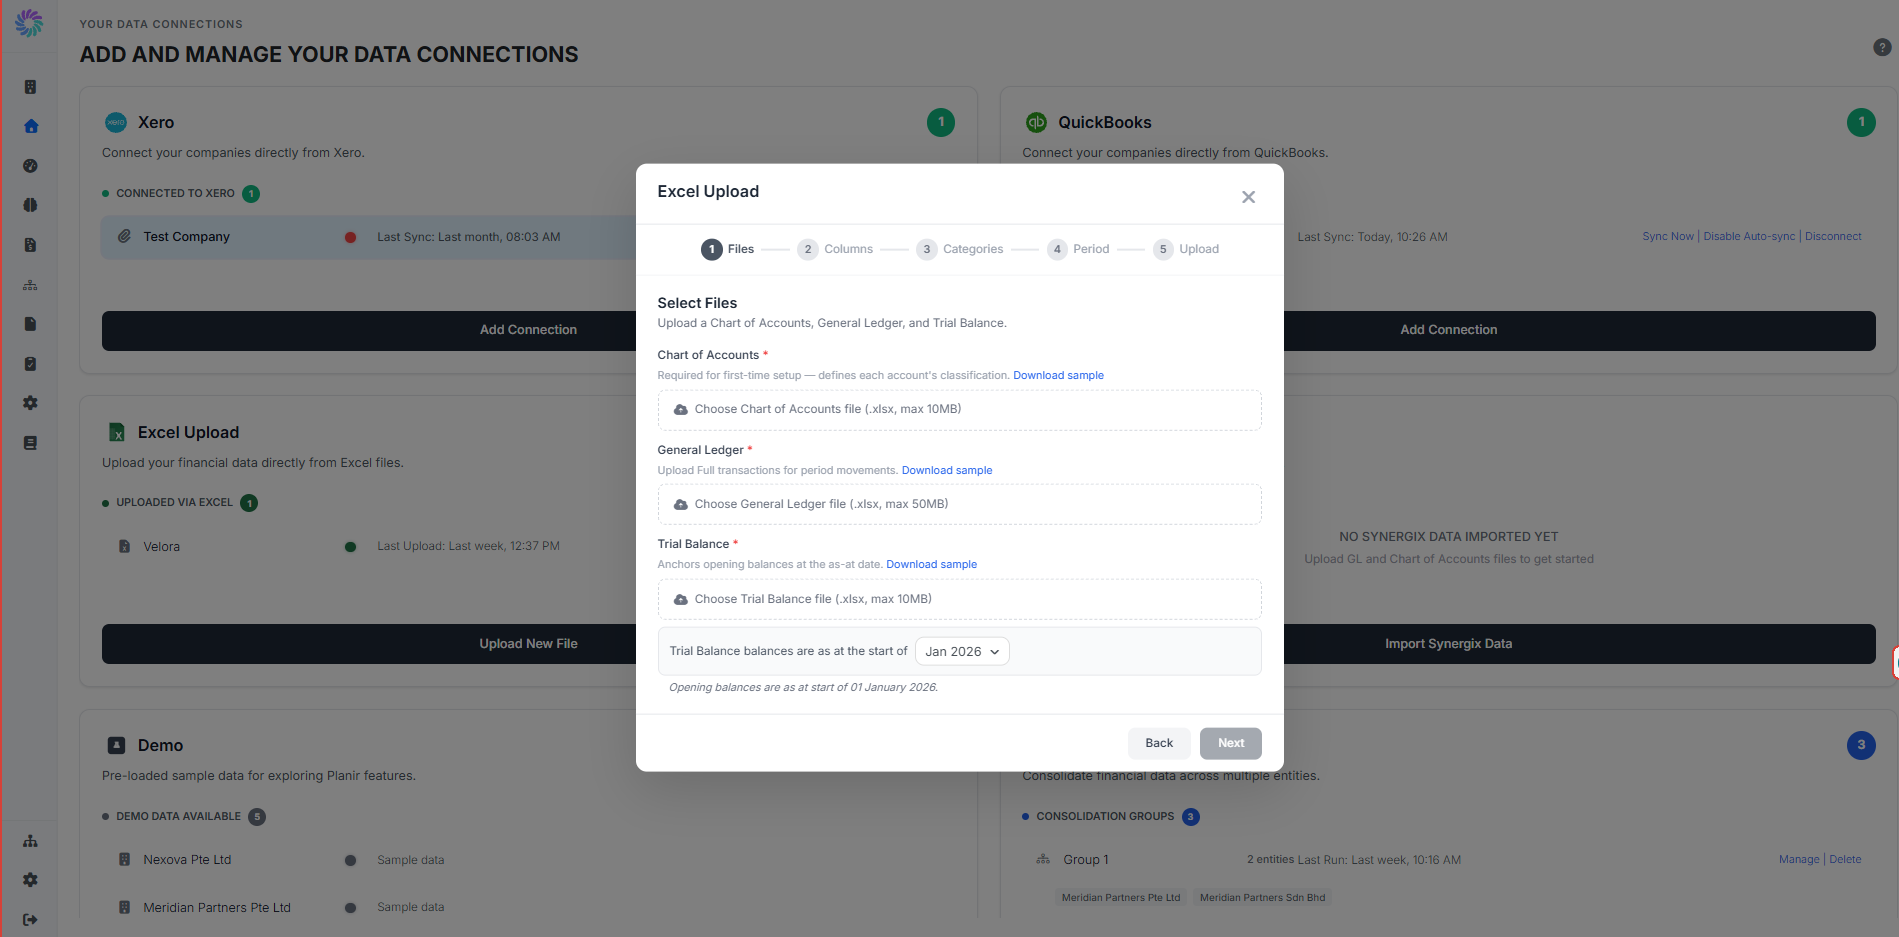
Step 2. Select Your Files
In the Files step, upload your required files:
- Trial Balance — anchors your opening balances at the as-at date. Click Choose Trial Balance file to upload (Set Trial Balance balances are as at the start of to the correct month and year)
- Chart of Accounts — required for first-time setup. This file defines each account's classification.
- General Ledger — provides the transaction-level data used to calculate period movements.
Each row offers a Download sample link if you'd like to use a Planir-formatted template as your starting point.
Once all files are attached, click Next.
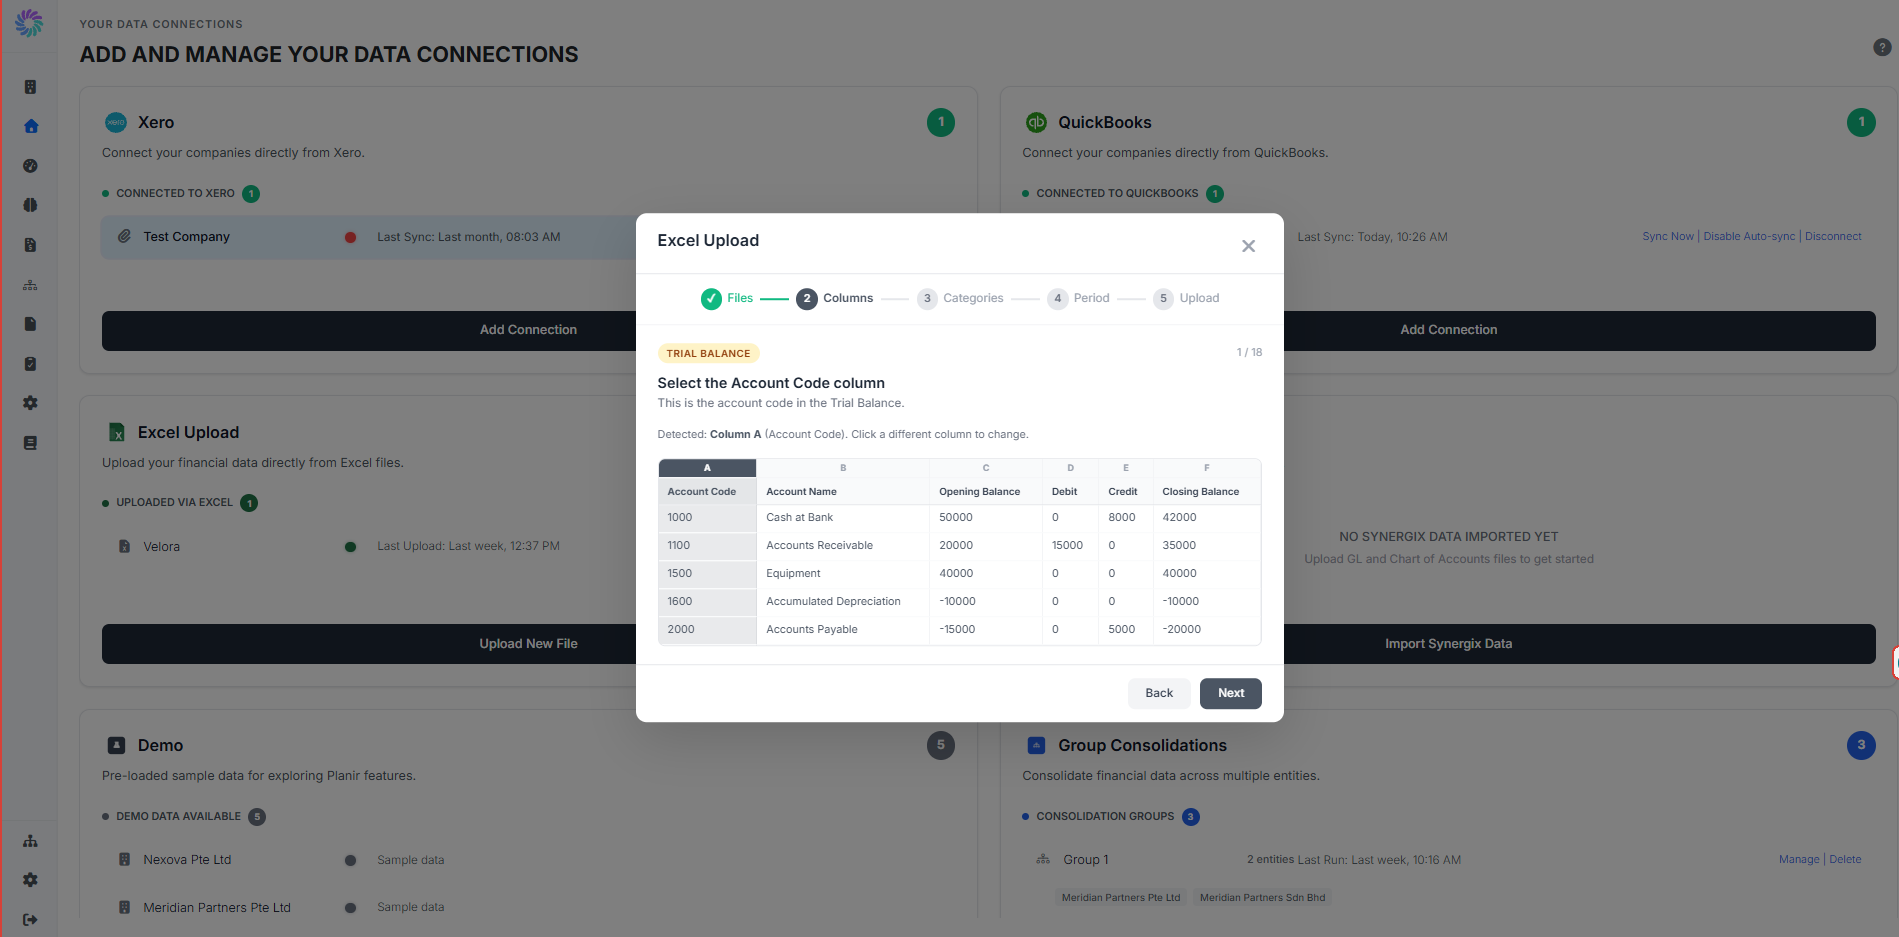
Step 3. Map Your Columns
In the Columns step, Planir walks you through 17 prompts in total, first mapping the columns in your Trial Balance, then your General Ledger. For each prompt, Planir auto-detects a likely column from your file and shows a preview of the data. If the detected column is correct, click Next. If not, click the correct column header in the preview before continuing.
You'll be asked to map:
- Trial Balance — Account Code, Account Name, Opening Balance, Debit, Credit, and Closing Balance
- General Ledger — Account Code, Date, Debit, Credit, Description, and up to five optional Category columns for dimensional slicing
The Category columns are optional. If your General Ledger doesn't include a particular category, click Skip to move on.
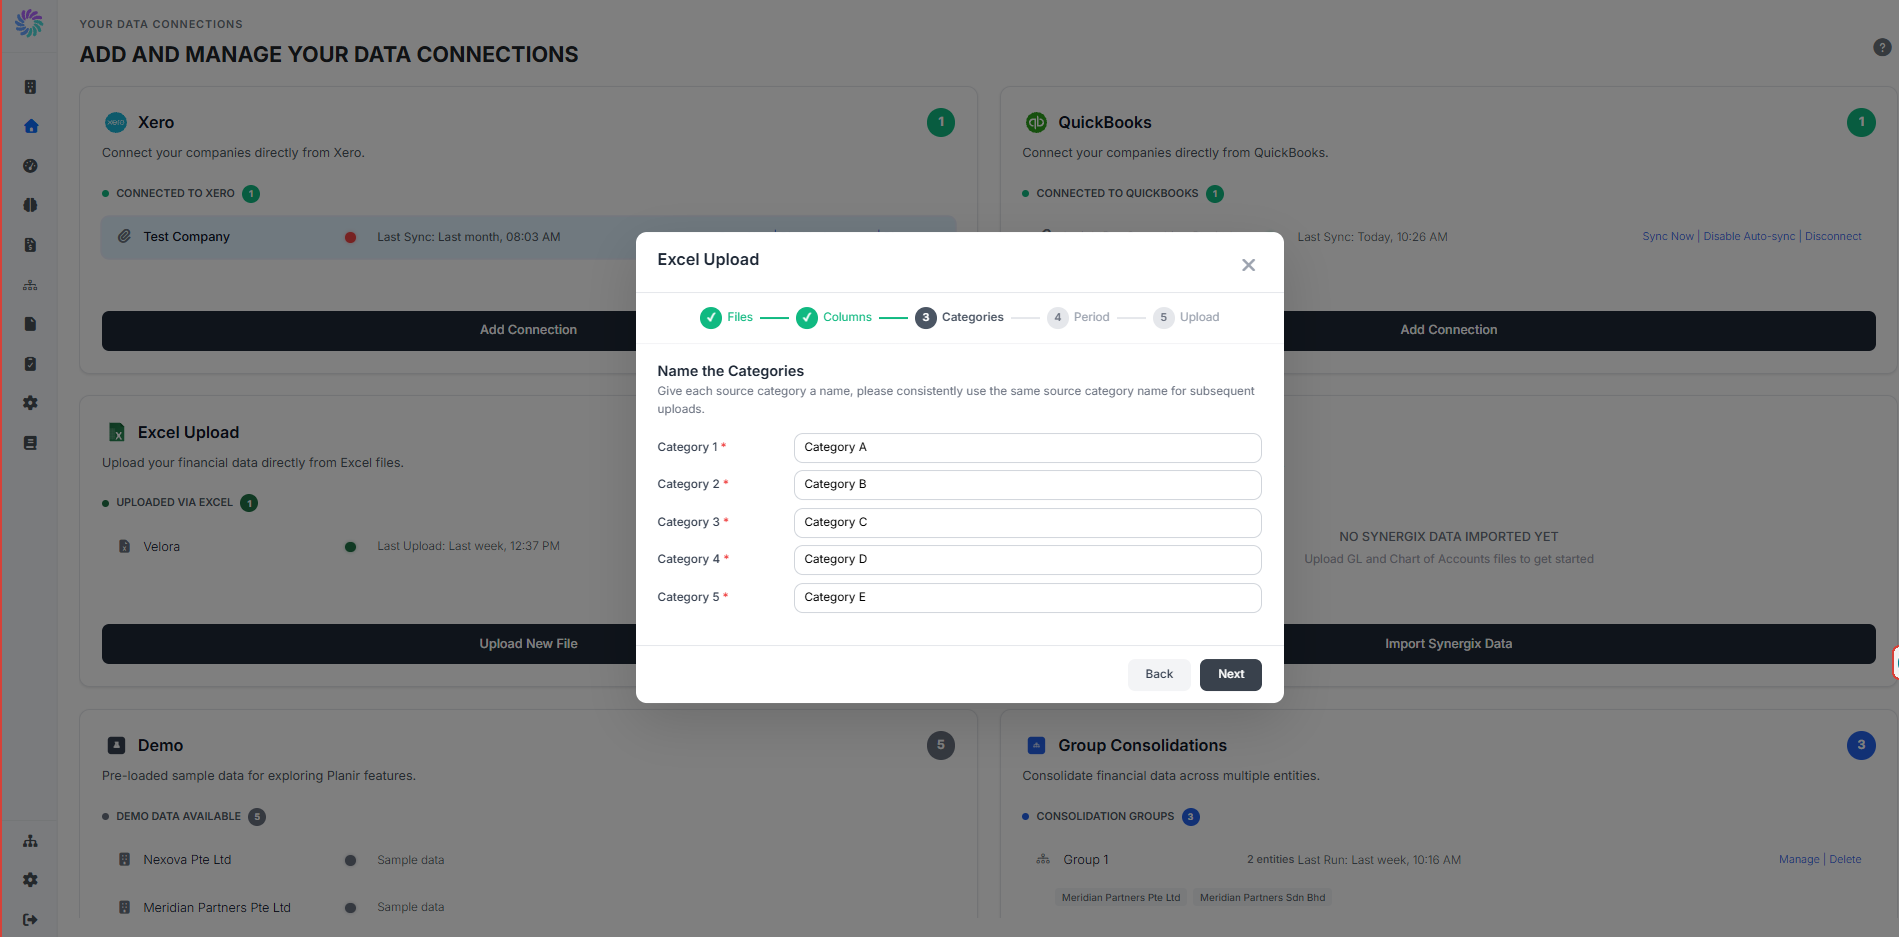
Step 4. Name Your Categories
If you mapped any Category columns, the Categories step lets you give each one a meaningful name (for example, "Department," "Region," or "Project"). These labels appear throughout Planir wherever your category data is shown in dashboards, reports, and analysis tools.
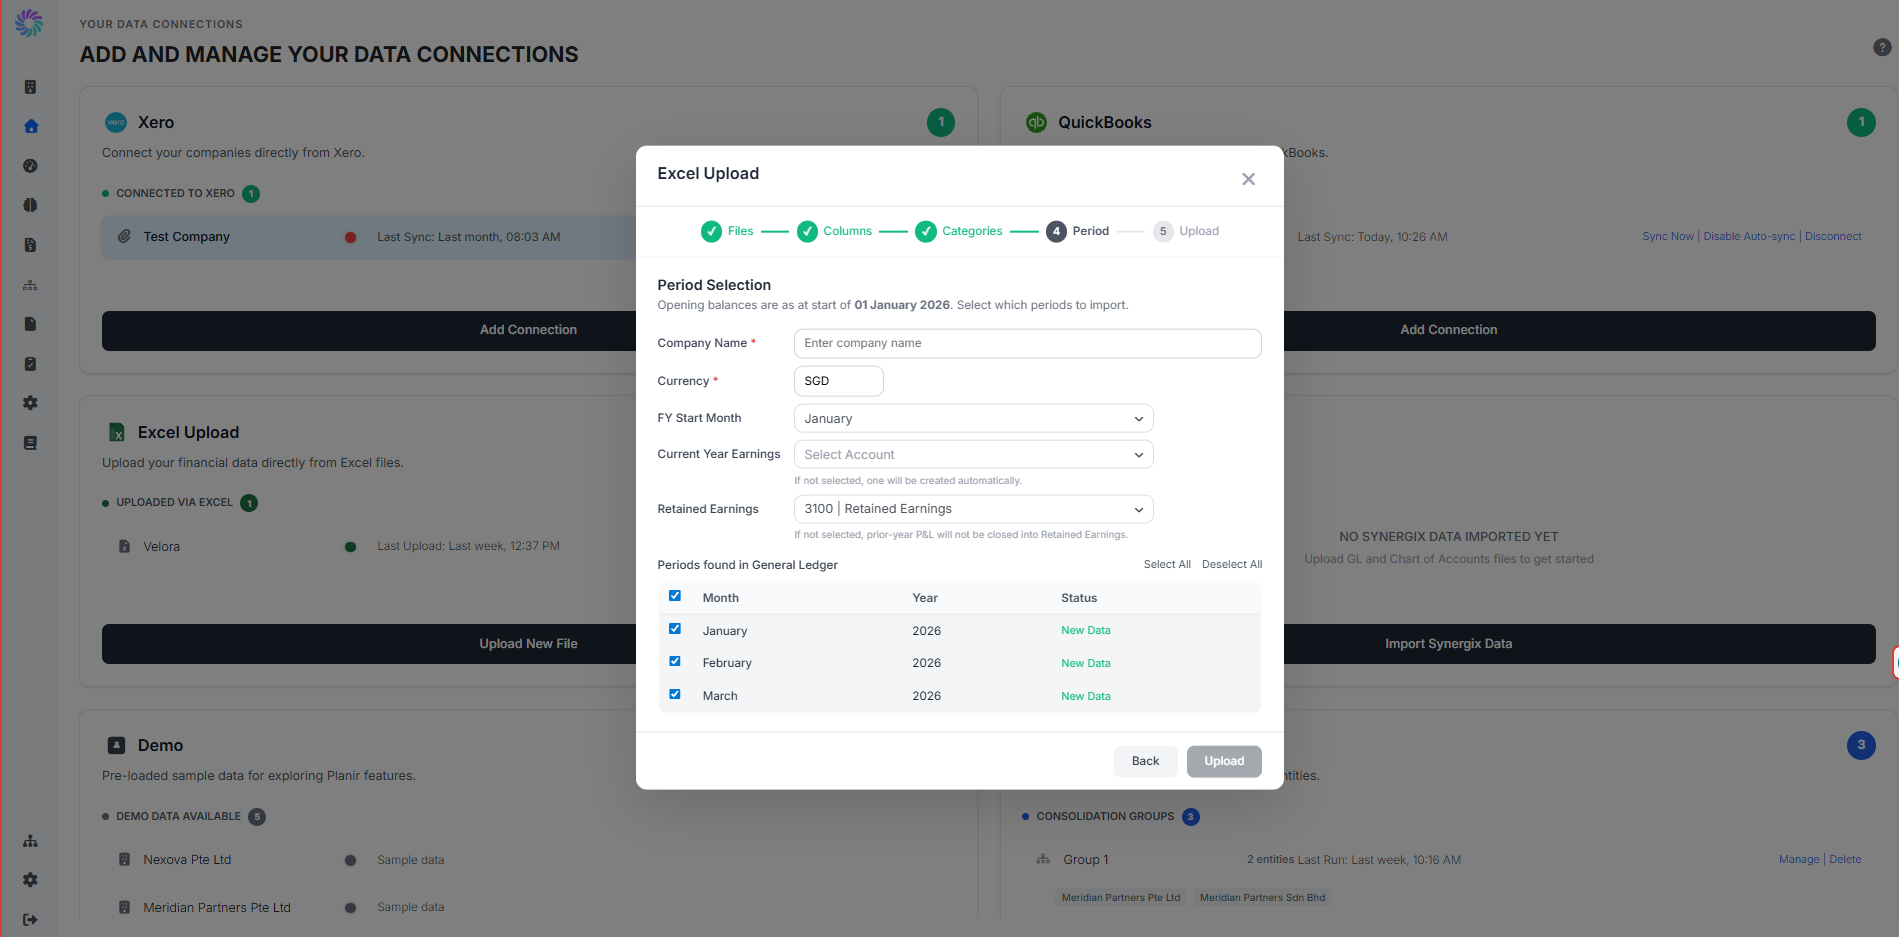
Step 5. Configure the Period and Company Settings
In the Period step, set the basics for your new company:
- Company Name — the name that will appear in your Planir workspace
- Currency — your reporting currency (e.g., SGD, USD)
- FY Start Month — the first month of your financial year
- Current Year Earnings — link the account that holds current-year P&L. If left blank, Planir will create one automatically.
- Retained Earnings — link the account used to close prior-year P&L into Retained Earnings. If left blank, prior-year P&L will not be closed automatically.
Below those settings, the Periods found in General Ledger table lists every period detected in your GL file. Each period is marked New Data, Updated, or Existing. Tick the periods you want to import (or use Select All / Deselect All).
Click Upload to begin processing.
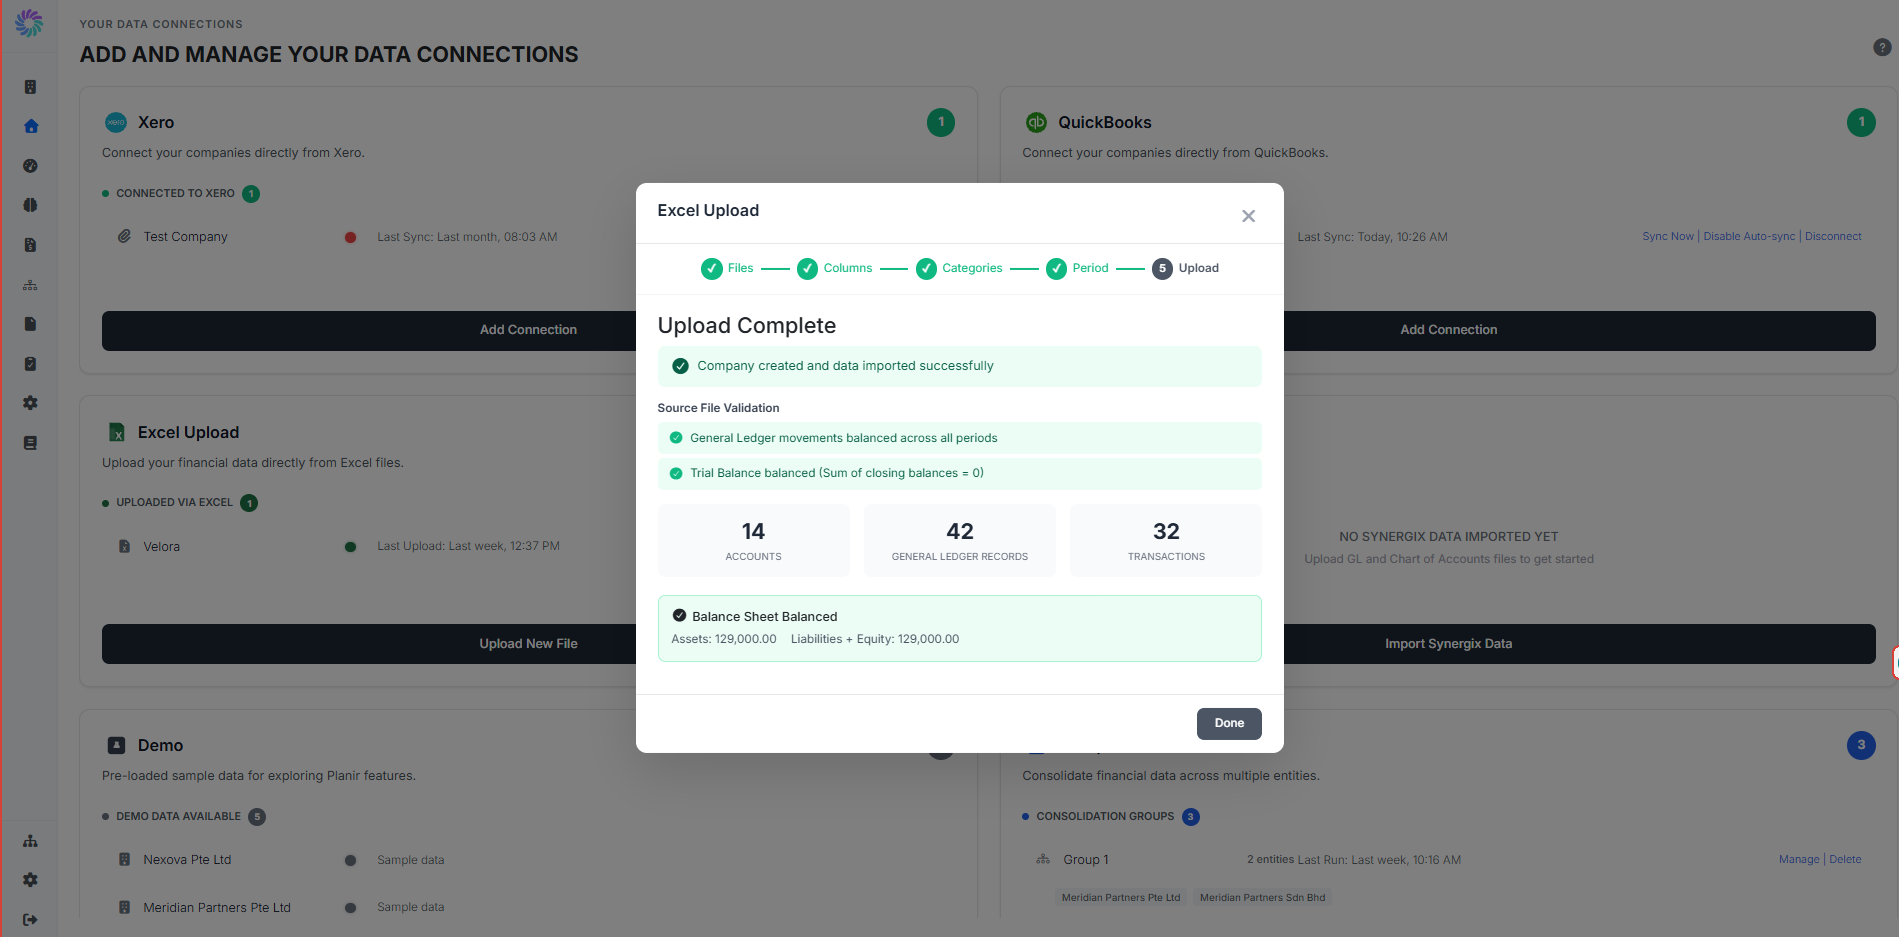
Step 6. Review the Upload Result
When processing completes, the Upload step displays a summary of what was created and validated:
- Source File Validation — confirms that your General Ledger movements balance across all periods, and that your Trial Balance is balanced
- Account, GL Record, and Transaction counts — quick totals so you can sanity-check the import
- Balance Sheet Balanced — confirms that Assets equal Liabilities + Equity at the as-at date
If anything fails validation, the wizard will tell you which file or period needs attention. Fix the source file and re-run the upload.
Click Done to close the wizard. A confirmation modal then appears, prompting you to review the auto-generated account classification.
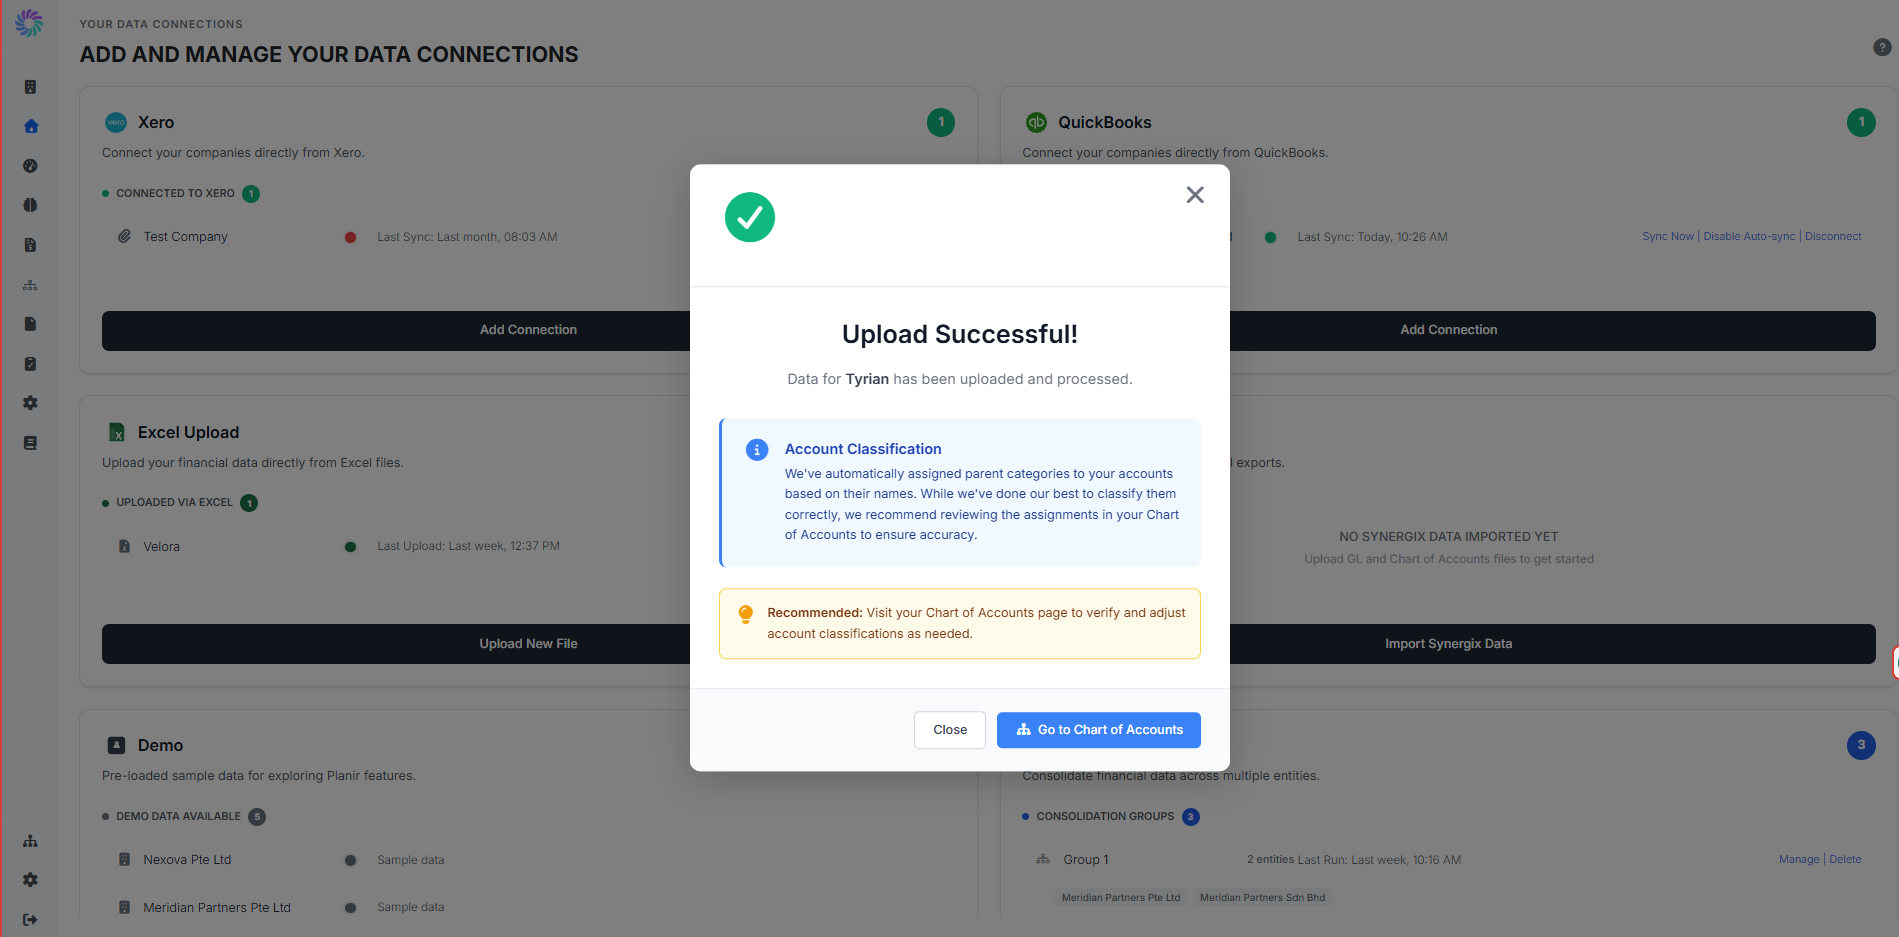
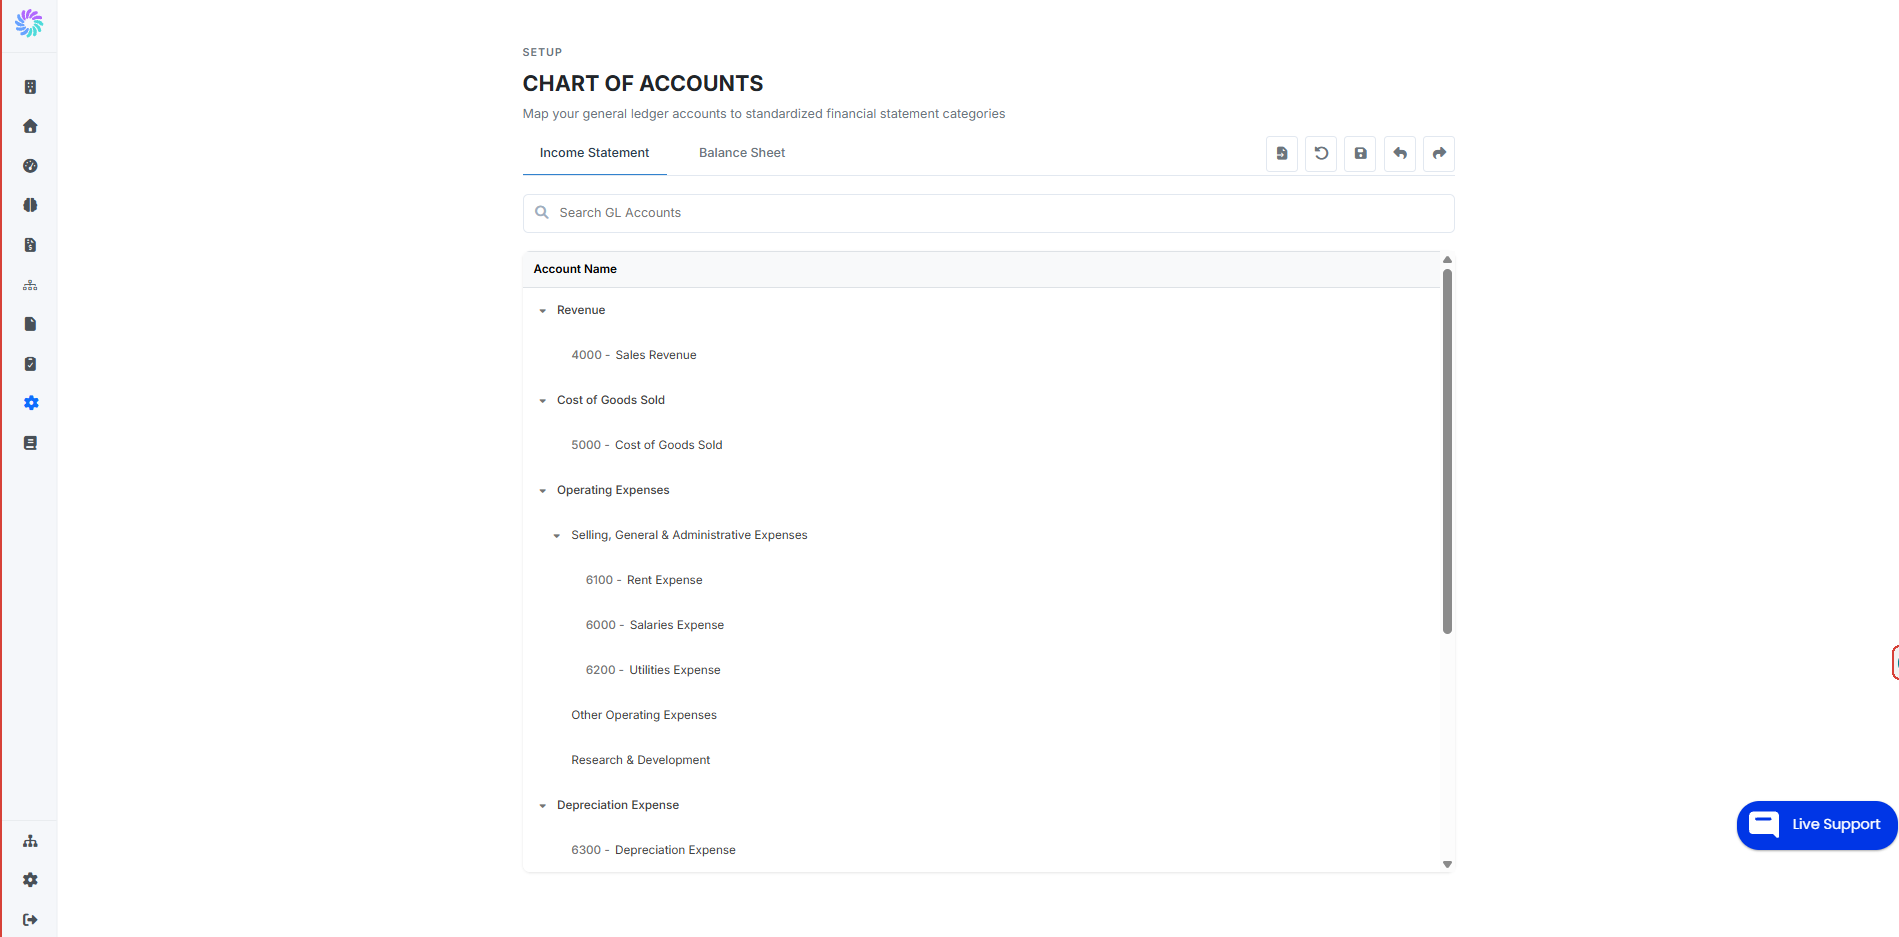
Step 7. Review Your Chart of Accounts
Planir automatically classifies each account into a standard category (Revenue, Cost of Goods Sold, Operating Expenses, etc.) based on the account name and code. While the auto-classification is usually accurate, we recommend reviewing it before relying on the data.
- Click Go to Chart of Accounts from the success modal, or open Setup → Chart of Accounts from the sidebar.
- Use the Income Statement and Balance Sheet tabs to walk through your auto-mapped accounts.
- Adjust any classifications that don't fit your reporting structure.
Managing Your Excel Upload
Upload another period later
To add new months of data, repeat the upload process. Planir will detect which periods are new versus already loaded and let you choose what to import.
Replace an existing period
If you need to overwrite a period that's already loaded, re-upload it and tick that period in the Period step. The status column will show Updated for any month already in the system.
Add a new company
Each Excel upload creates a new company in your workspace. To upload a different entity, run the wizard again from the Excel Upload card.
Planir Tip
If you're unsure how Planir expects your files to be structured, always start by downloading the sample files from the wizard. They show the exact column layout, naming, and date formatting that Planir is built to recognize saving you time during column mapping.
Example Scenario
You're onboarding a new client whose accounting team works exclusively in Excel.
- Open Home → Add and Manage Your Data Connections
- On the Excel Upload card, click Upload Excel File
- Upload the client's Trial Balance, Chart of Accounts, and General Ledger
- Step through the 17 column-mapping prompts
- Name your categories (e.g., Department, Region)
- Set the company name, currency, FY start, and retained earnings account
- Select the periods you want to import and click Upload
- Confirm the validation results, then go to Setup → Chart of Accounts to review the auto-classification
Your workspace is now live and populated.