Setting up your Chart of Accounts
Map your General Ledger accounts to standardized financial statement categories so that your reports, dashboards, and AI insights in Planir are grounded in a clean, consistent structure.
Why this matters
Your Chart of Accounts is the backbone of every financial view in Planir. The way each account is classified determines how it rolls up into your Income Statement, Balance Sheet, KPIs, and dashboards. When you first connect a data source, Planir auto-classifies your accounts based on their names and codes but you should review and adjust this mapping before relying on the data.
When to use this
- Right after connecting a new data source (Xero, QuickBooks, Excel, or Synergix)
- When you've added new accounts in your accounting system
- When your reporting structure changes (e.g., new revenue streams, restructured cost categories)
- When you want to clean up auto-classified accounts that don't match how you actually report
Before You Start
Make sure you have:
- A connected data source so your accounts are loaded into Planir
- A clear view of how you want each account classified particularly any accounts flagged with a warning icon
- Permissions to modify configuration in your Planir workspace
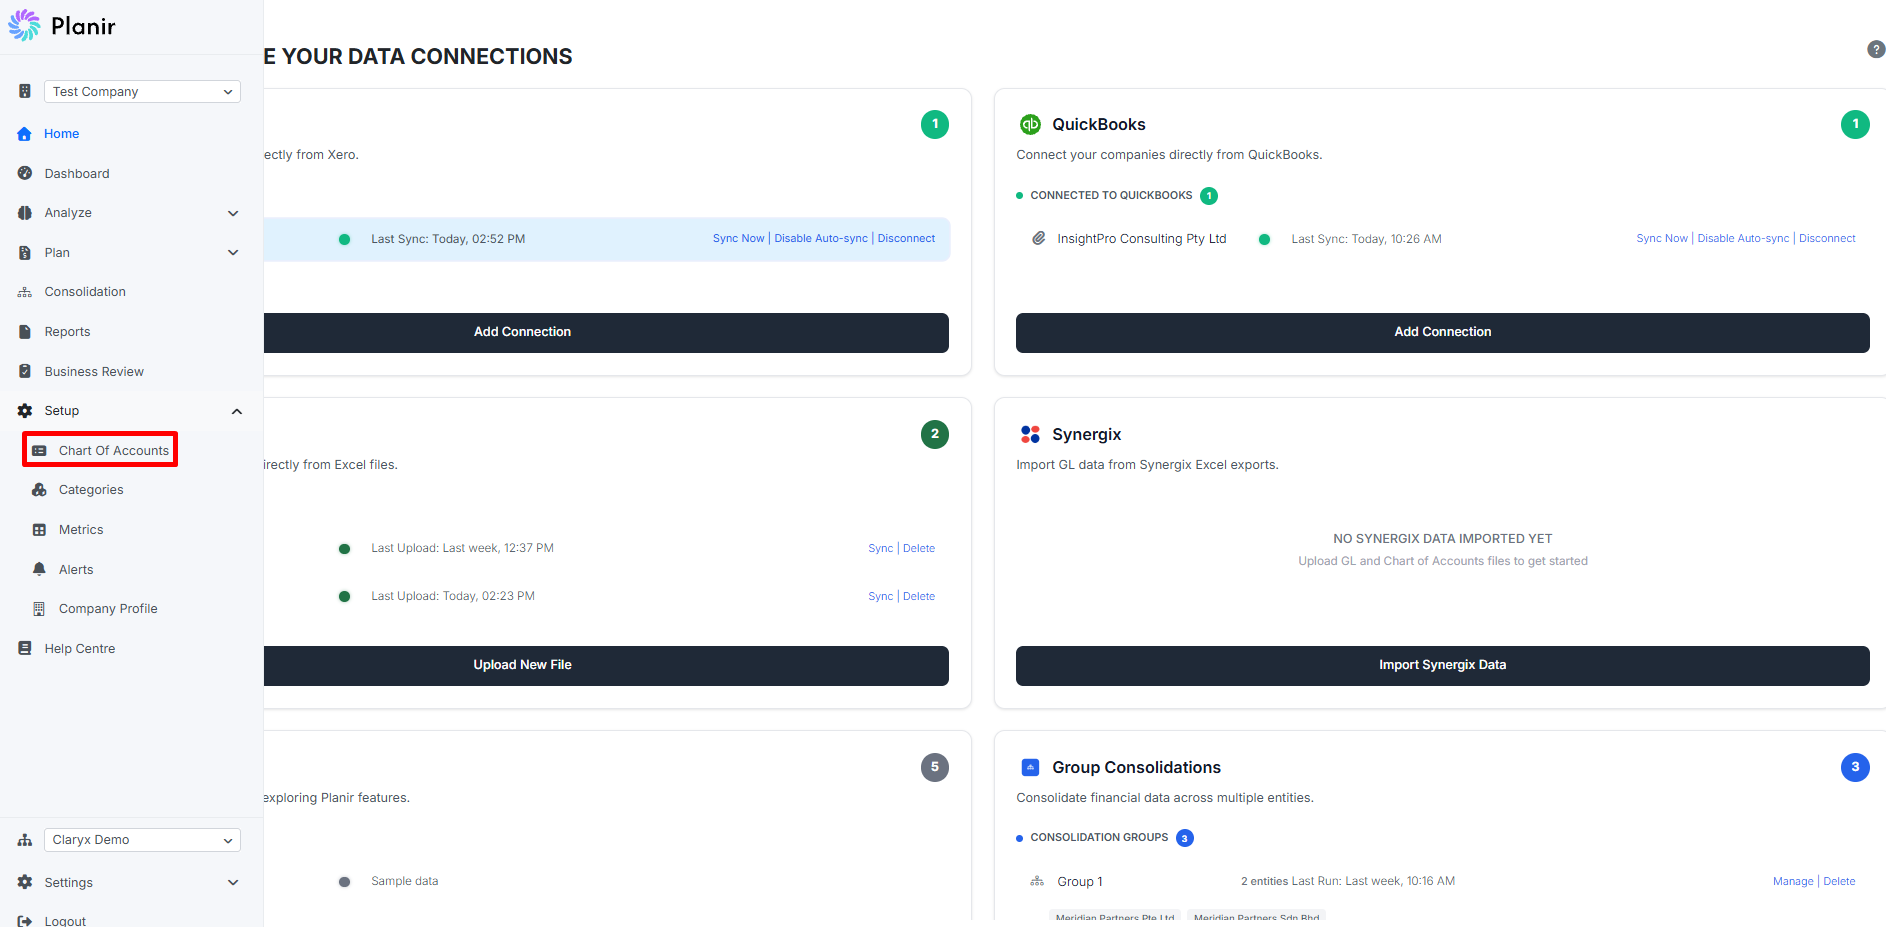
Step 1. Open the Chart of Accounts
- From the sidebar, expand Setup.
- Click Chart of Accounts.
The Chart of Accounts page opens, showing your account hierarchy under two tabs: Income Statement and Balance Sheet.
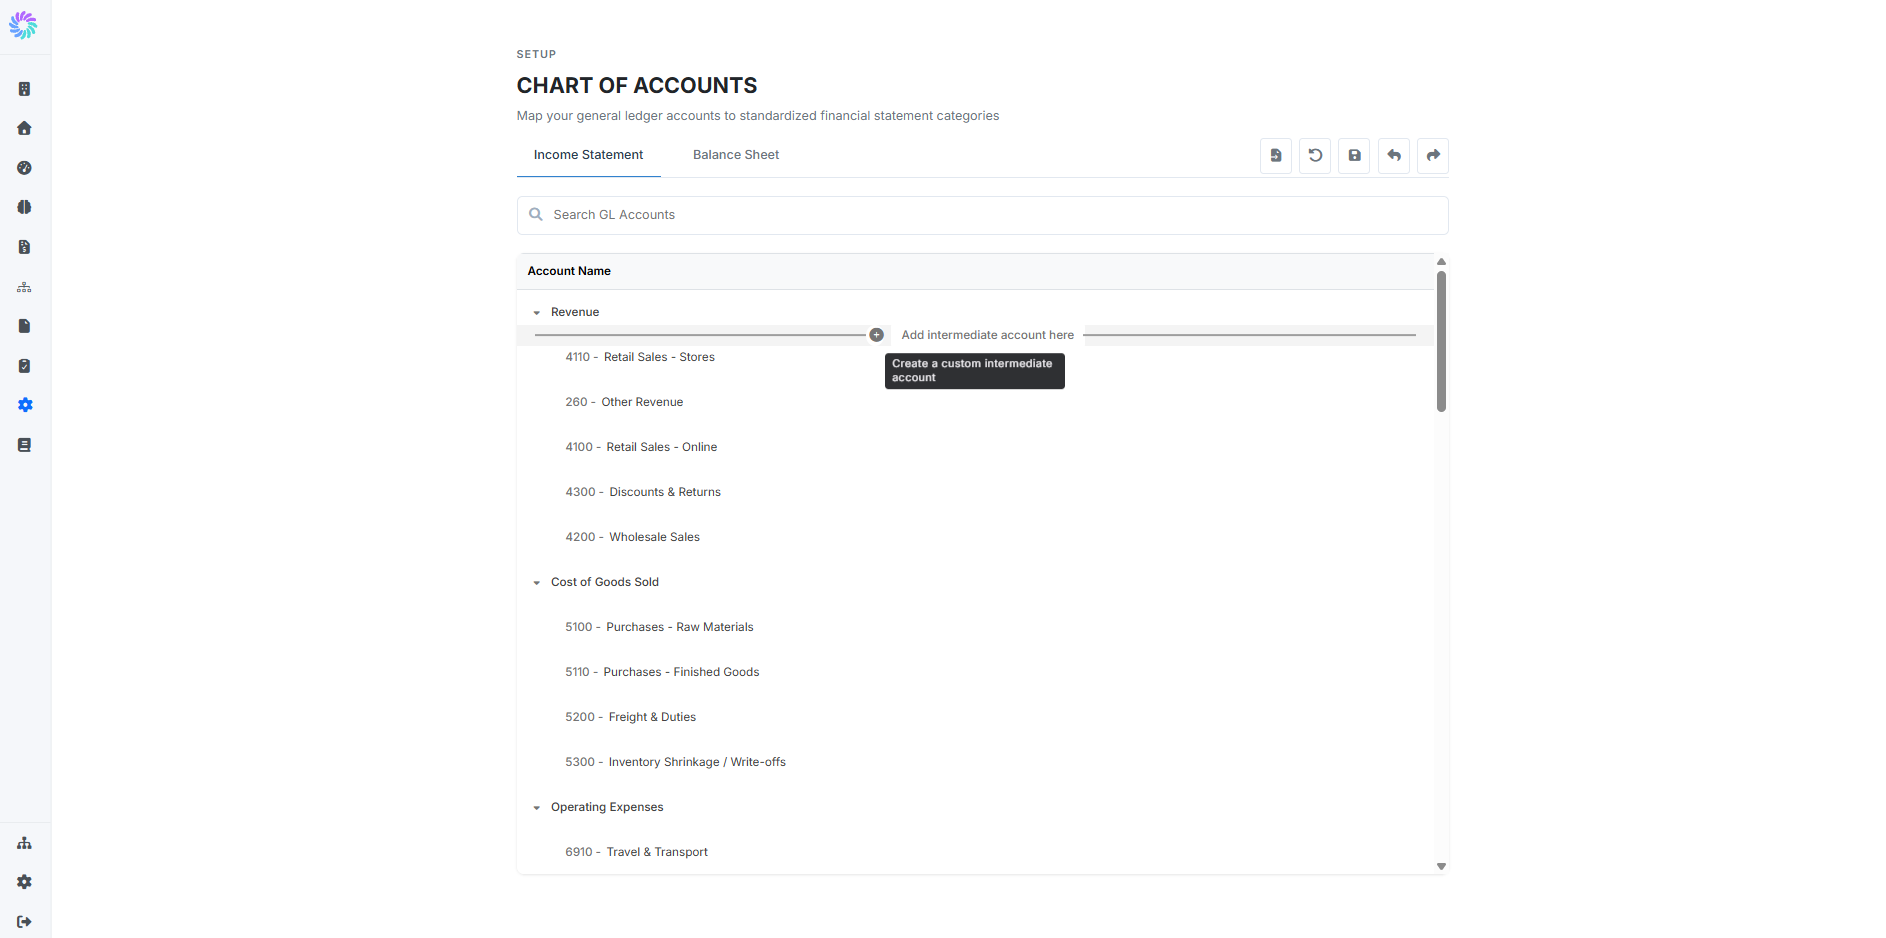
Step 2. Review Your Account Hierarchy
Use the two tabs to walk through your accounts:
- Income Statement — Revenue, Cost of Goods Sold, Operating Expenses, and other P&L categories
- Balance Sheet — Assets, Liabilities, and Equity
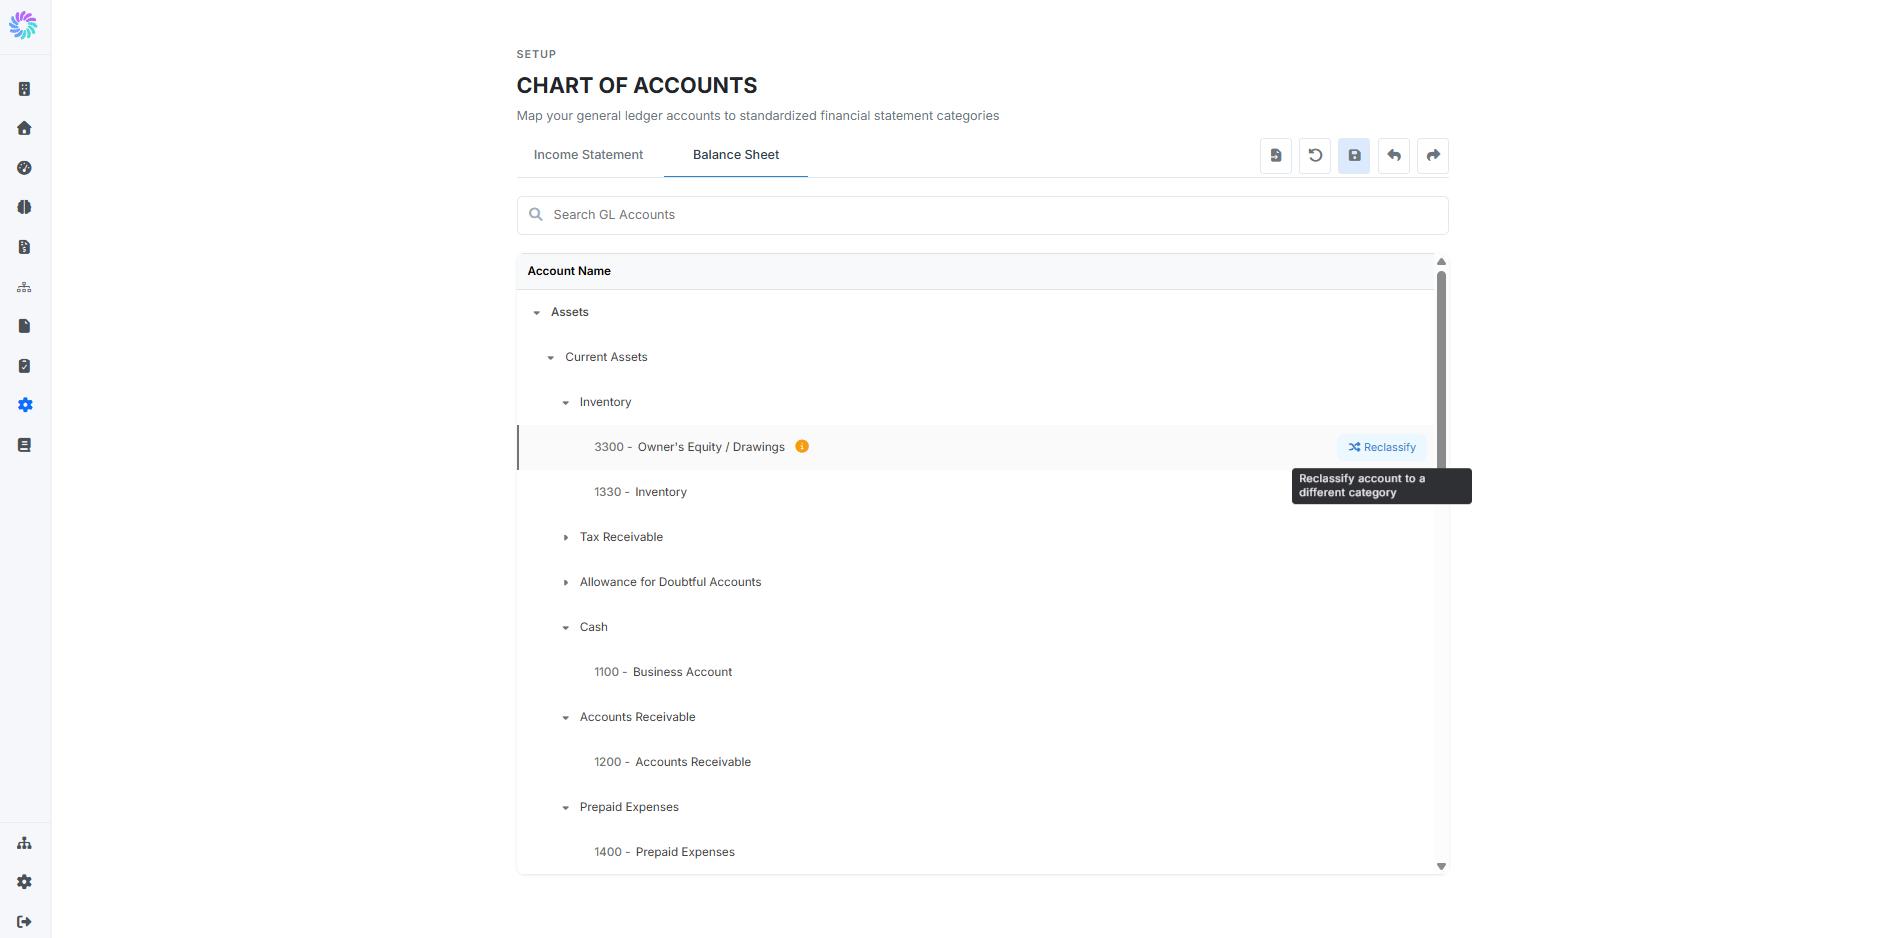
Each account appears under its parent category, with its account code and name. Accounts flagged with a yellow warning icon need your attention Planir wasn't able to confidently classify them and is asking you to confirm where they belong.
Use the Search GL Accounts bar at the top of the page to jump directly to any account by name or code.
Step 3. Reclassify an Account
There are three ways to move an account into a different category:
Option A — Reclassify button
- Hover over an account row.
- Click the Reclassify button on the right.
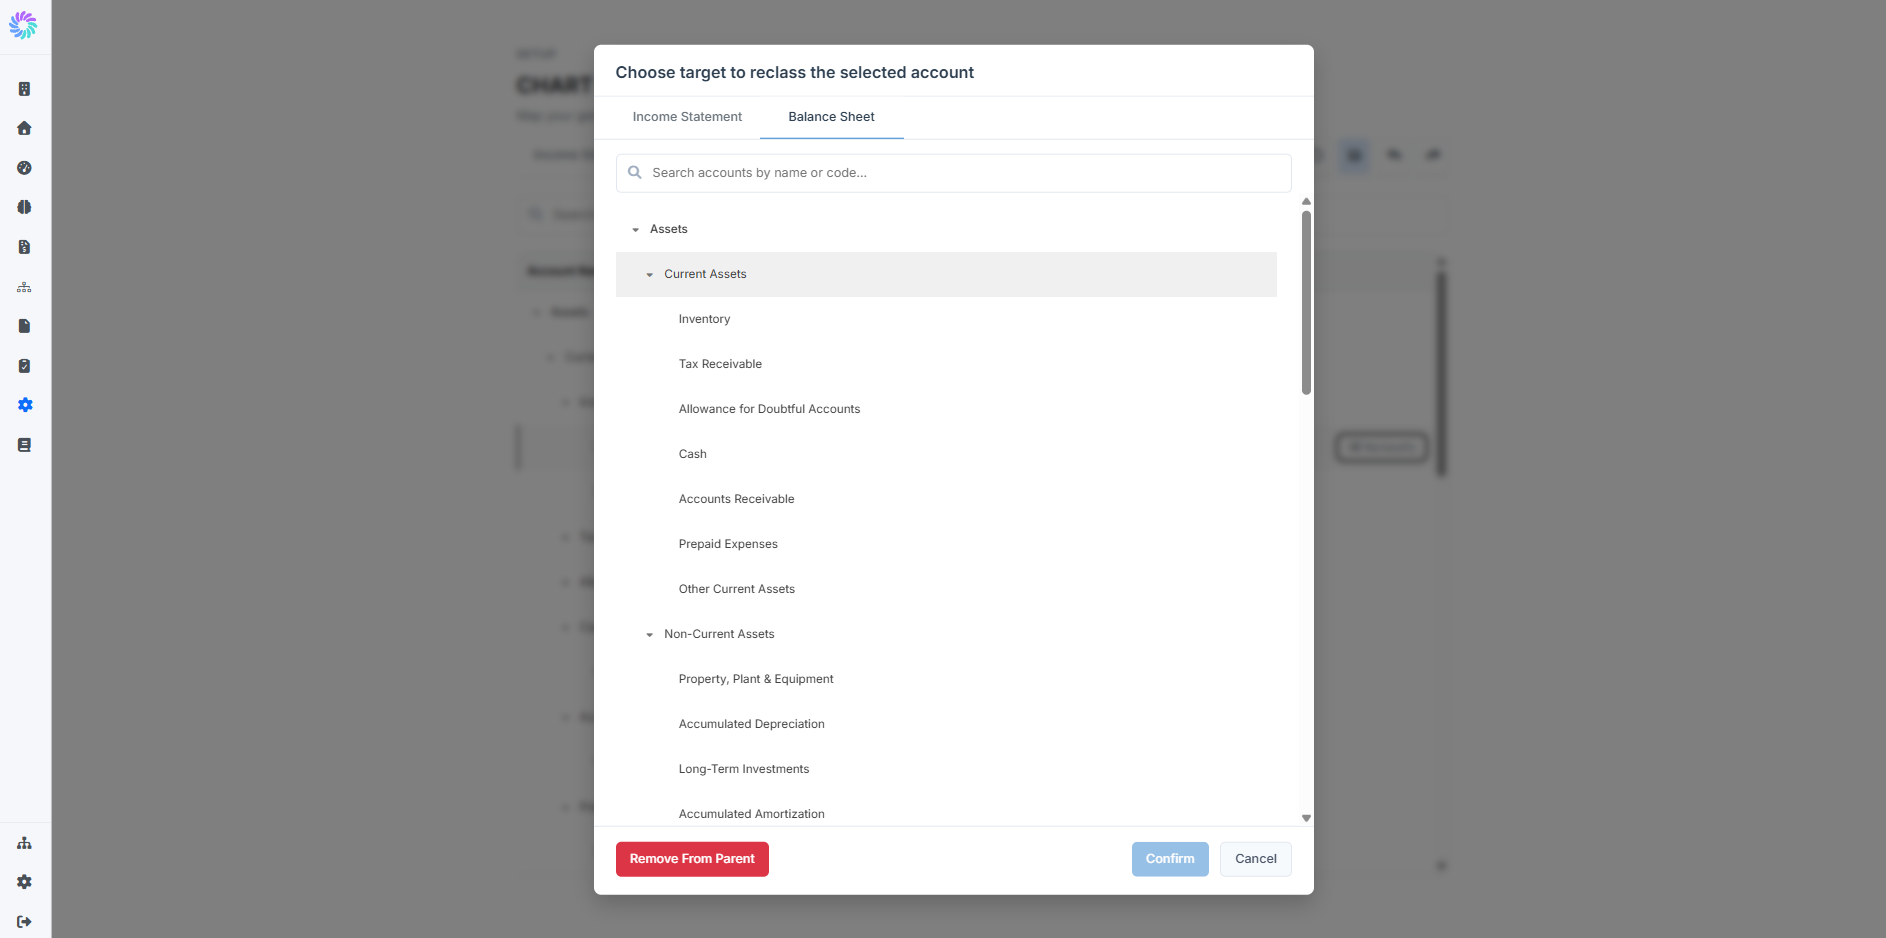
- In the Choose target to reclass the selected account dialog, browse the category tree or use the search bar to find the destination category.
- Click the target category, then click Confirm.
If you want to detach an account from its current parent without immediately assigning a new one, click Remove From Parent.
Option B — Click and drag
You can also reclassify by clicking and dragging an account directly to its new parent category in the hierarchy. This is the fastest method when you can see both the account and its destination on the same screen.
Option C — Add an intermediate category
If you need a custom grouping that doesn't already exist (for example, splitting Revenue into "Online" and "Retail" subgroups), hover between a parent category and its accounts. A + Add intermediate account here prompt appears. Click it to create a custom intermediate category, then drag or reclassify accounts into it.
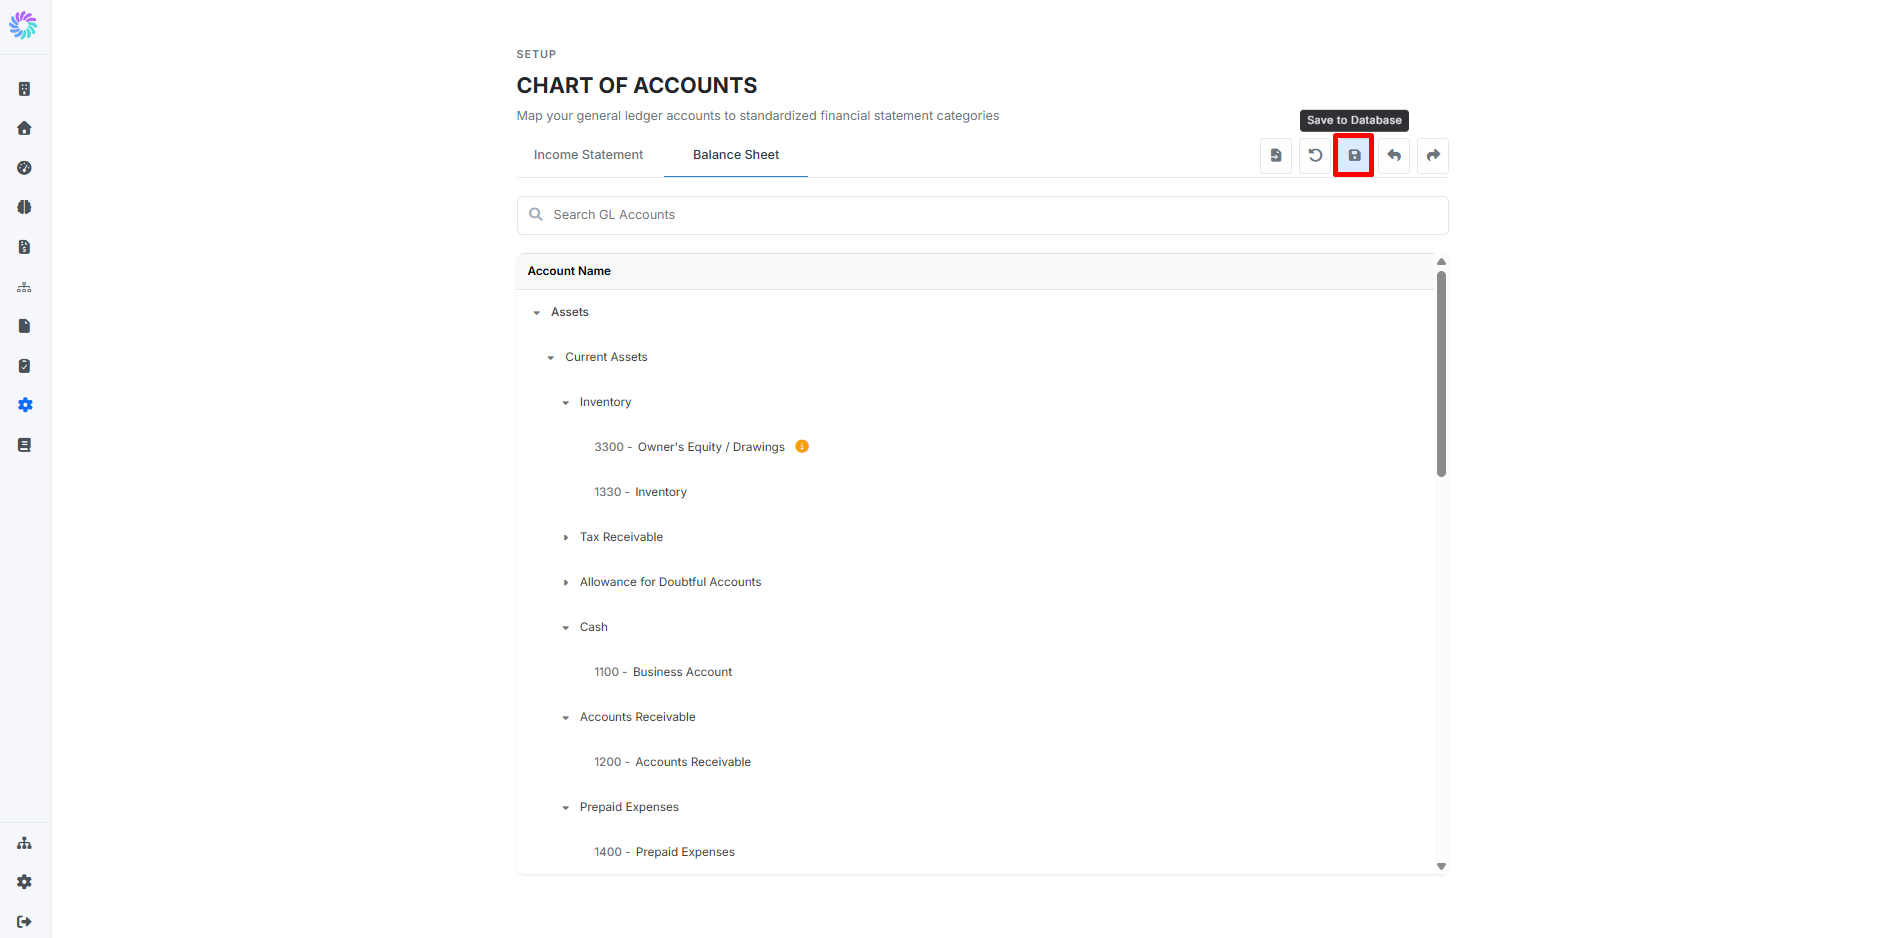
Step 4. Save Your Changes
After reclassifying or adding categories, click the Save icon at the top right of the page to commit your changes. The undo and redo icons next to it let you step backward or forward through edits before you save.
Your reports, dashboards, and KPIs will refresh against the updated structure as soon as you save.
Your Chart of Accounts now reflects the way your business actually reports, and every Planir view will use the updated structure going forward.