Running a Business Review
The Business Review page generates a structured monthly performance review for a client, complete with AI-driven insights, commentary, and action items. Use it to move from raw numbers to a board-ready or advisory-ready review without writing the analysis from scratch every month.
Why this matters
Monthly client reviews are time-consuming when done from scratch. Business Review turns the same data that powers the rest of Planir into a structured advisory document, with categorized insights (Performing Well, Opportunities to Discuss, Requires Attention) and editable AI commentary that you can refine before sharing. The output is consistent month over month, so you spend less time formatting and more time advising.
When to use this
- During your monthly close cycle, to produce a client-ready performance review
- When preparing for a quarterly board or advisory meeting
- When tracking ongoing follow-up items between meetings
- When sharing performance commentary with a client outside of Planir
Before You Start
Make sure you have:
- A connected data source so the review has data to analyze
- Your Chart of Accounts reviewed in Setup, Chart of Accounts
- Your KPIs configured in Setup, Metrics with targets and thresholds
- Your Business Review KPIs selected in Setup, Company Profile under the Business Review Settings tab
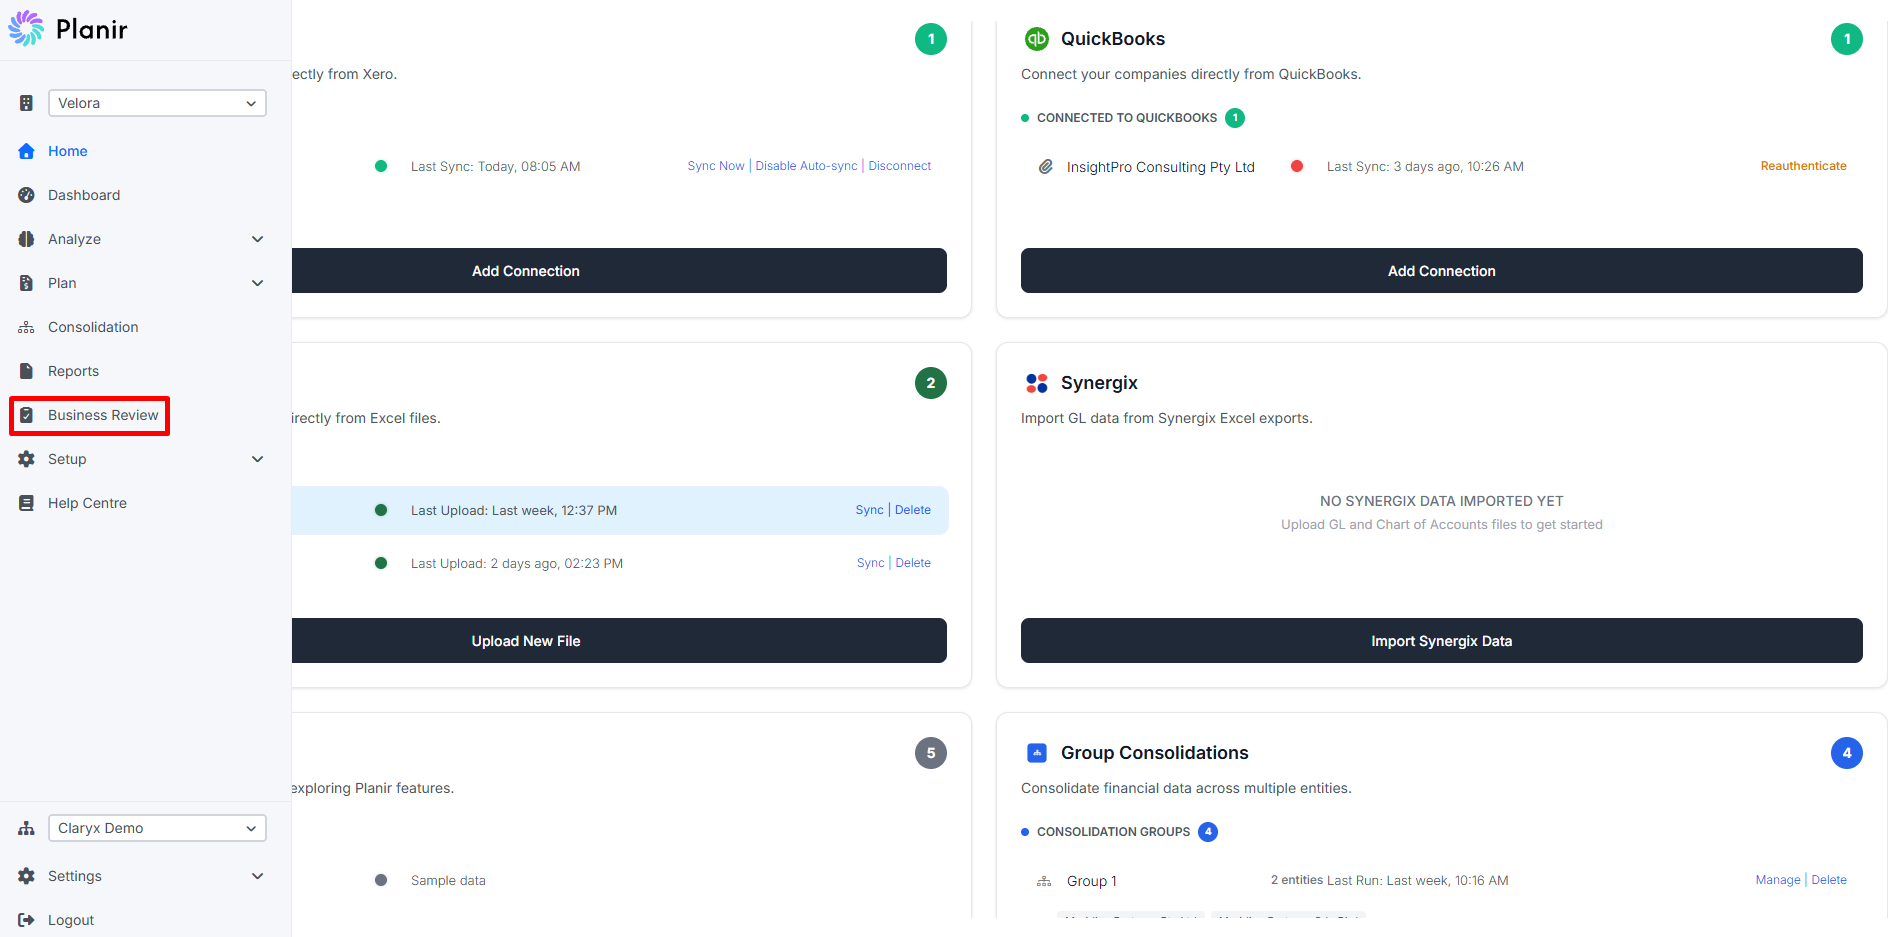
Step 1. Open the Business Review Page
From the sidebar, click Business Review.
The page opens with a list of any reviews already generated. If this is your first review, you will see "Start by generating a new review."
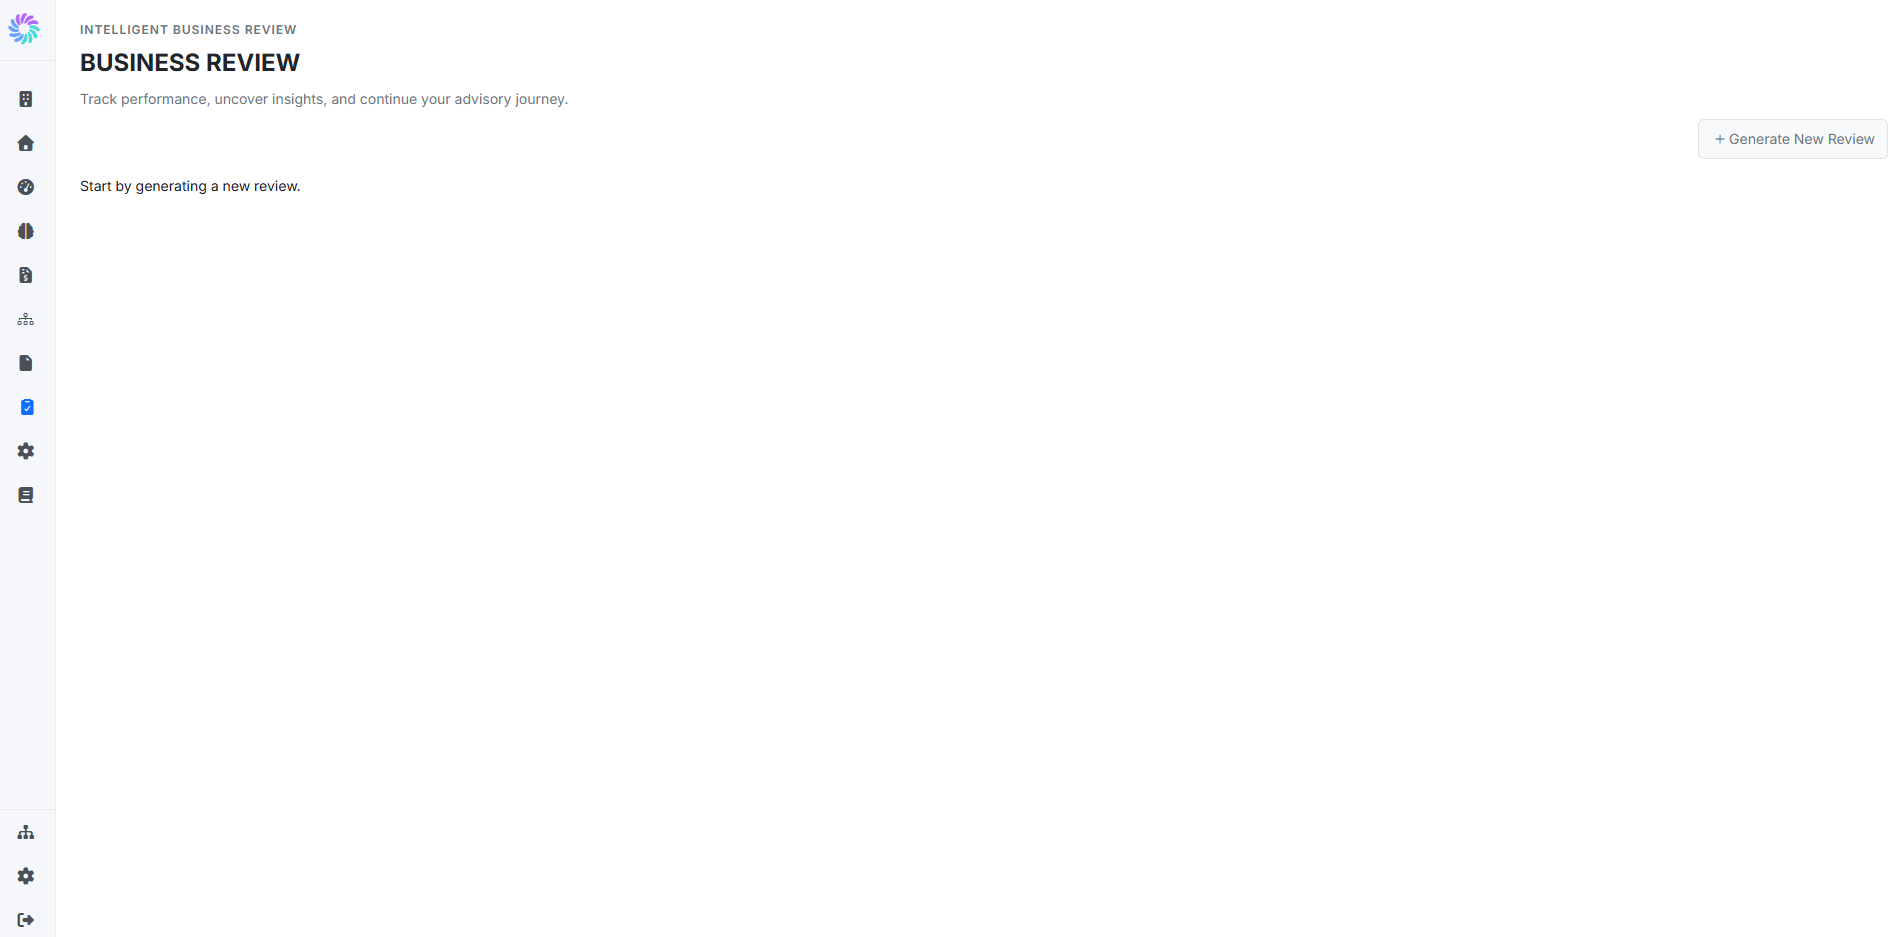
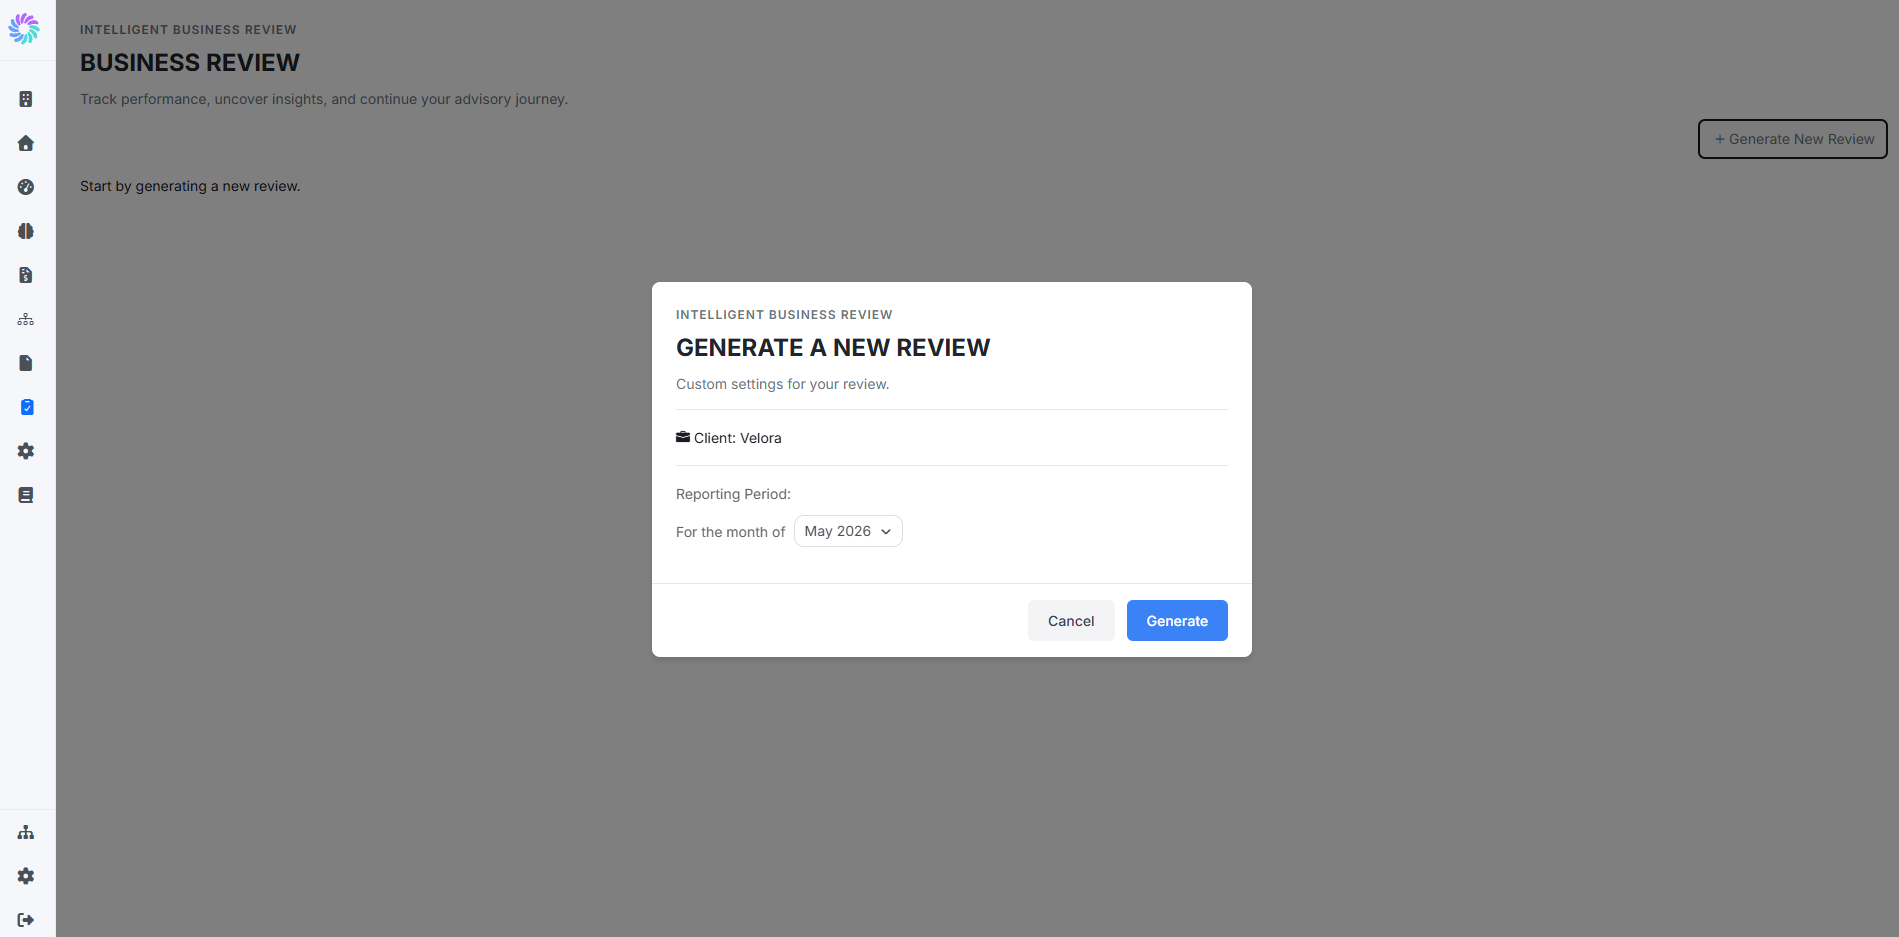
Step 2. Generate a New Review
- Click + Generate New Review in the top right.
- The Generate a New Review modal opens.
- Confirm the Client (the active company in your workspace).
- Set the Reporting Period by choosing the month under "For the month of."
- Click Generate.
Planir's AI then analyzes the period's data and generates a structured review with a headline summary, business health metrics, and a categorized list of insights.
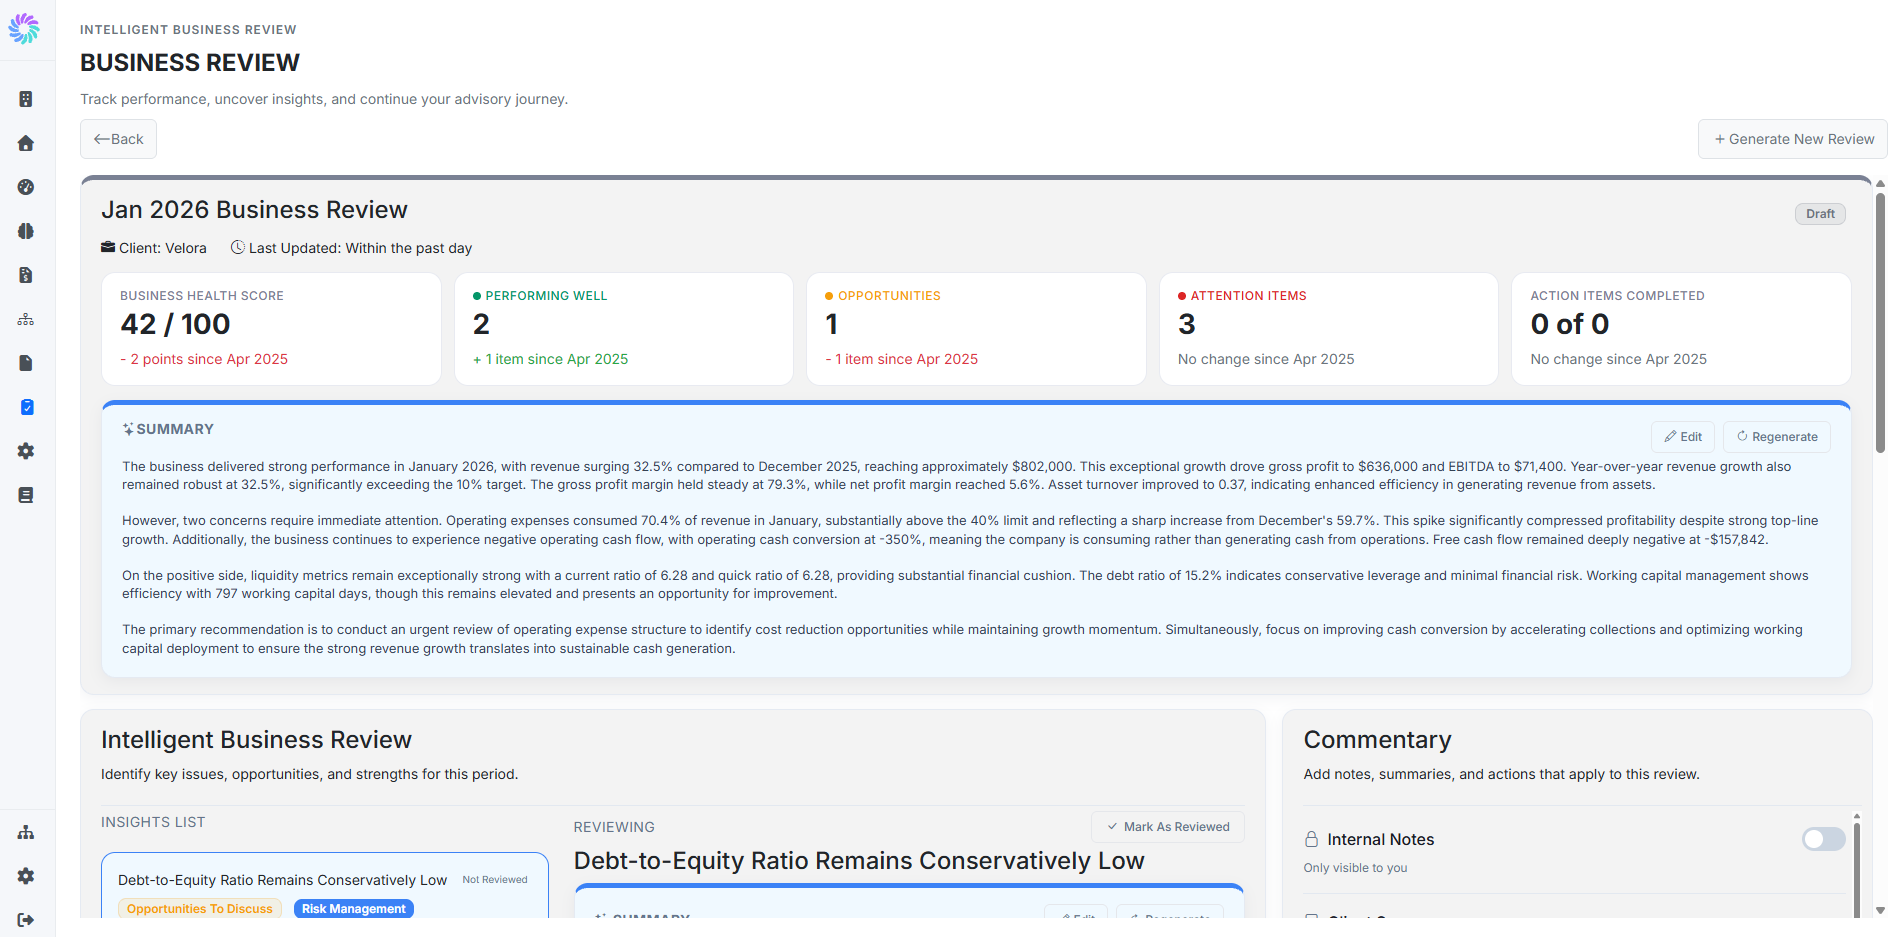
Step 3. Read the Headline Summary
The new review opens with five summary tiles across the top:
- Business Health Score: an overall score out of 100
- Performing Well: count of areas the AI identified as strengths
- Opportunities: count of areas worth discussing or improving
- Attention Items: count of areas that need urgent action
- Action Items Completed: count of follow-ups completed since they were created
Below the tiles is the Summary, an AI-generated paragraph covering the period's headline numbers (revenue change, profitability, cash position, working capital trends) and ending with a recommendation.
You can refine the Summary at any time using the Edit and Regenerate buttons in its top right. Edit lets you tweak the wording manually; Regenerate produces a fresh AI version of the same text.
Step 4. Work Through the Insights
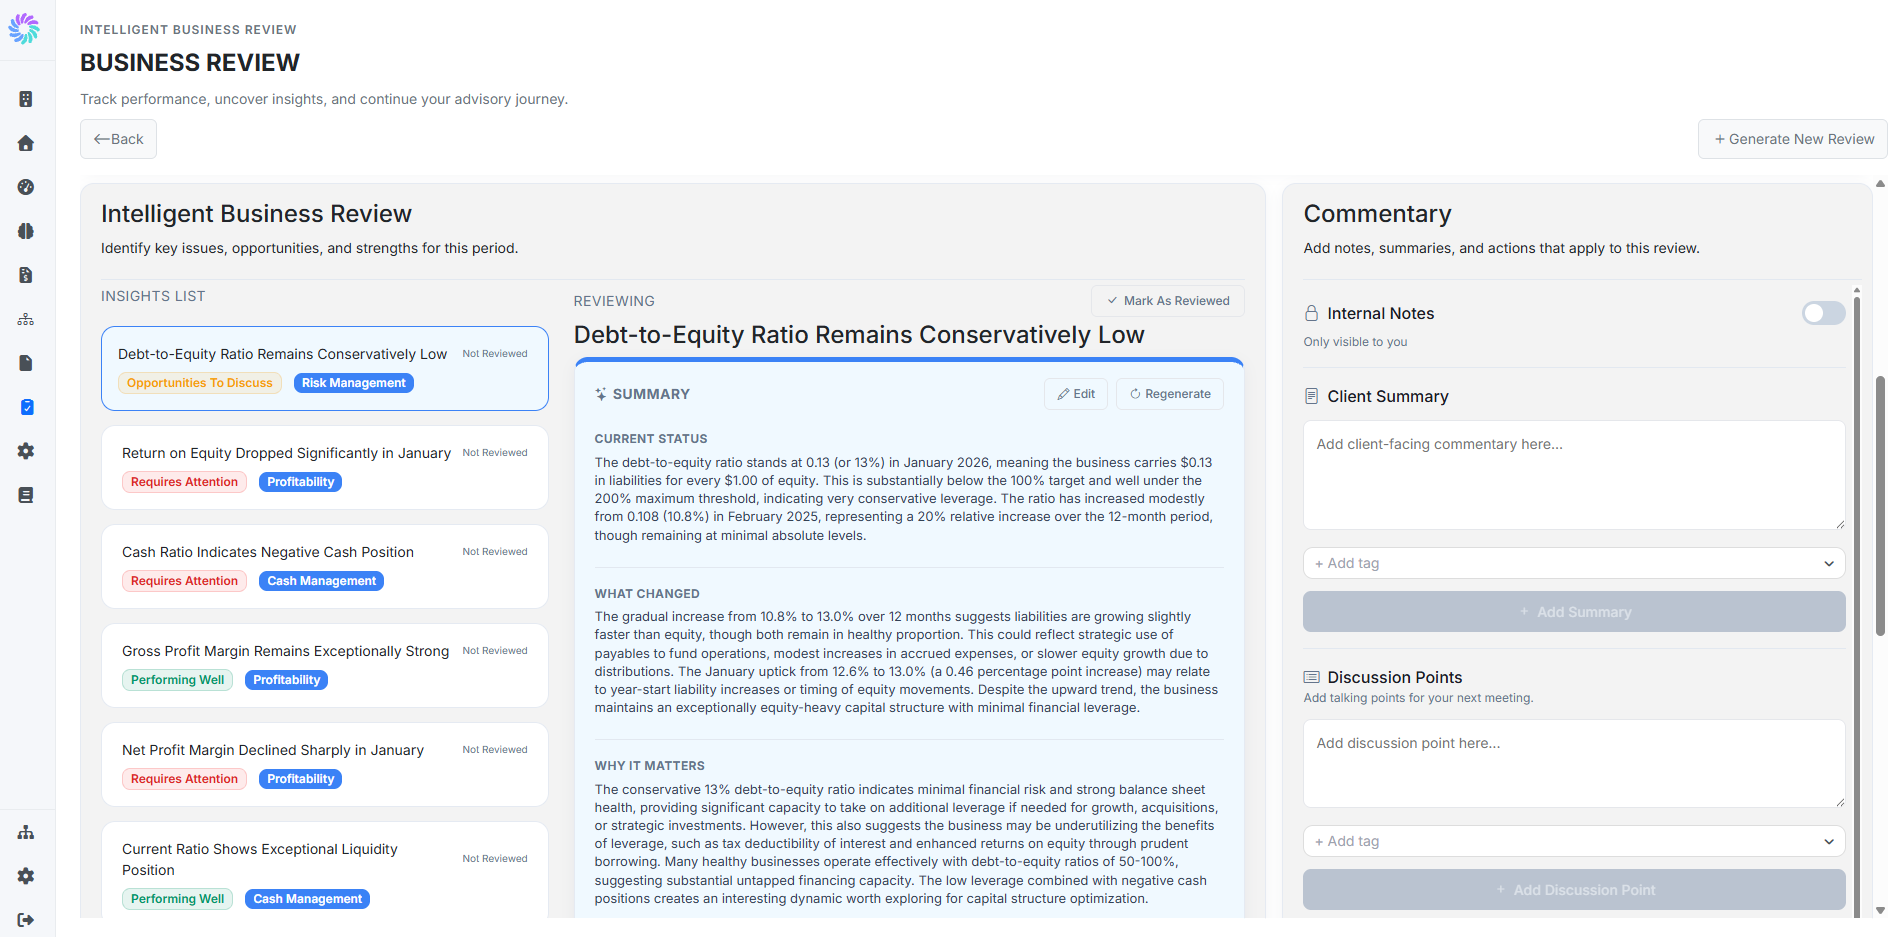
Below the Summary, the Intelligent Business Review section organizes the period's findings into individual insights. The page is split into three columns:
- Insights List on the left: every insight the AI identified, each tagged with a category (for example, Risk Management, Profitability, Cash Management) and a status (Performing Well, Opportunities To Discuss, Requires Attention)
- Reviewing in the center: the selected insight shown in detail
- Commentary on the right: where you add internal notes, client-facing summaries, discussion points, and action items for this review
Click any insight in the Insights List to load it in the Reviewing column. Each insight contains:
- Current Status: where the metric or KPI stands today
- What Changed: what shifted in the period
- Why It Matters: the strategic or operational implication
- Recommendations: suggested actions for the client
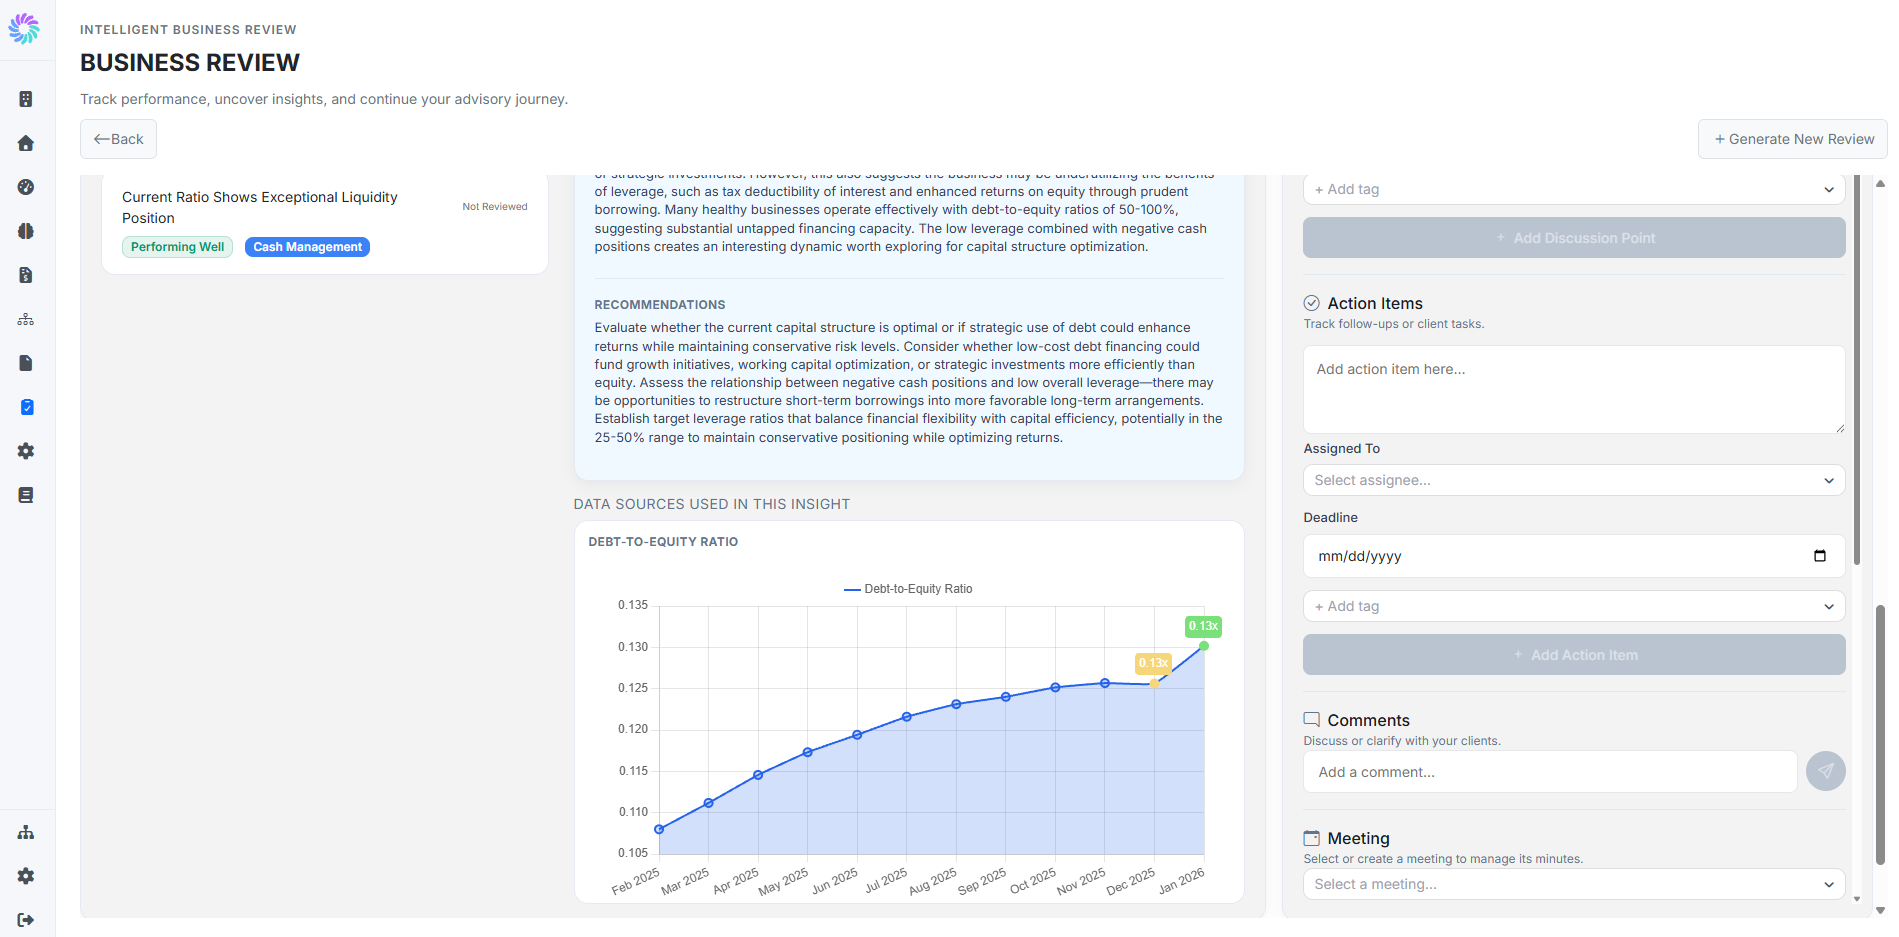
- Data Sources Used in This Insight: charts and references the AI used to generate the insight
Step 5. Edit or Regenerate Insight Text
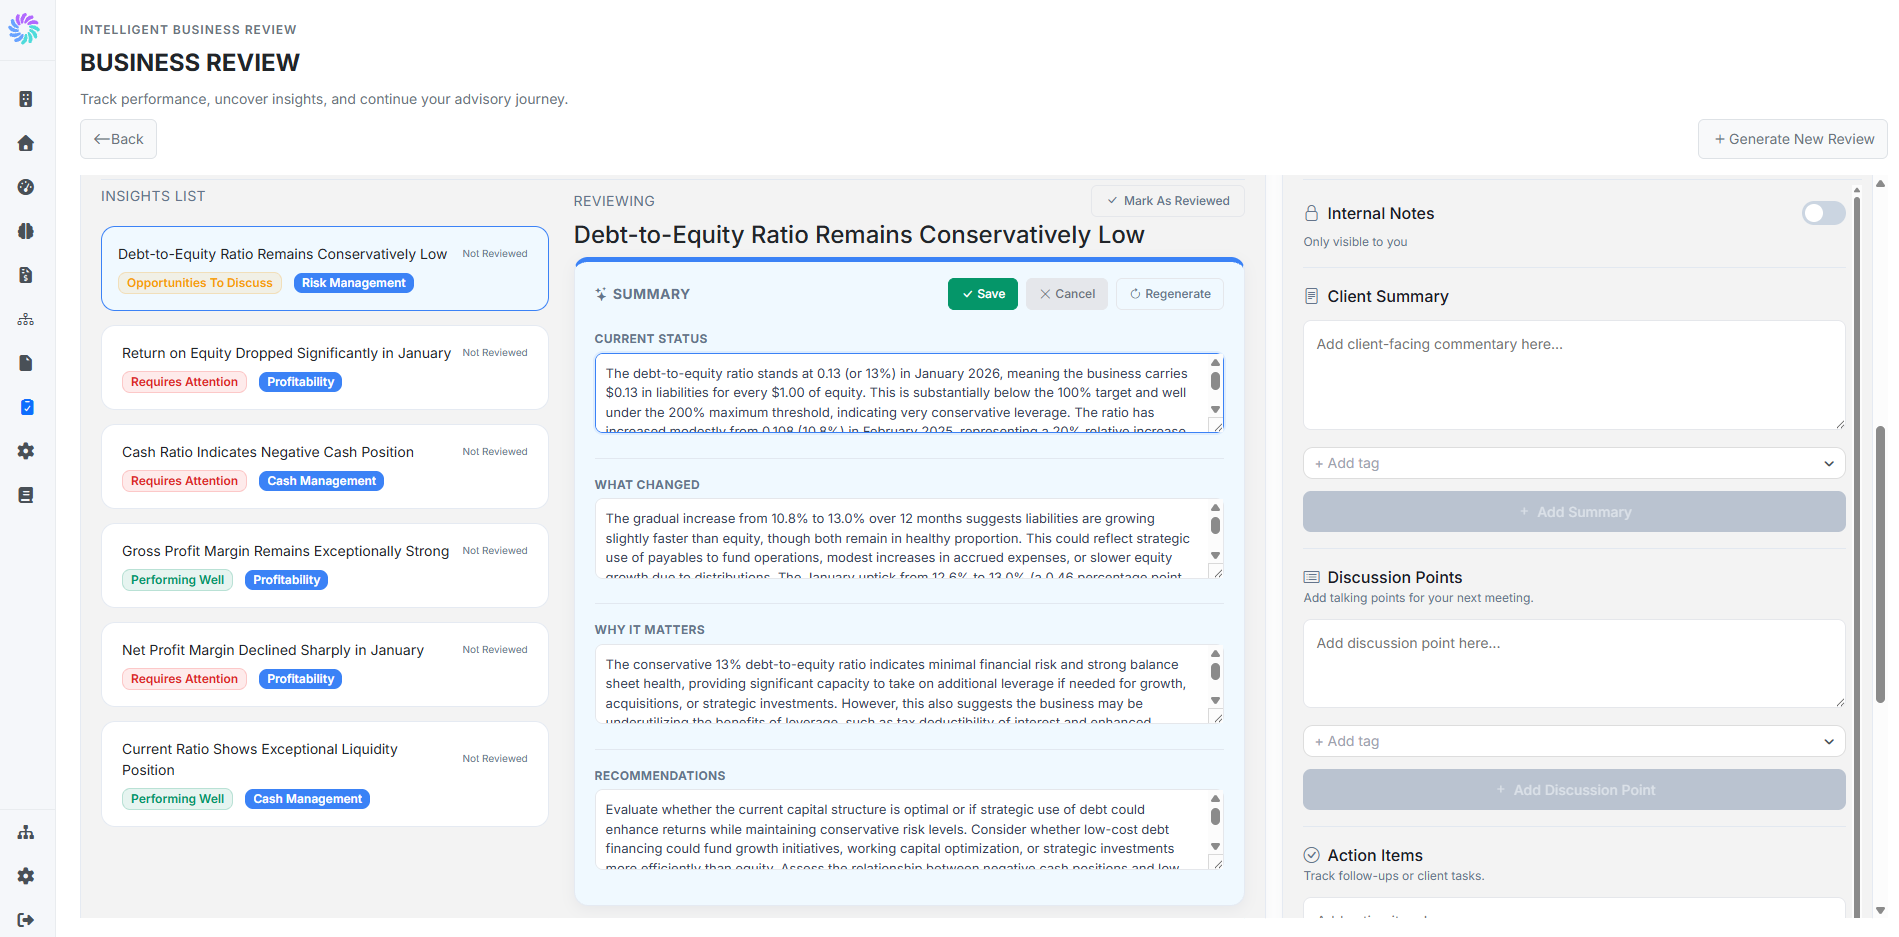
Each section of an insight (Summary, Current Status, What Changed, etc.) has its own Edit and Regenerate buttons.
- Click Edit to switch the section to an editable text box. Make your changes, then click Save to commit (or Cancel to discard).
- Click Regenerate to ask the AI to produce a fresh version of just that section.
This lets you keep the AI's structure but refine the wording for tone, your firm's voice, or your client's specific context.
Step 6. Mark Insights as Reviewed
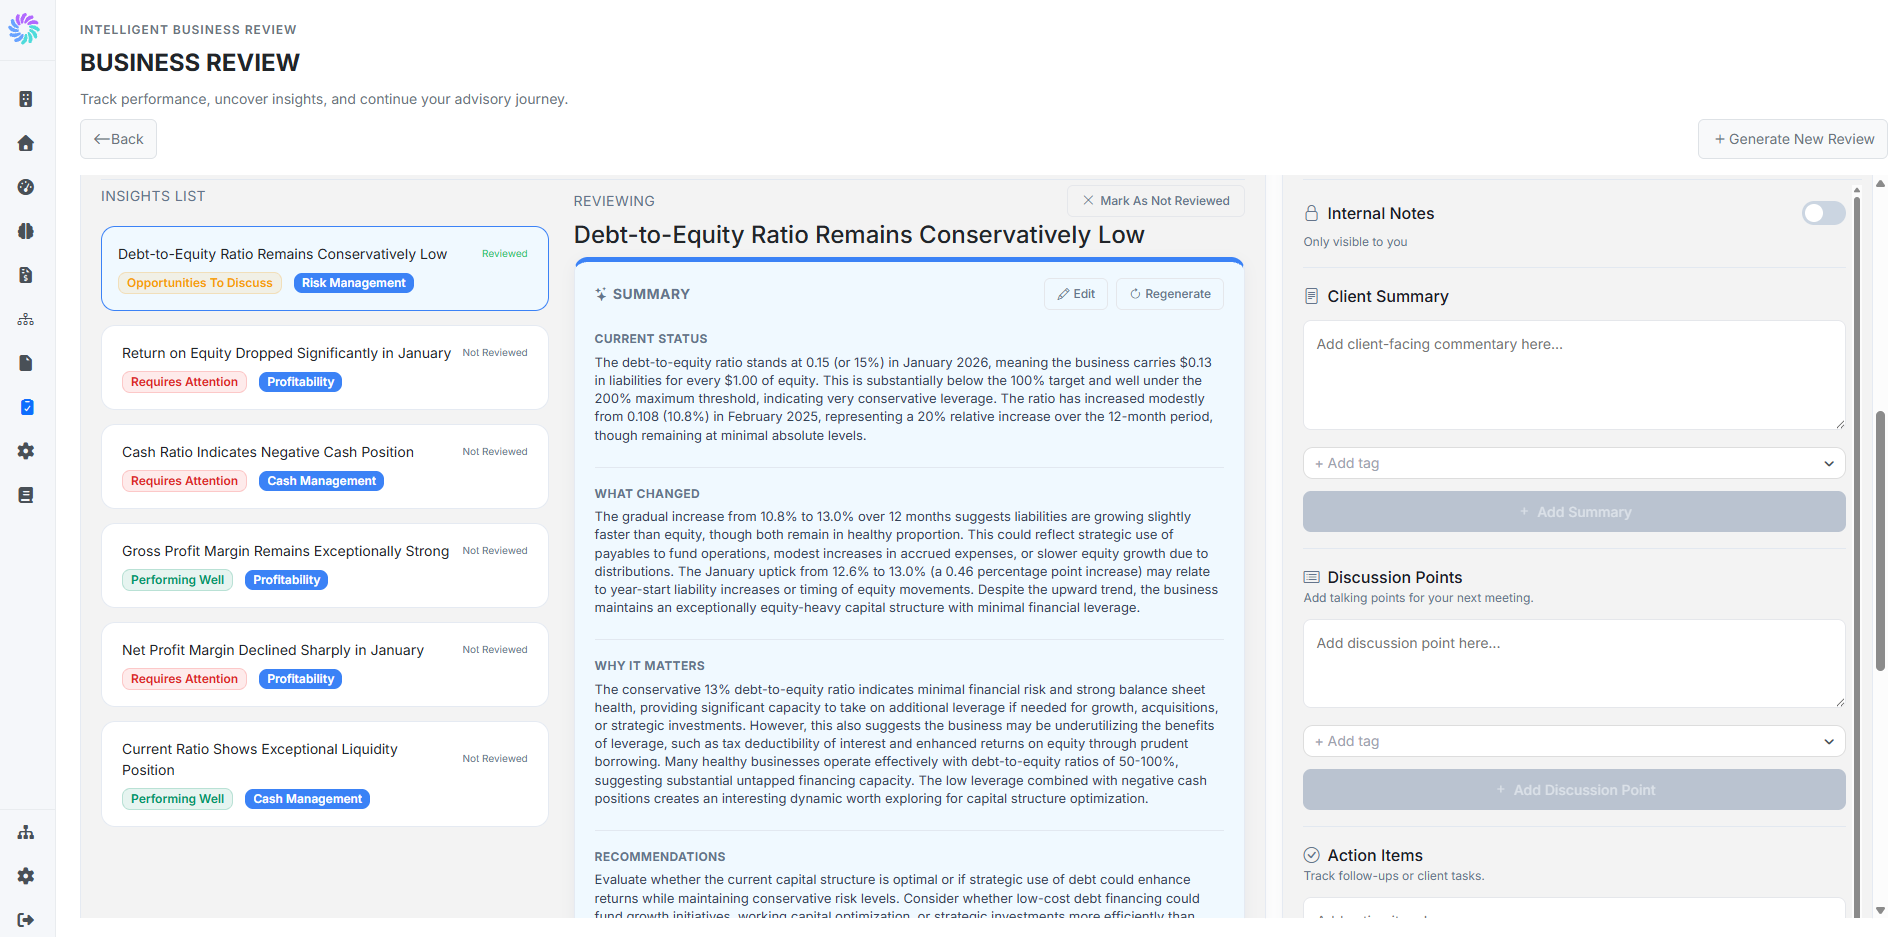
As you work through each insight (reading the four sections, editing or regenerating wording as needed), click Mark As Reviewed at the top of the Reviewing column once you are satisfied with it.
The insight's tag in the Insights List flips from Not Reviewed to Reviewed, and the button changes to Mark As Not Reviewed in case you want to come back to it. Repeat for every insight in the list so the Insights List shows all items as Reviewed before you move on.
Step 7. Add Commentary for the Review
Once every insight has been reviewed, use the Commentary panel on the right to add notes, summaries, and actions that apply to the entire business review. Commentary is tagged to the review as a whole, not to any individual insight, so what you add here represents your overall advisory takeaways for the period.
The panel has several sections:
- Internal Notes: private notes only visible to you. Toggle on to enable.
- Client Summary: client-facing commentary for the review overall, with optional tags
- Discussion Points: talking points to raise in your next meeting with the client
- Action Items: follow-ups or client tasks, with assignee and deadline
- Comments: discussion thread with your clients
- Meeting: link the review to a specific meeting to manage its minutes
Each section has its own input field, optional tags, and an Add button to commit the entry.