Manage Scenarios
The Manage Scenario page is the central place to configure how each forecast scenario behaves in Planir. Set the default projection rule, toggle activity drivers on or off, configure financial settings and default Balance Sheet accounts, create new scenarios, and lock in a forecast as a fixed budget. Everything that controls how a scenario projects lives here.
Why this matters
Scenarios let you stress-test the same business against different assumptions. The Manage Scenario page is where those assumptions actually live. By centralizing projection rules, activity drivers, account settings, and budget snaps in one screen, you can move from "what if" to a fully configured scenario without bouncing between five different parts of the app.
When to use this
- When setting up a new forecast scenario (Best Case, Worst Case, Stretch Plan, etc.)
- When changing the default growth assumption that applies across all accounts
- When tuning Cash Realization timing or default Balance Sheet account mappings
- When toggling specific activities on or off to test a scenario without those decisions
- When converting a finalized scenario into a fixed budget you can compare actuals against
Before You Start
Make sure you have:
- Your Chart of Accounts reviewed in Setup, Chart of Accounts
- Your activities created in Plan, Activity Forecast if you want to use activity-based drivers in your scenarios
- A clear view of which scenarios you want to maintain (Base Case, Best Case, Worst Case, etc.)
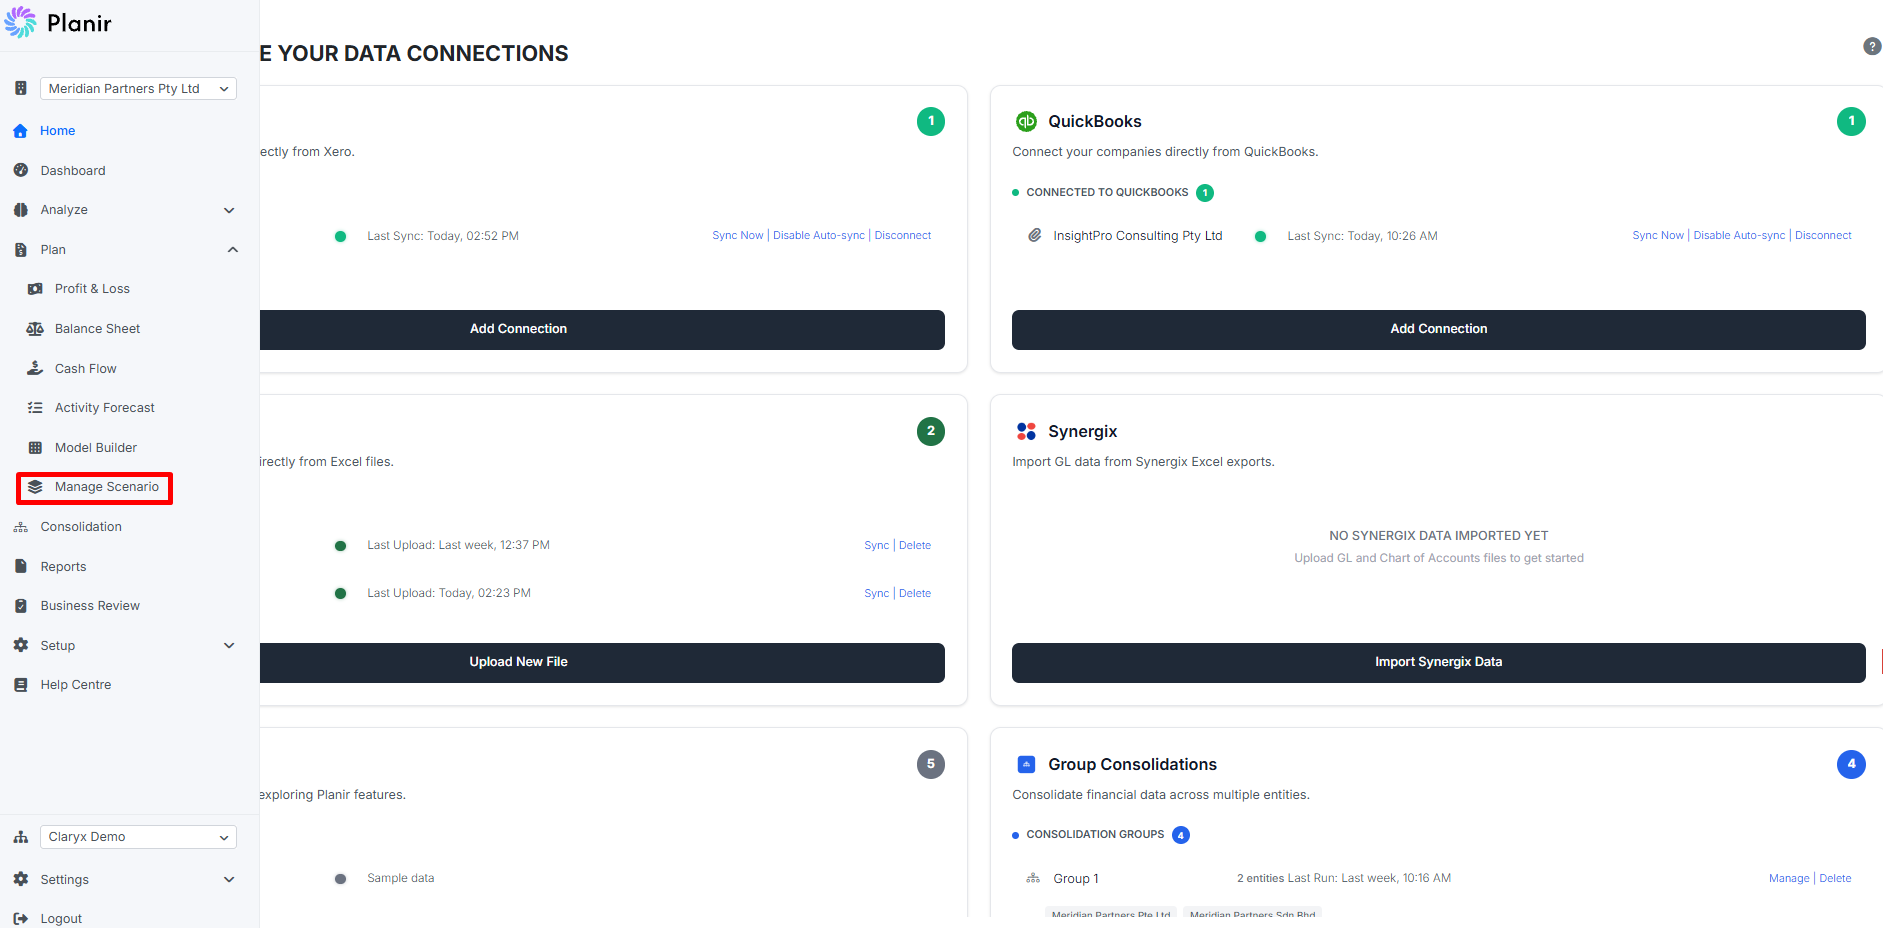
Step 1. Open the Manage Scenario Page
- From the sidebar, expand Plan.
- Click Manage Scenario.
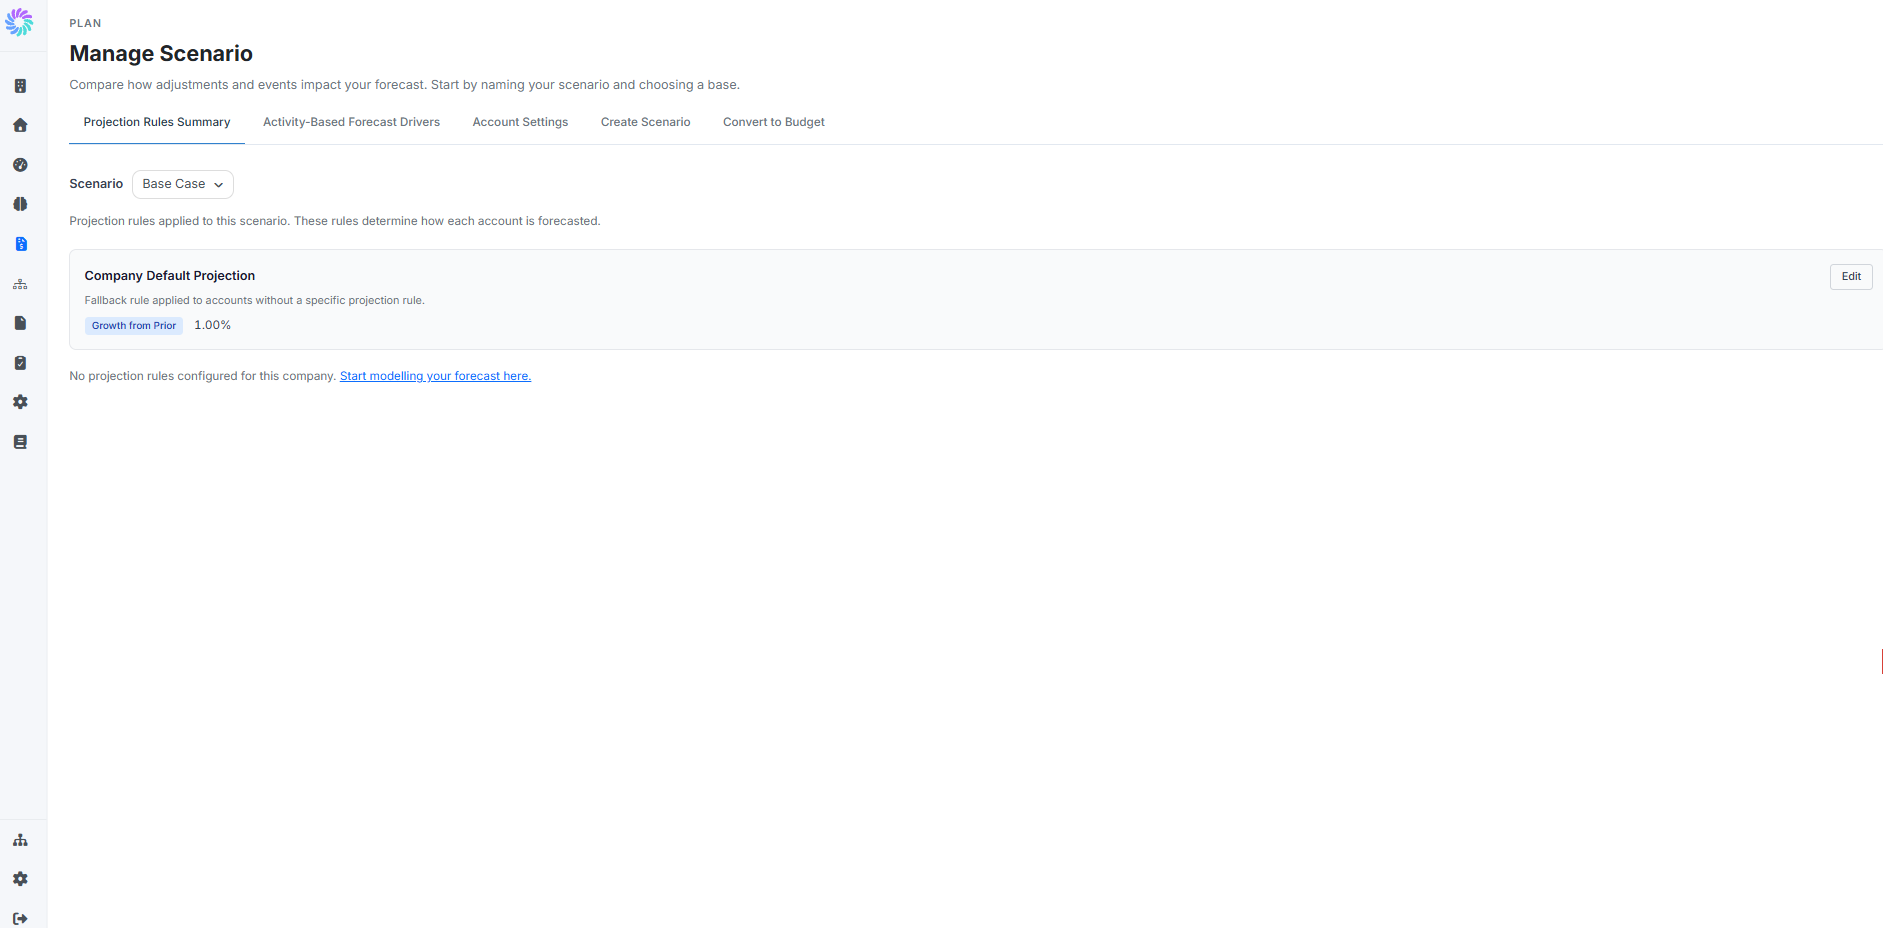
The page opens with five tabs across the top: Projection Rules Summary, Activity-Based Forecast Drivers, Account Settings, Create Scenario, and Convert to Budget.
Use the Scenario dropdown near the top of each tab to choose which scenario you are configuring. The Base Case scenario exists by default.
Step 2. Configure the Projection Rules
The Projection Rules Summary tab shows the rules that apply to the selected scenario.
- Company Default Projection at the top is the fallback rule applied to any account that does not have a specific override. By default it is set to Growth from Prior at 1.00%.
- The table below lists every account that has a specific projection rule overriding the default, along with the method and a one-line summary of what the rule does.
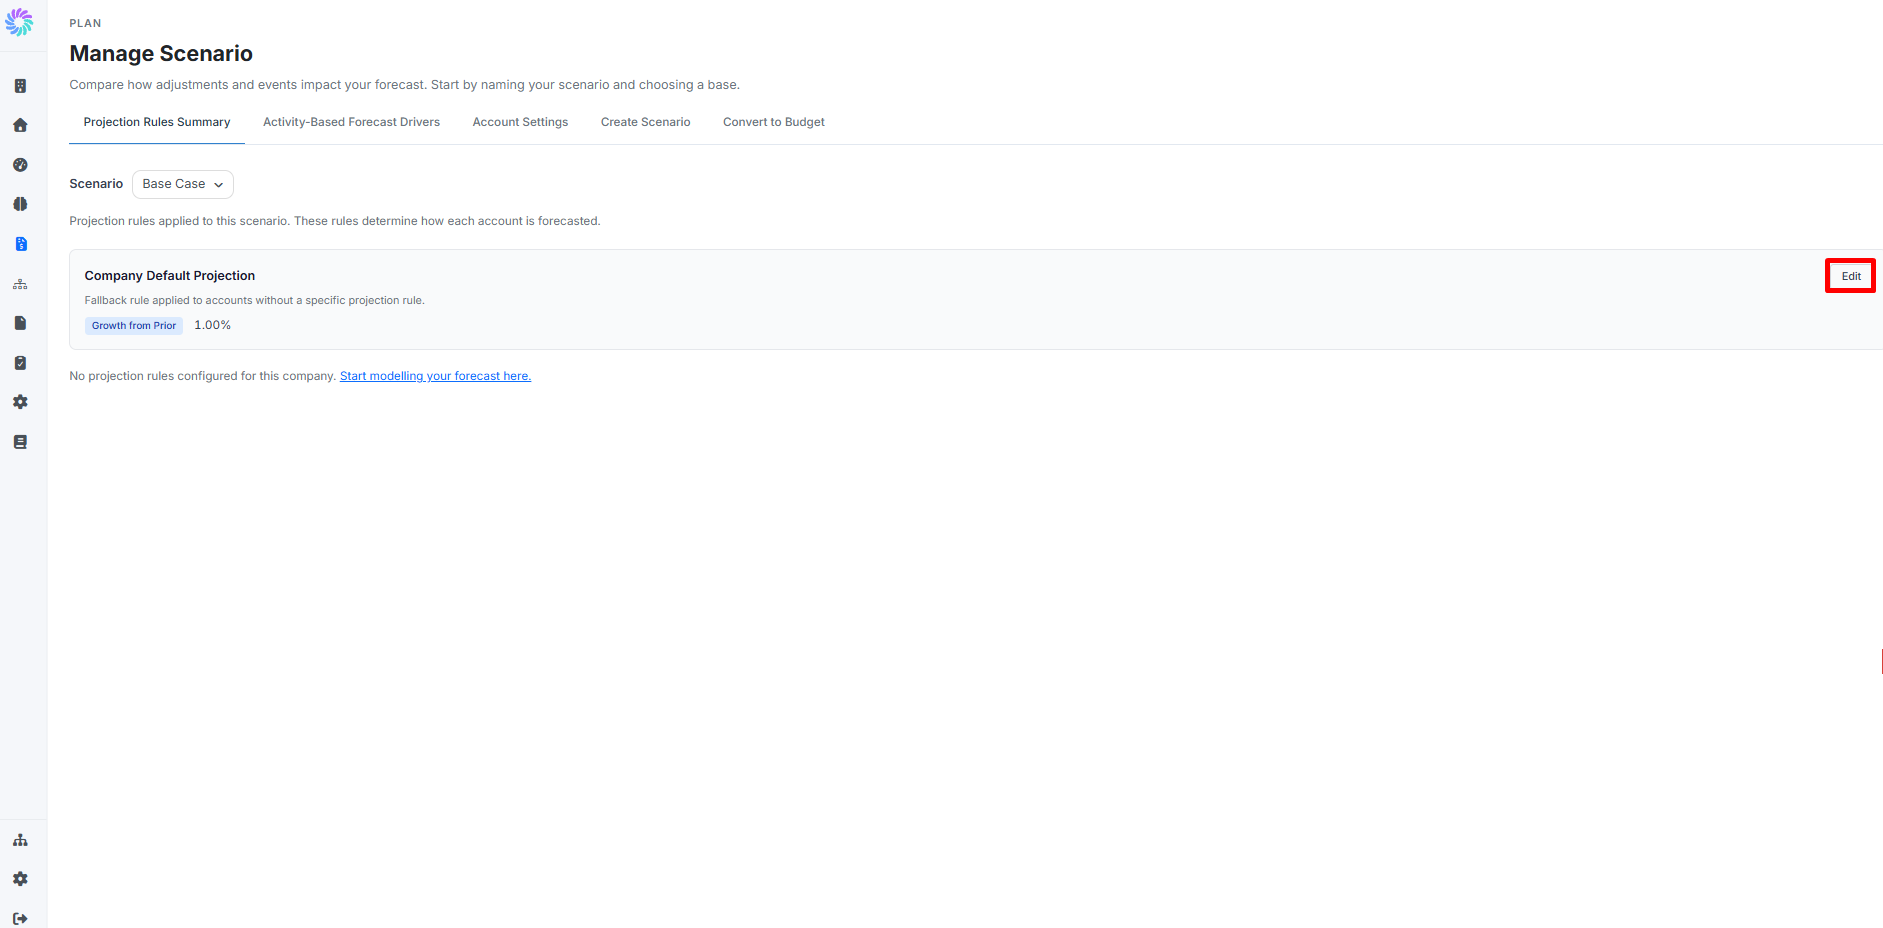
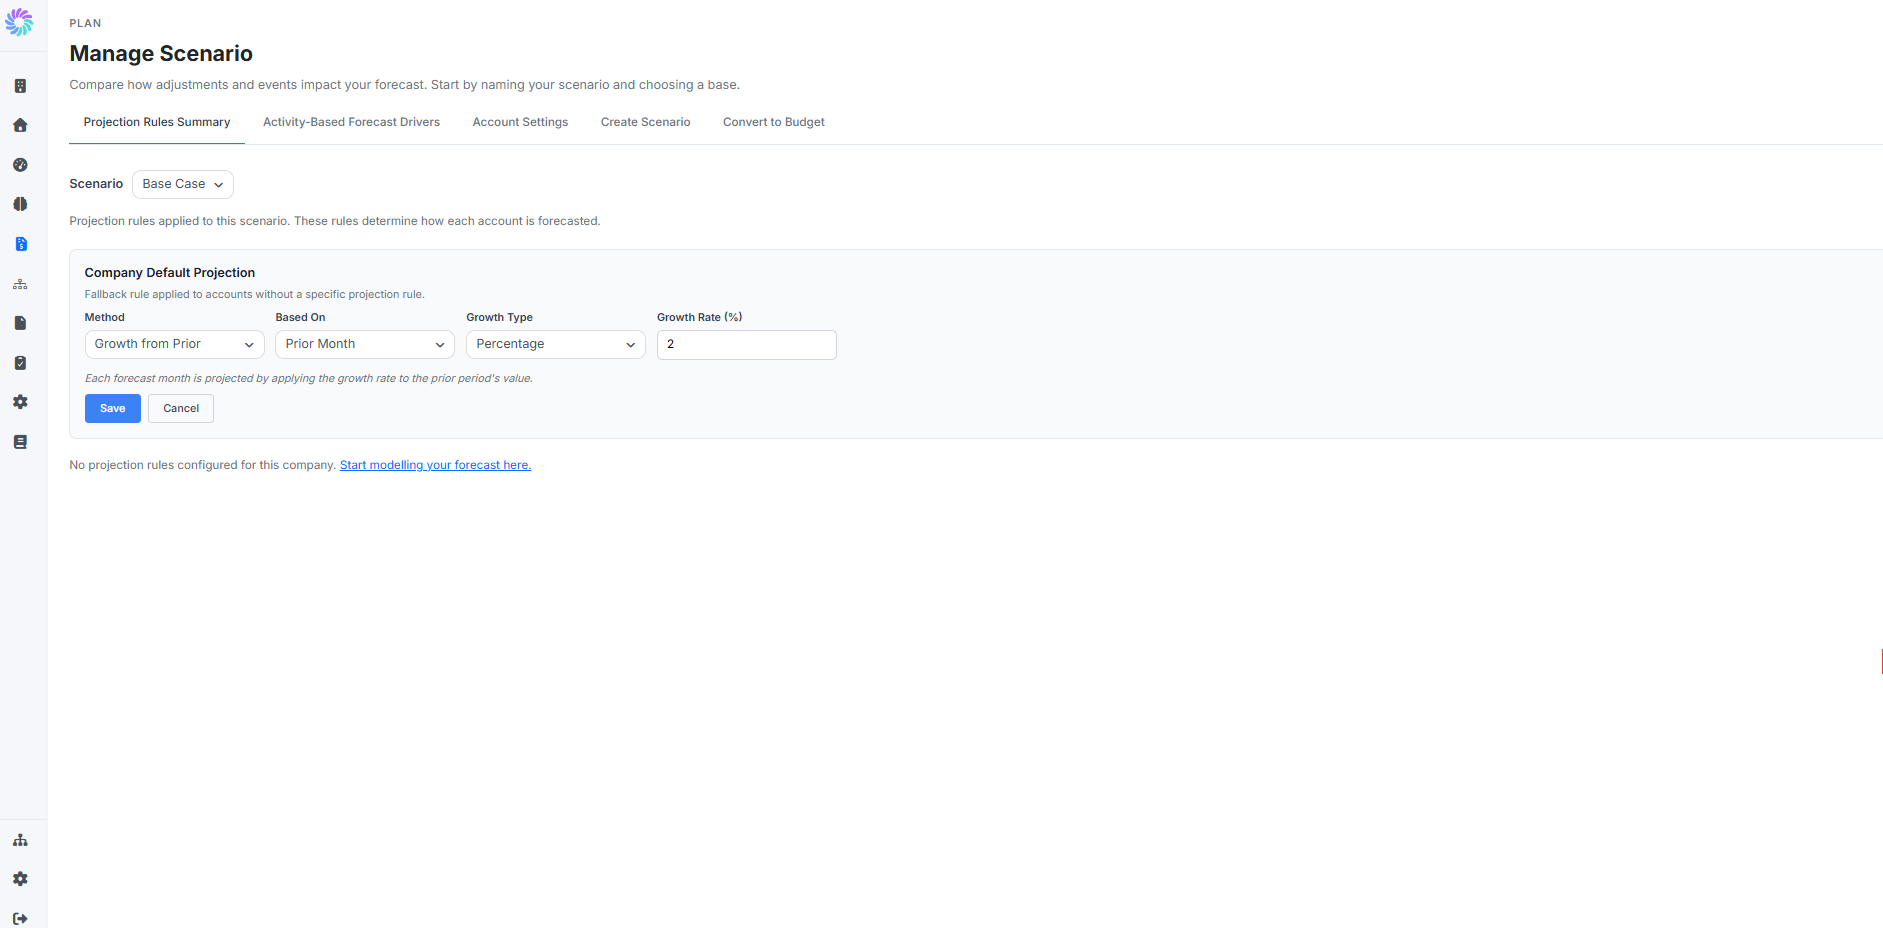
To change the default:
- Click Edit on the Company Default Projection card.
- Set the Method (Growth from Prior, Fixed Base Growth, Derived from Accounts).
- Set the Based On period (Prior Month, Prior Quarter, Prior Year).
- Set the Growth Type (Percentage or Fixed Amount).
- Enter the Growth Rate value.
- Click Save.
To override the default on a specific account, set the rule directly on that account using the detail panel in Plan, Profit & Loss or Plan, Balance Sheet. Those overrides automatically appear in the table here.
Step 3. Toggle Activity-Based Drivers
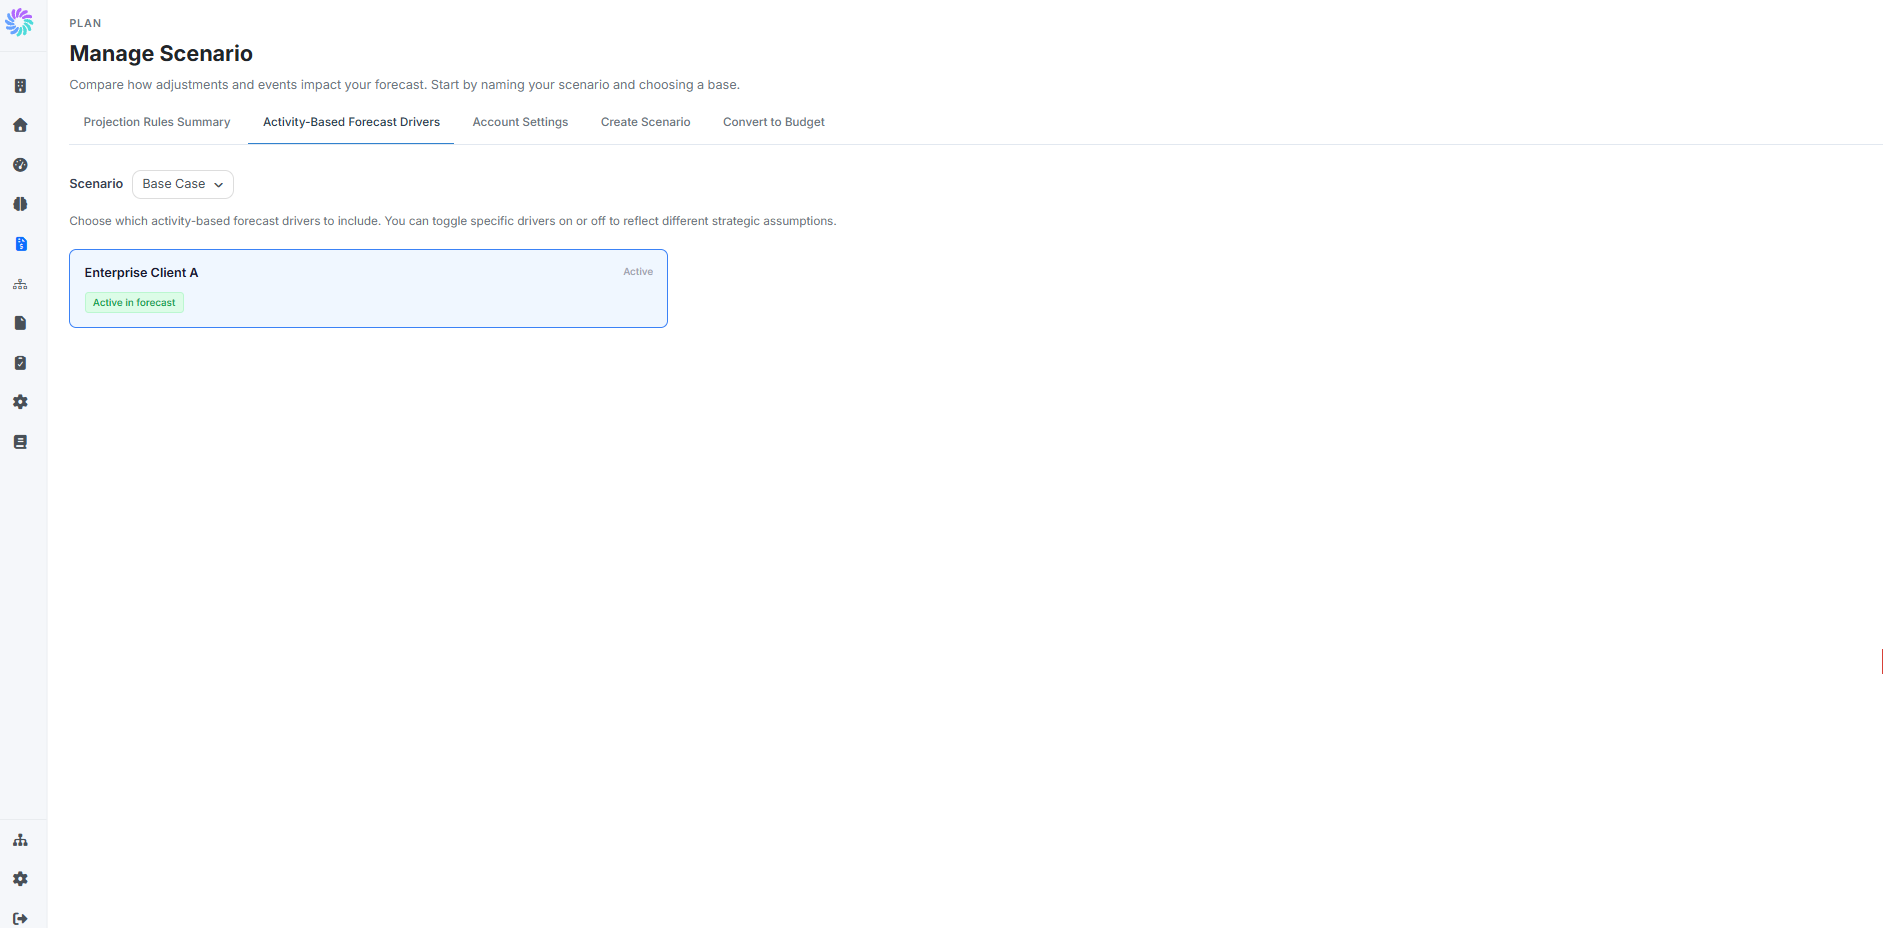
The Activity-Based Forecast Drivers tab lists every activity created in Plan, Activity Forecast and lets you decide which ones are active in the selected scenario.
Each activity card shows whether it is Active or inactive in the scenario. Click a card to toggle its status. Inactive activities have their values excluded from the scenario's forecast without being deleted.
This is where stress-testing happens. For example, in a Worst Case scenario you might toggle off your "New Wholesale Customer" activity to see how the forecast holds up if that deal never closes.
Step 4. Adjust Account Settings
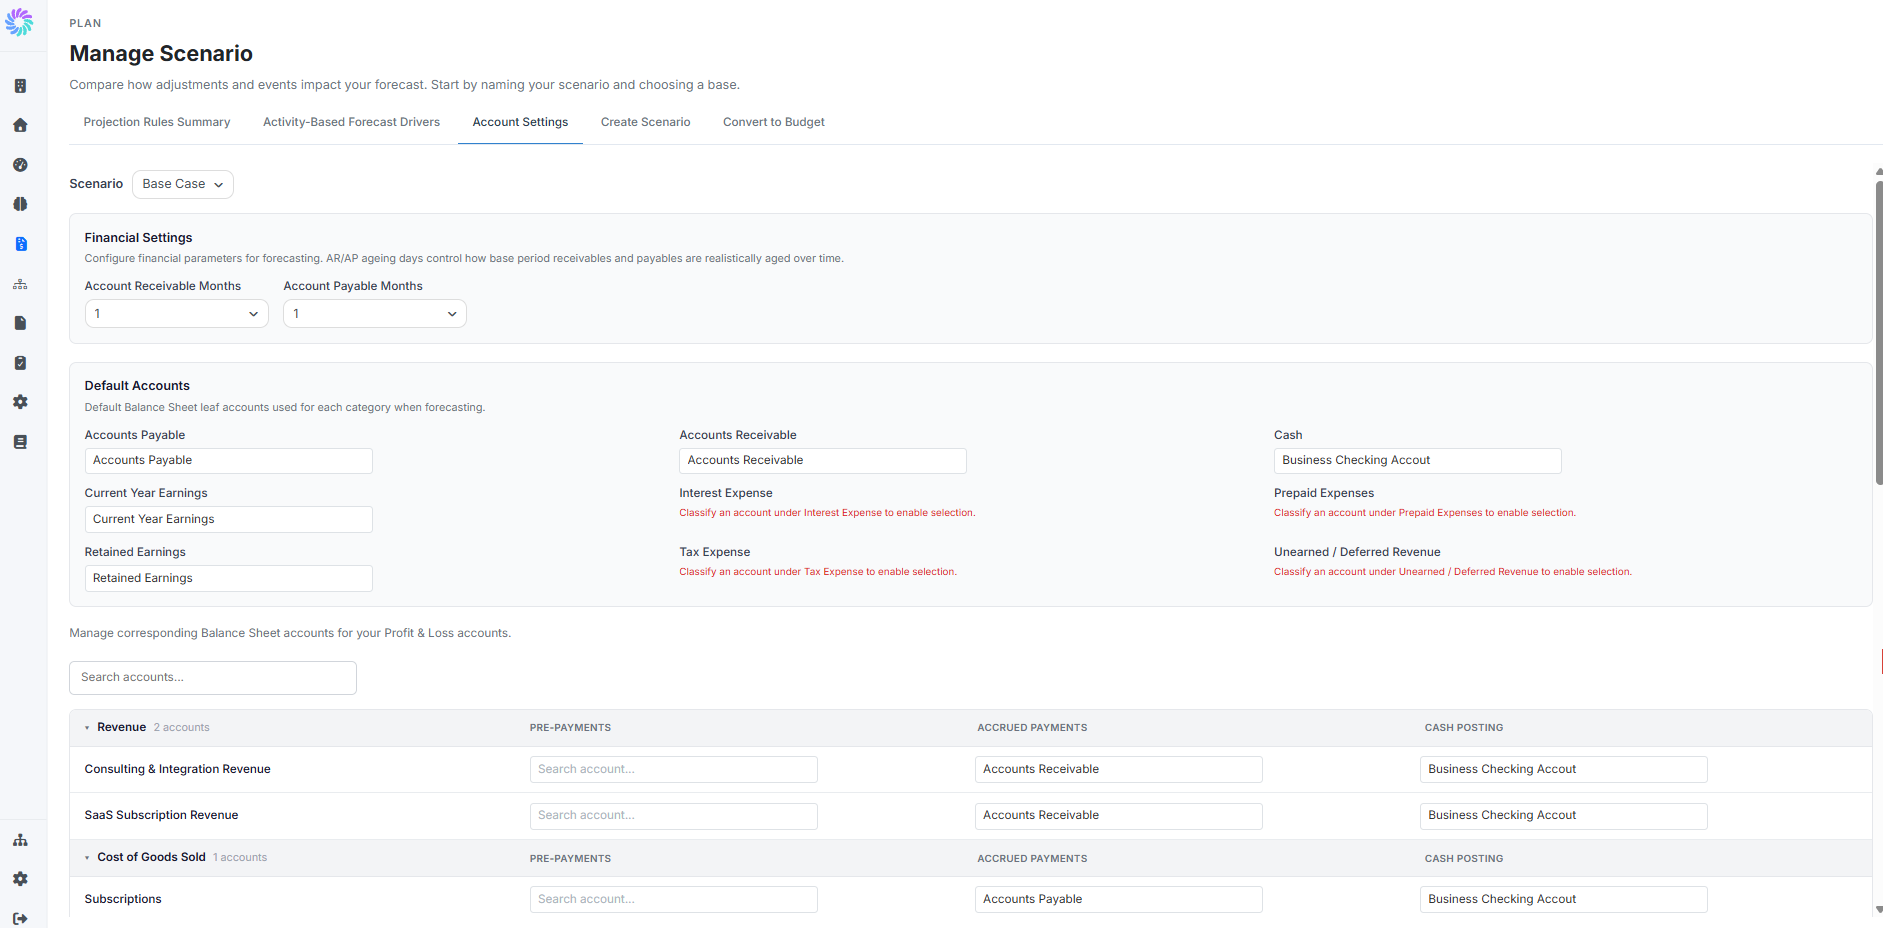
The Account Settings tab covers two things: financial parameters and default Balance Sheet account mappings.
Financial Settings
- Account Receivable Months: how many months it takes for receivables to age in the forecast (default 1)
- Account Payable Months: how many months it takes for payables to age in the forecast (default 1)
These control how base-period AR and AP balances are realistically rolled forward over time.
Default Accounts
The Default Accounts section sets the leaf account that should be used for each Balance Sheet category when the forecast needs to post a movement (Accounts Payable, Accounts Receivable, Cash, Current Year Earnings, Interest Expense, Prepaid Expenses, Retained Earnings, Tax Expense, Unearned / Deferred Revenue).
If a category shows "Classify an account under [Category] to enable selection" in red, you need to first classify at least one account into that category in Setup, Chart of Accounts before you can pick a default.
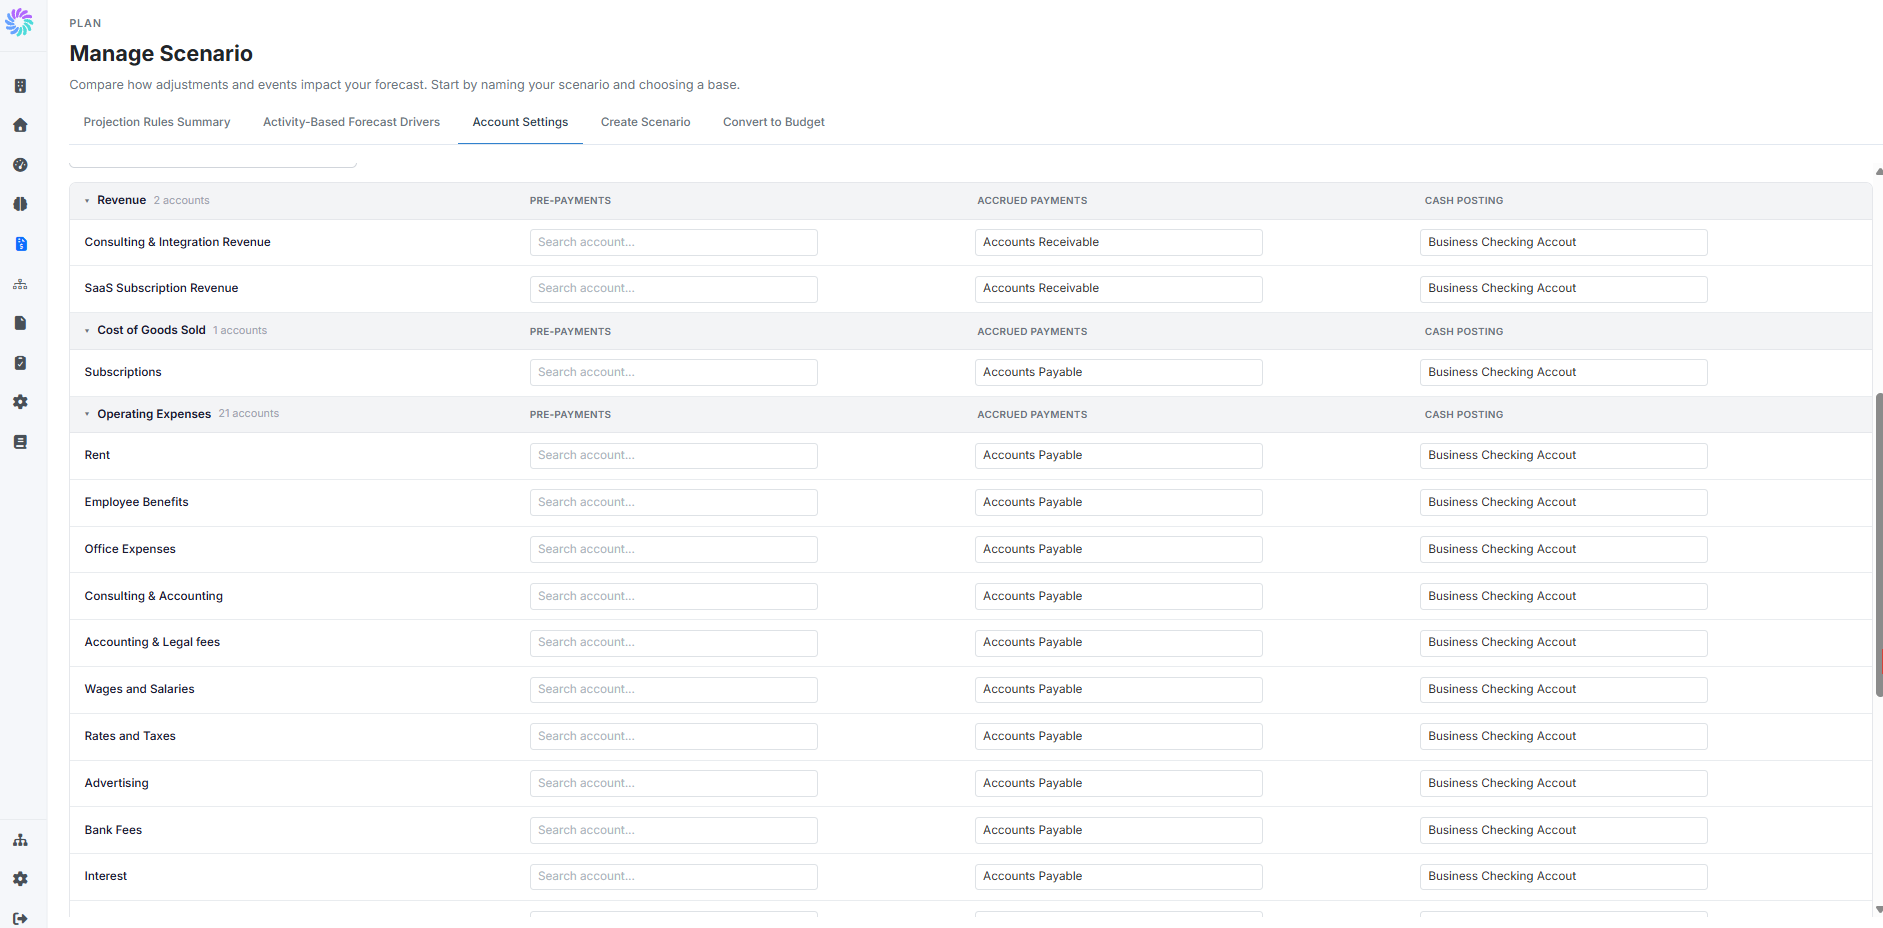
Balance Sheet Mappings for P&L Accounts
Below the Default Accounts section, every P&L account is listed with three columns:
- Pre-payments: the Balance Sheet account that holds prepayments related to this P&L line (typically a receivable or prepaid expense account)
- Accrued Payments: the Balance Sheet account that holds accruals related to this P&L line (typically an Accounts Payable account)
- Cash Posting: the Balance Sheet account where the actual cash movement lands (typically your Business Checking Account)
These mappings control how Cash Realization rules from the P&L flow through to the Balance Sheet and Cash Flow.
Step 5. Create a New Scenario
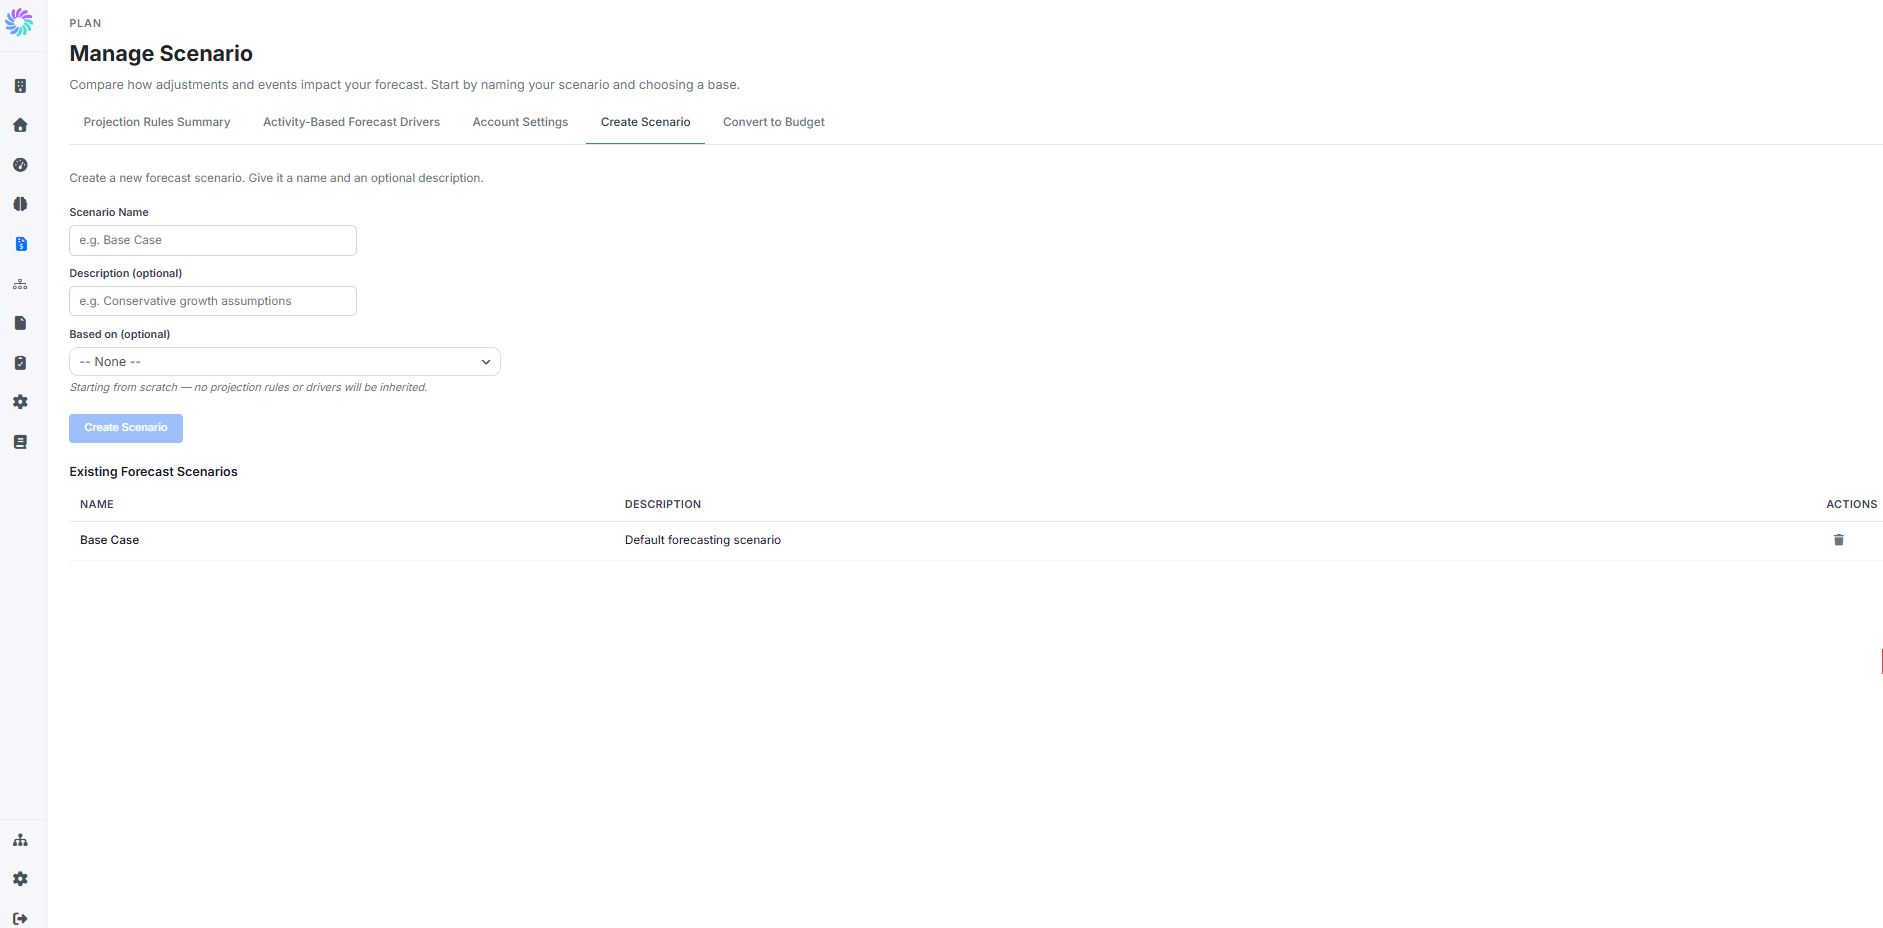
The Create Scenario tab is where you add additional scenarios alongside your Base Case.
- Enter a Scenario Name (for example,
Best Case,Worst Case,Stretch Plan). - Add an optional Description (for example, "Conservative growth assumptions" or "Aggressive Q4 push").
- Use the Based on dropdown to either start fresh (
-- None --) or inherit projection rules and drivers from an existing scenario (such as Base Case). - Click Create Scenario.
The new scenario appears in the Existing Forecast Scenarios list at the bottom. From now on it will appear in the Scenario dropdown across the rest of Planir (P&L, Balance Sheet, Cash Flow, Dashboard, Metrics) so you can compare its projections against any other scenario.
To delete a scenario, click the trash icon next to it in the Existing Forecast Scenarios list.
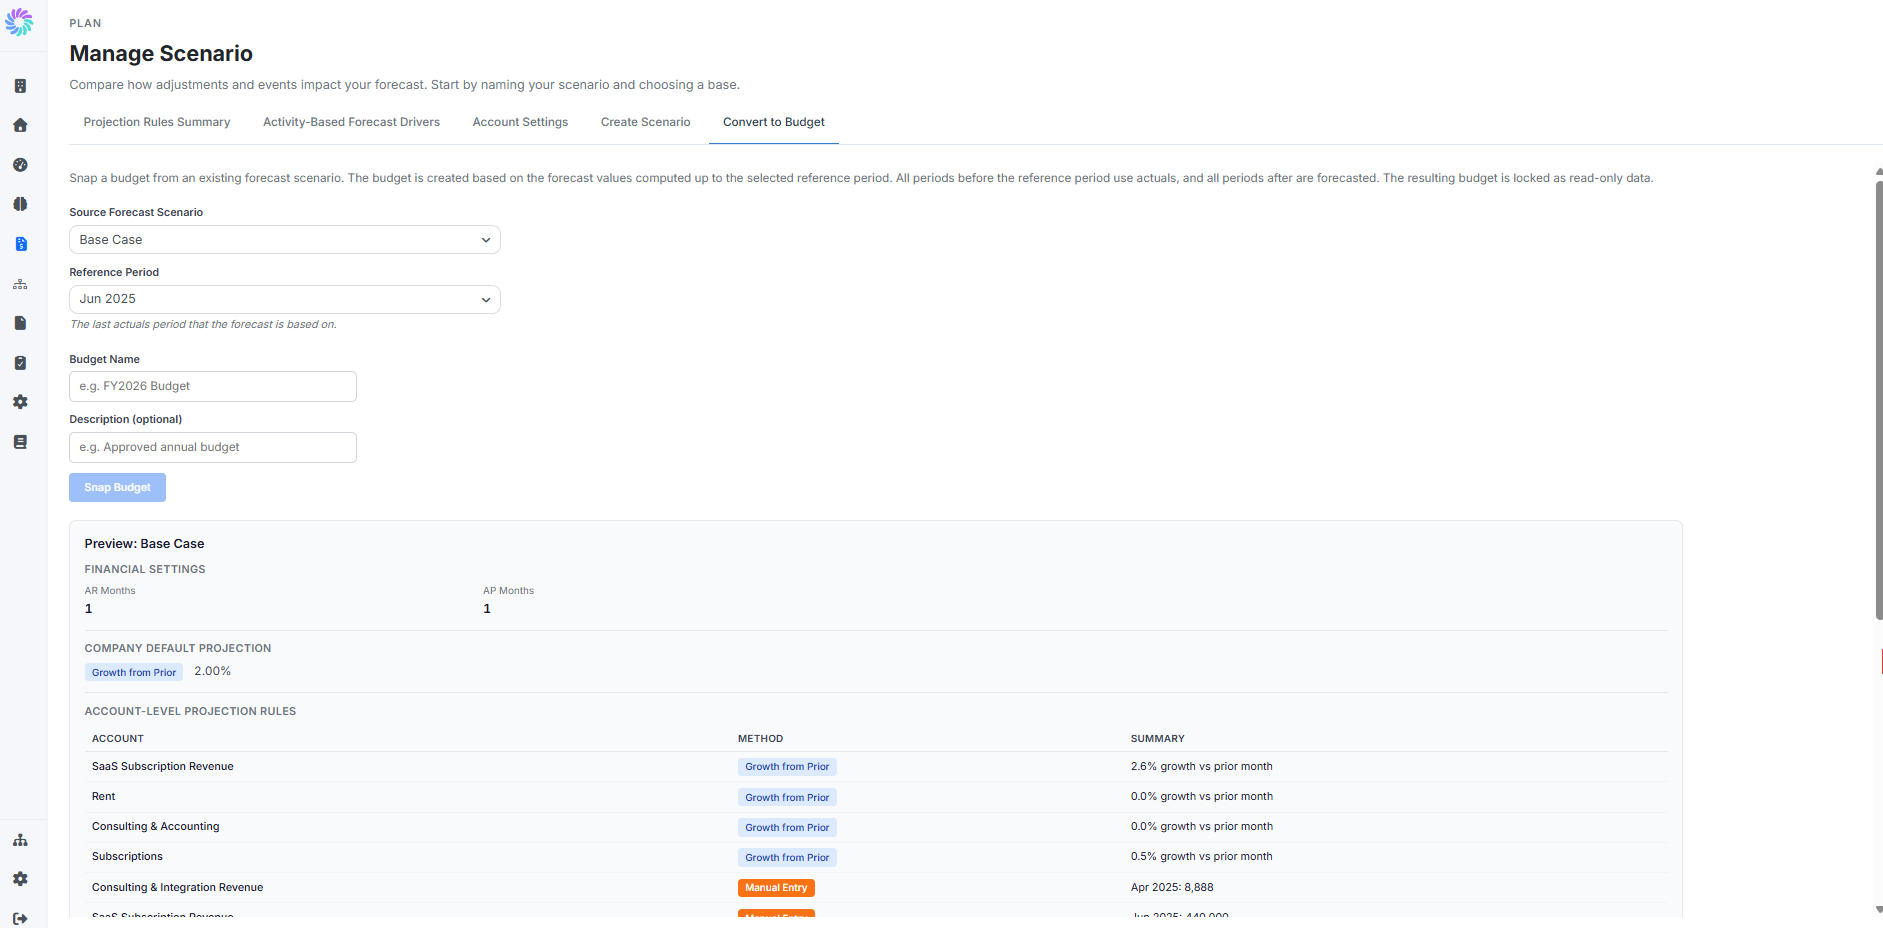
Step 6. Convert a Scenario to a Budget
A budget is a fixed snapshot of a forecast at a specific point in time, locked as read-only and used as the benchmark for future actuals.
- Open the Convert to Budget tab.
- Select the Source Forecast Scenario to snap from (for example, Base Case).
- Select the Reference Period: the last actuals period the forecast should be based on. Periods before this date use actuals; periods after use the forecast values.
- Enter a Budget Name (for example,
FY2026 Budget). - Add an optional Description.
- Review the Preview below the form, which shows financial settings, the company default projection, account-level projection rules, and any active activity drivers.
- Click Snap Budget.
The new budget appears in the Existing Budgets list. The budget is locked, so its values will not change as you continue refining the source scenario. From this point on, every actual you load can be compared against the budget in your Variance Analysis and reports.