Manage Profile
The Manage Profile page is where you update your personal information, change your password, set up two-factor authentication, and choose the analytics focus areas Planir should prioritize for each of your companies. Open it any time you need to keep your account details or security settings up to date.
Why this matters
Your profile controls both how Planir represents you (name, contact details) and how it secures your account (password, two-factor authentication). The Analytics Preferences tab also shapes how Planir's insights are tailored, telling the platform which focus areas matter most for each company you work with. Keeping all four areas current means the platform stays secure and the analytics stay relevant.
When to use this
- After your first login, to fill in your name and contact details
- When changing your password, either as part of routine security hygiene or after a suspected compromise
- When setting up two-factor authentication for added account security
- Whenever your reporting priorities change for a particular company (for example, shifting focus from growth to cash flow)
Before You Start
Make sure you have:
- Your current password handy if you plan to change it
- A two-factor authenticator app installed on your phone (Microsoft Authenticator or Google Authenticator) if you plan to enable 2FA
- A clear view of the focus areas (up to five) you want each company to be analyzed against
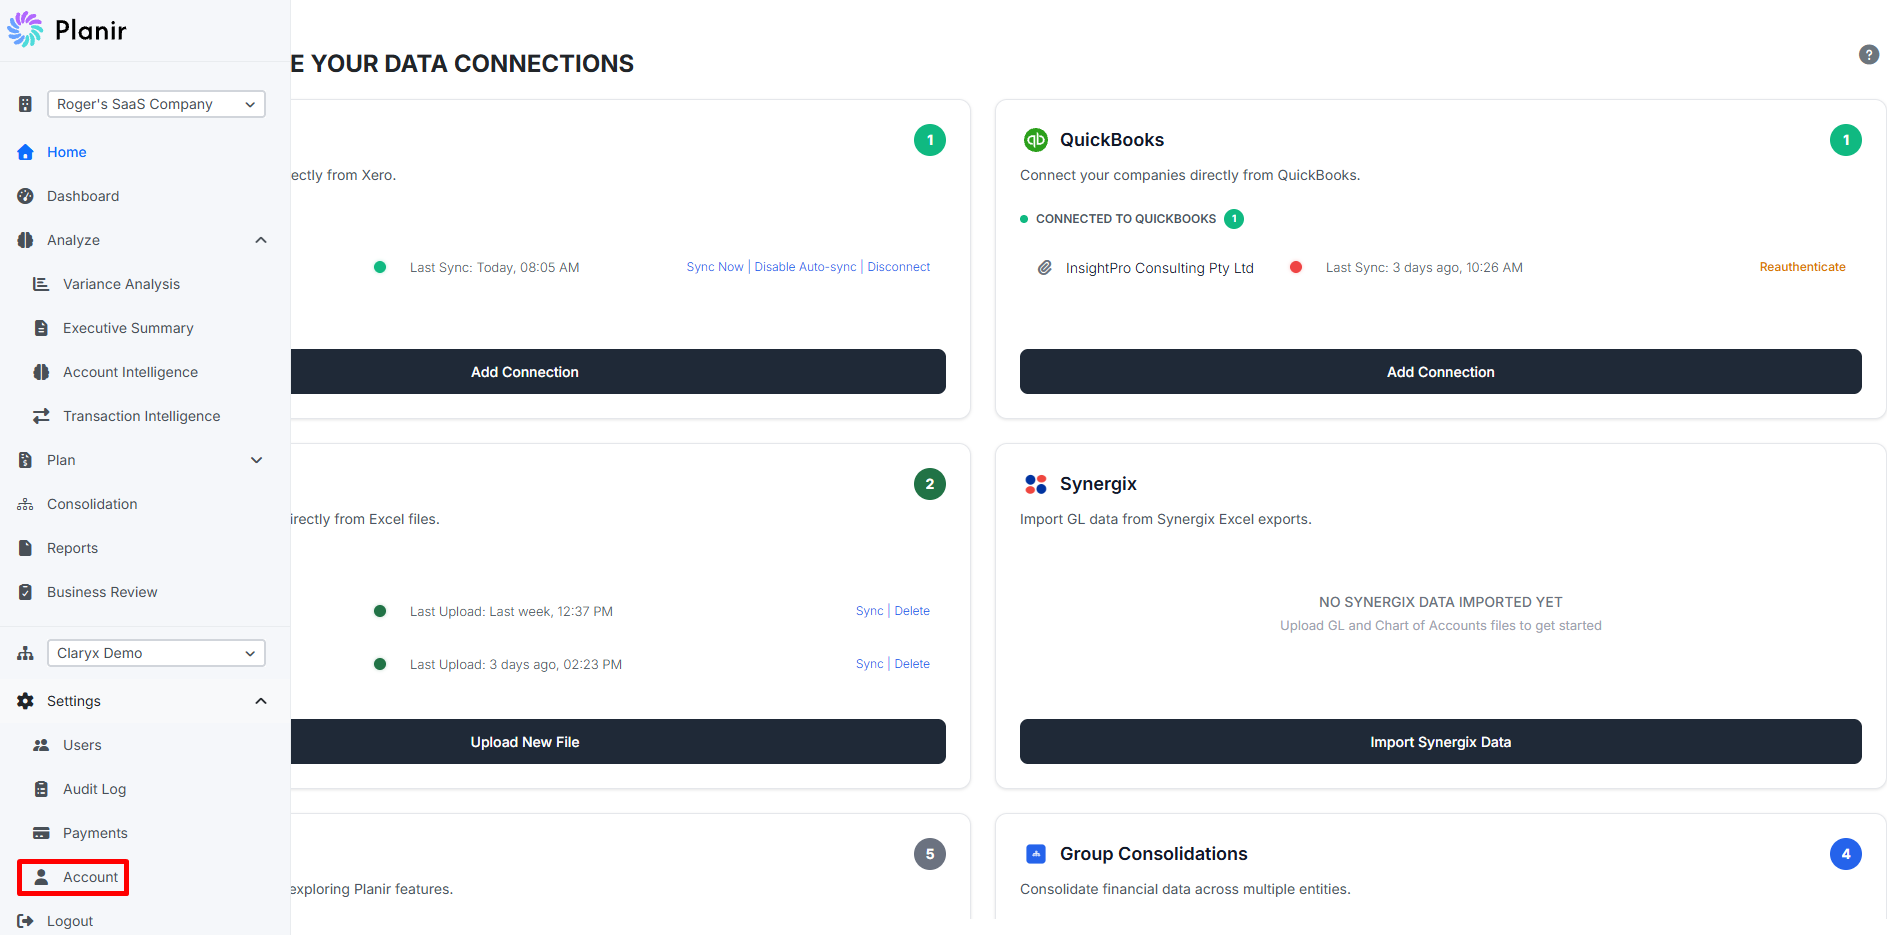
Step 1. Open Manage Profile
- From the bottom of the sidebar, expand Settings.
- Click Account.
The Manage Profile page opens with four tabs across the top: Personal Info, Change Password, Two-Factor Authentication, and Analytics Preferences.
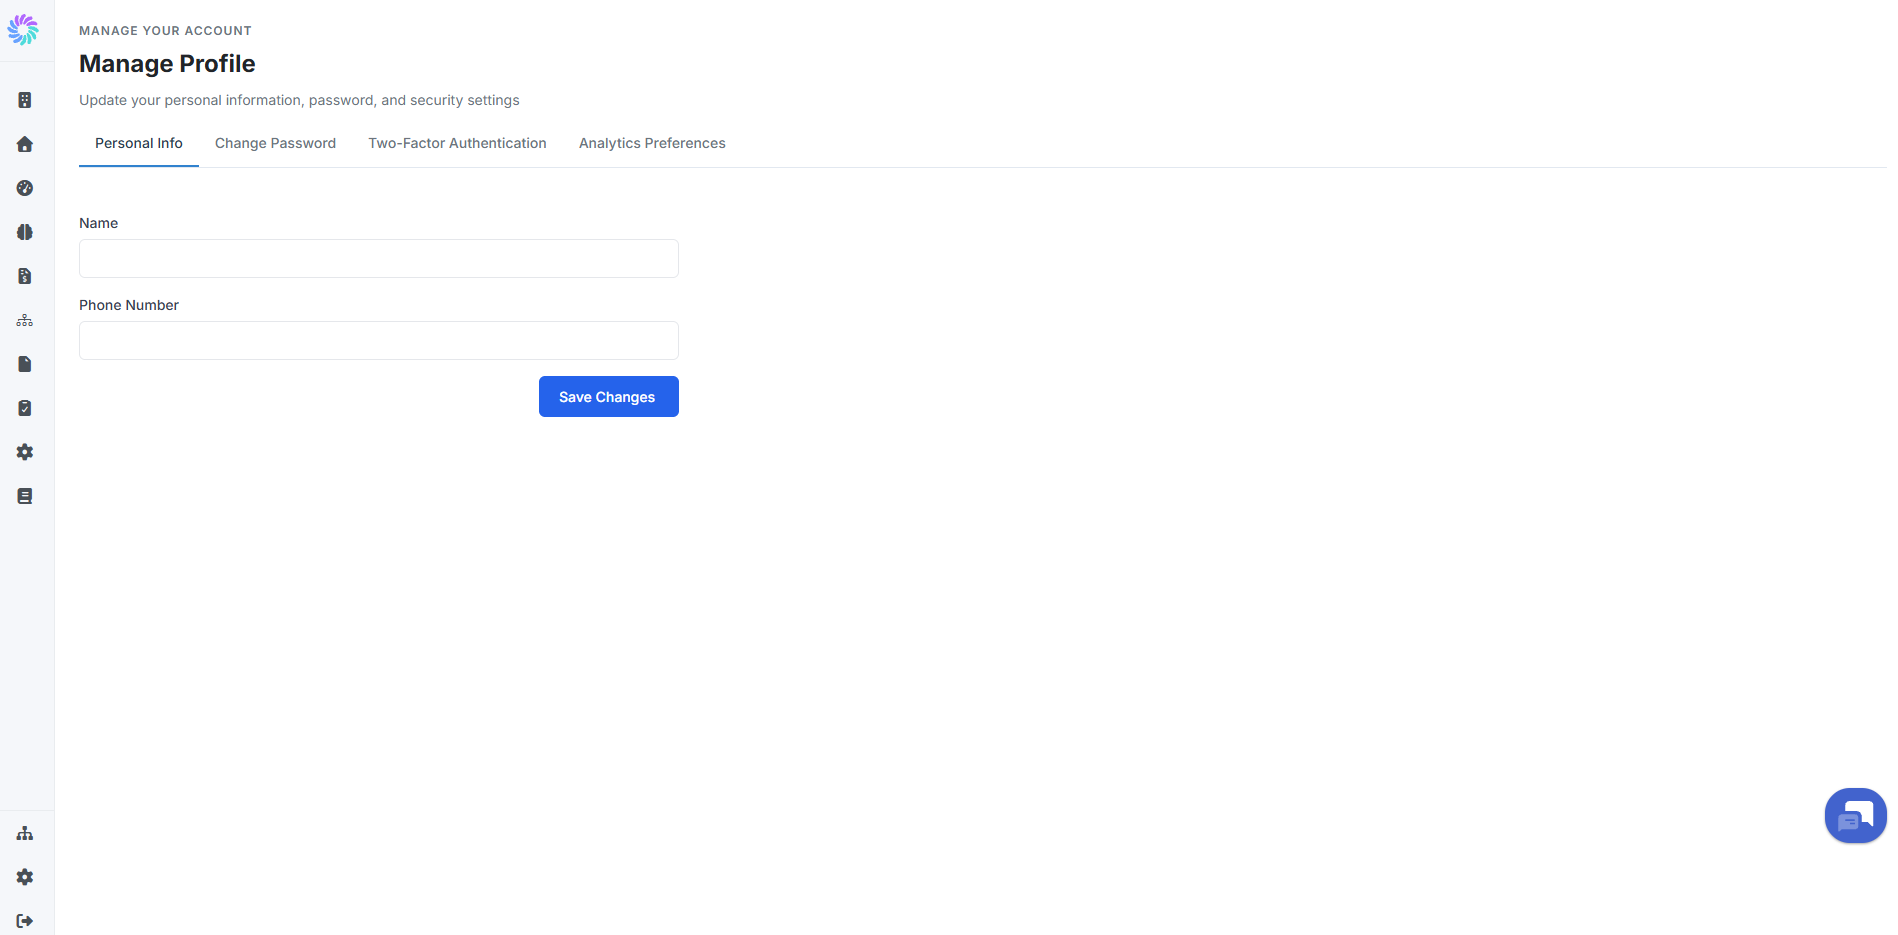
Step 2. Update Your Personal Info
The Personal Info tab covers your basic contact details.
- Enter or update your Name.
- Enter or update your Phone Number.
- Click Save Changes.
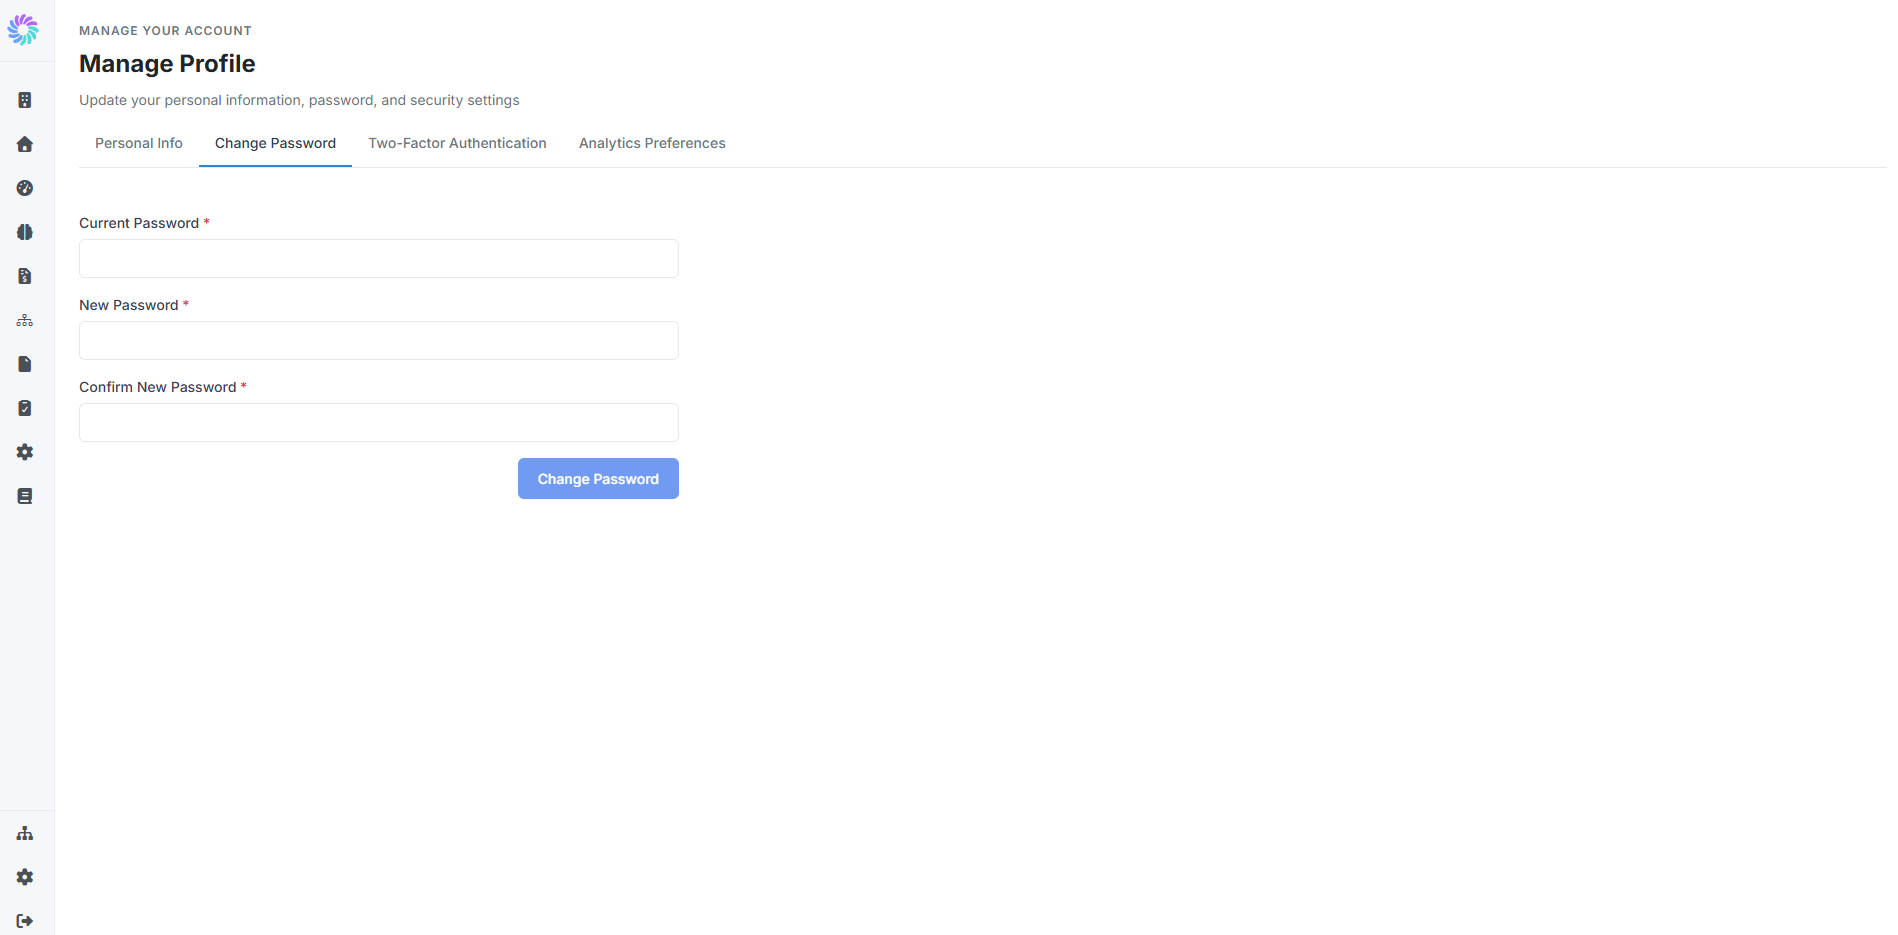
Step 3. Change Your Password
Switch to the Change Password tab when you want to update the password used to log in to Planir.
- Enter your current password to confirm your identity.
- Enter the new password and confirm it in the second field.
- Click Save Changes (or Update Password) to apply.
A confirmation appears once the password has been updated. The next time you log in, use the new password.
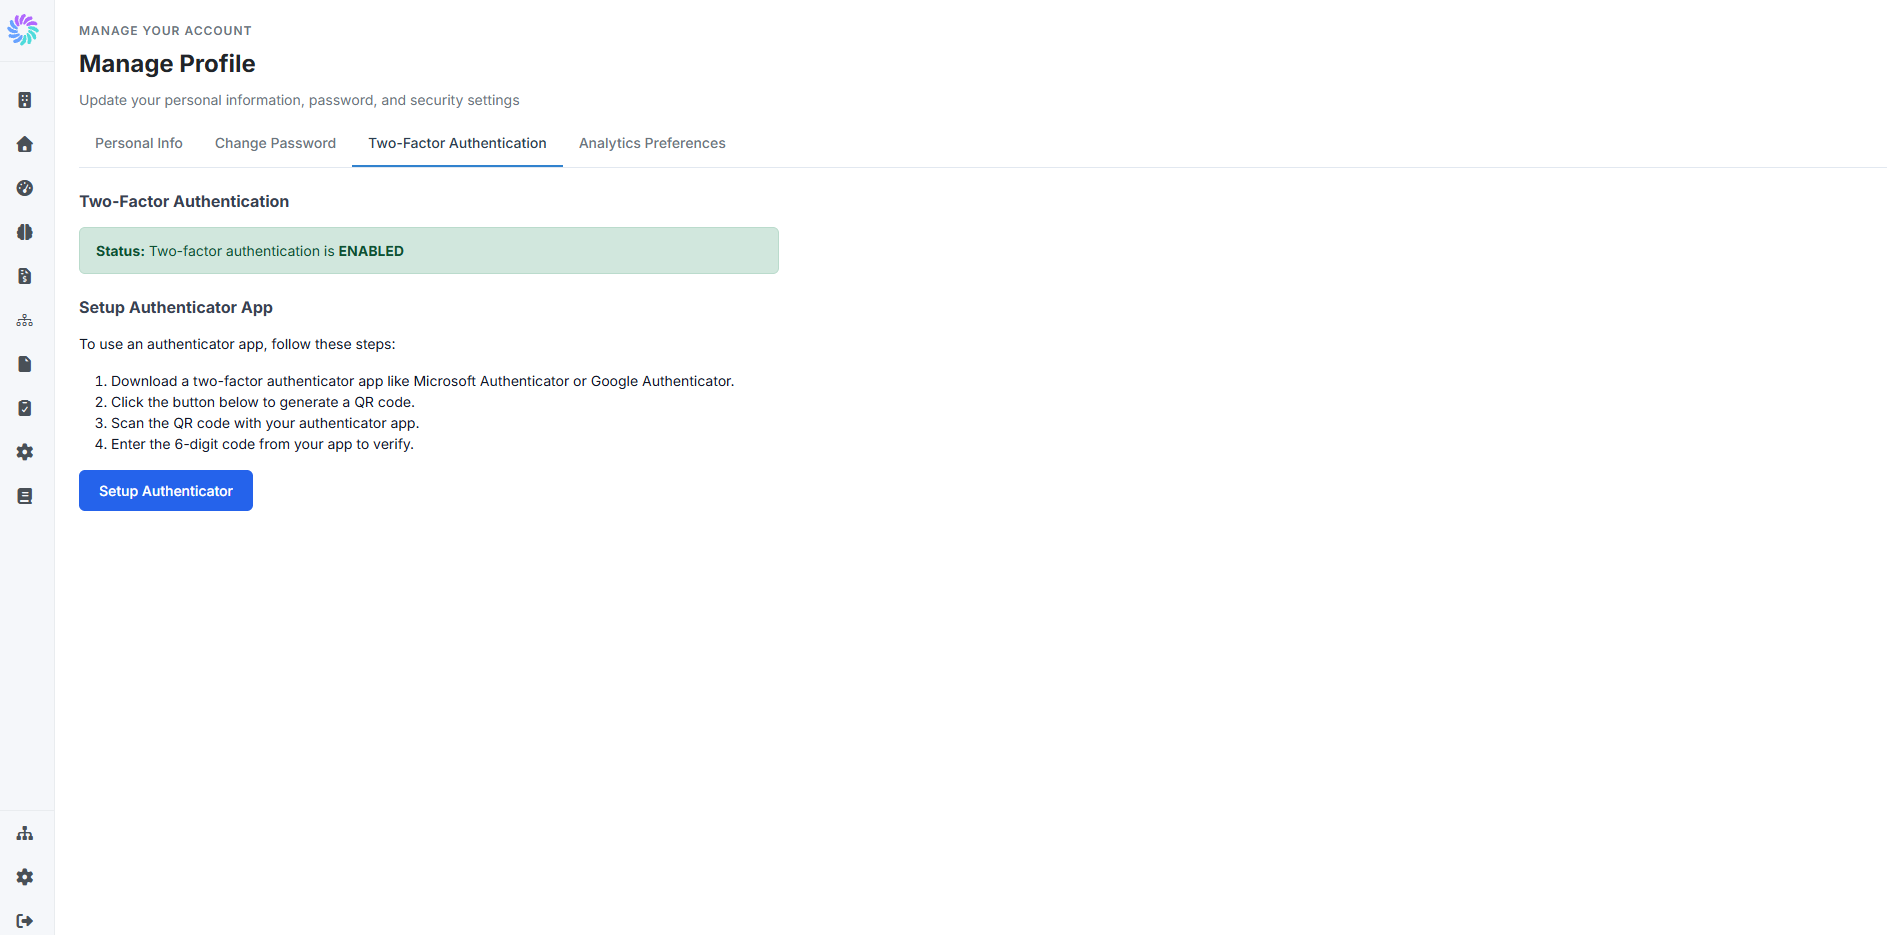
Step 4. Enable Two-Factor Authentication
Two-factor authentication (2FA) adds a second layer of security to your account, requiring a 6-digit code from an authenticator app on every login.
The Two-Factor Authentication tab shows the current status (Enabled or Disabled). When 2FA is disabled, follow these steps to set it up:
- Download a two-factor authenticator app such as Microsoft Authenticator or Google Authenticator on your phone.
- Click Setup Authenticator to generate a QR code.
- Scan the QR code with your authenticator app.
- Enter the 6-digit code from your app to verify the setup.
Once verified, the status changes to Enabled, and Planir will prompt for a 6-digit code on every future login.
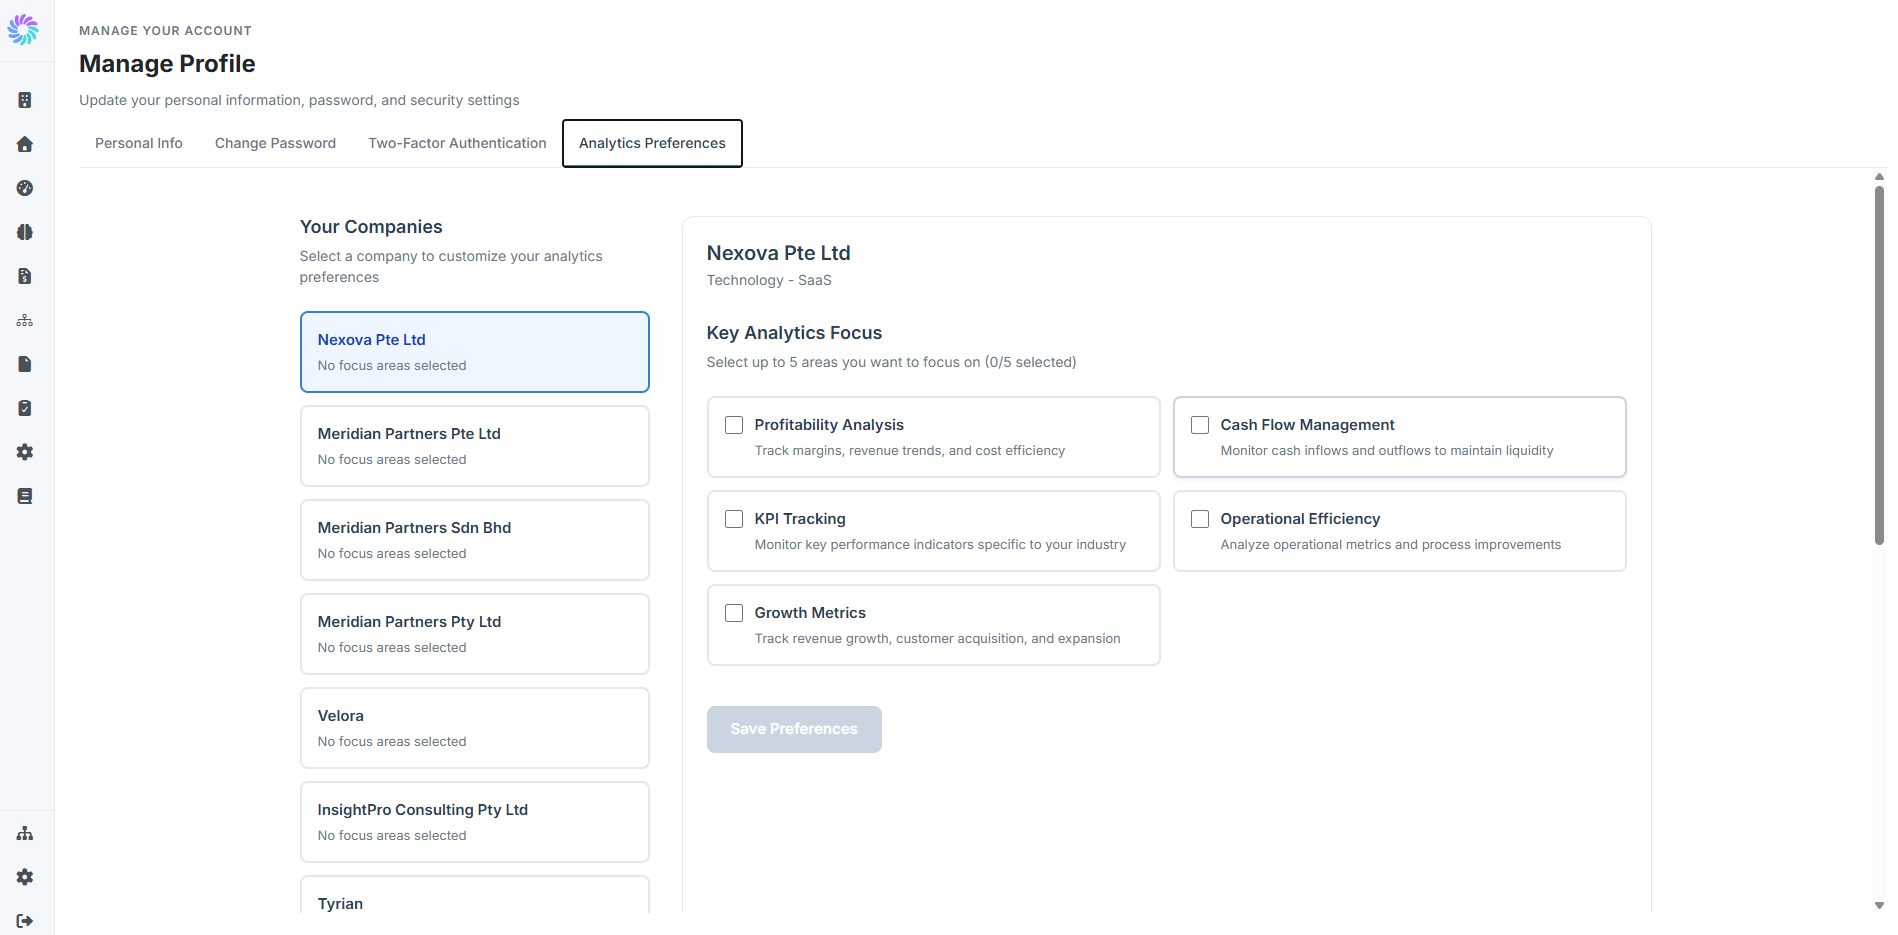
Step 5. Set Your Analytics Preferences
The Analytics Preferences tab lets you tell Planir which areas to prioritize when analyzing each of your companies. Settings are saved per company, so you can have different priorities for different entities.
- Under Your Companies on the left, click the company you want to configure.
- On the right, under Key Analytics Focus, select up to five areas:
- Profitability Analysis: track margins, revenue trends, and cost efficiency
- Cash Flow Management: monitor cash inflows and outflows to maintain liquidity
- KPI Tracking: monitor key performance indicators specific to your industry
- Operational Efficiency: analyze operational metrics and process improvements
- Growth Metrics: track revenue growth, customer acquisition, and expansion
Click Save Preferences to apply.
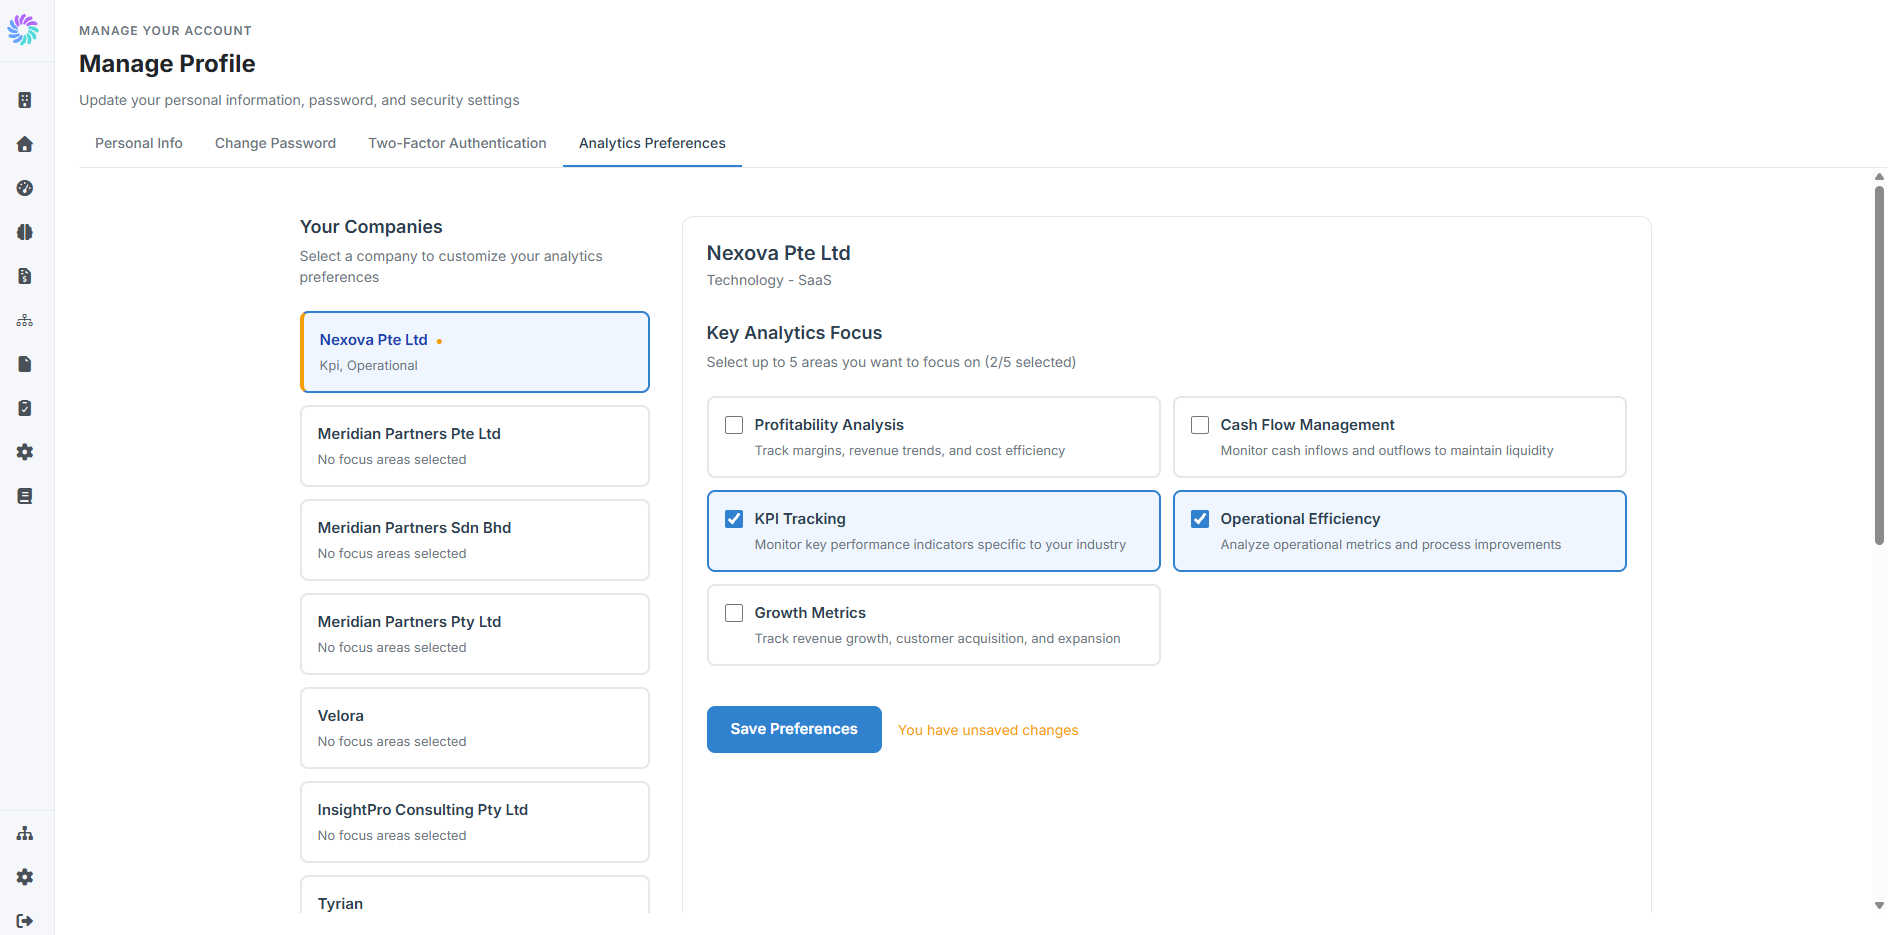
The selected count appears at the top of the focus area panel (for example, 2/5 selected).