Connect QuickBooks
Connect your QuickBooks company to Planir so you can import your financial data, build reports, create dashboards, and unlock AI-powered insights.
Why this matters
Your QuickBooks connection is the foundation of your workspace. Once connected, Planir automatically syncs your financial statements, chart of accounts, KPIs, and supporting data so you always work with up-to-date numbers.
When to use this
- When setting up Planir for the first time
- When adding a new QuickBooks company
- When refreshing your company data structure
- When switching to a clean or updated QuickBooks entity
Before You Start
Make sure you have:
- An Intuit account with access to the QuickBooks company you want to connect
- Admin or Company Administrator permissions in QuickBooks Online
- Your Planir workspace already created
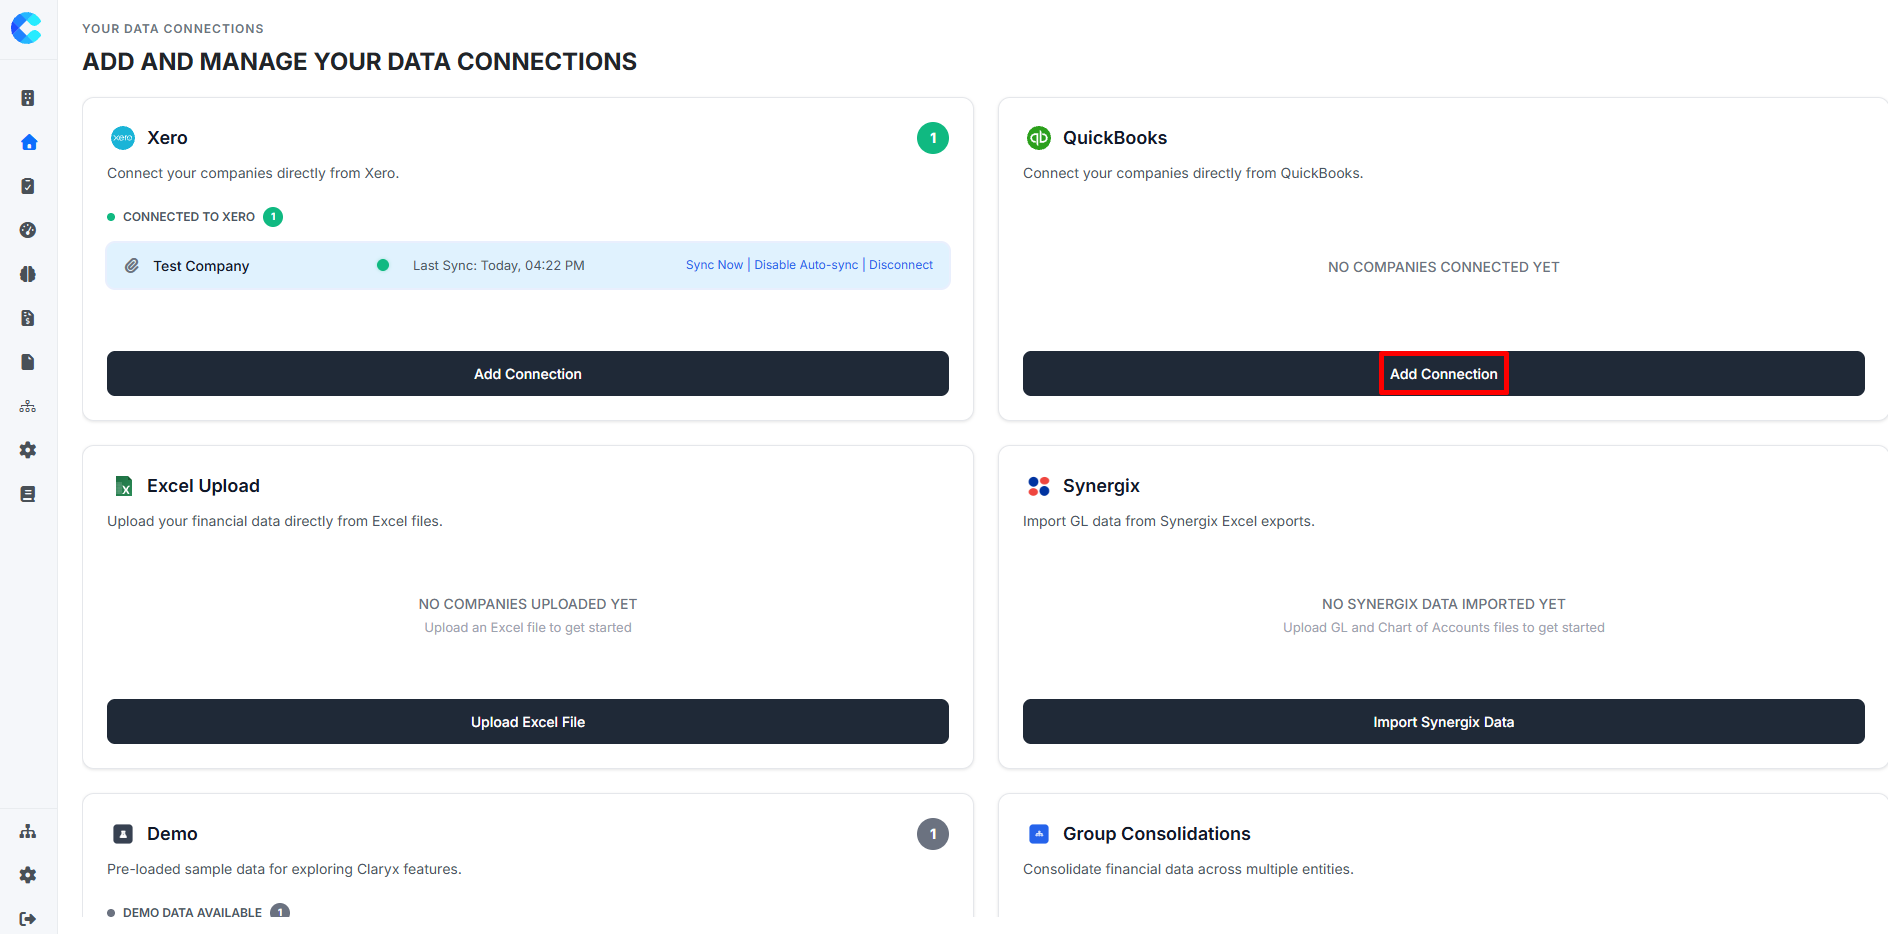
Step 1. Start the QuickBooks Connection
- From the sidebar, go to Home to open the Add and Manage Your Data Connections page.
- Locate the QuickBooks card.
- Click Add Connection.
You will be redirected to Intuit's secure sign-in page.Step 1. Start the Xero Connection
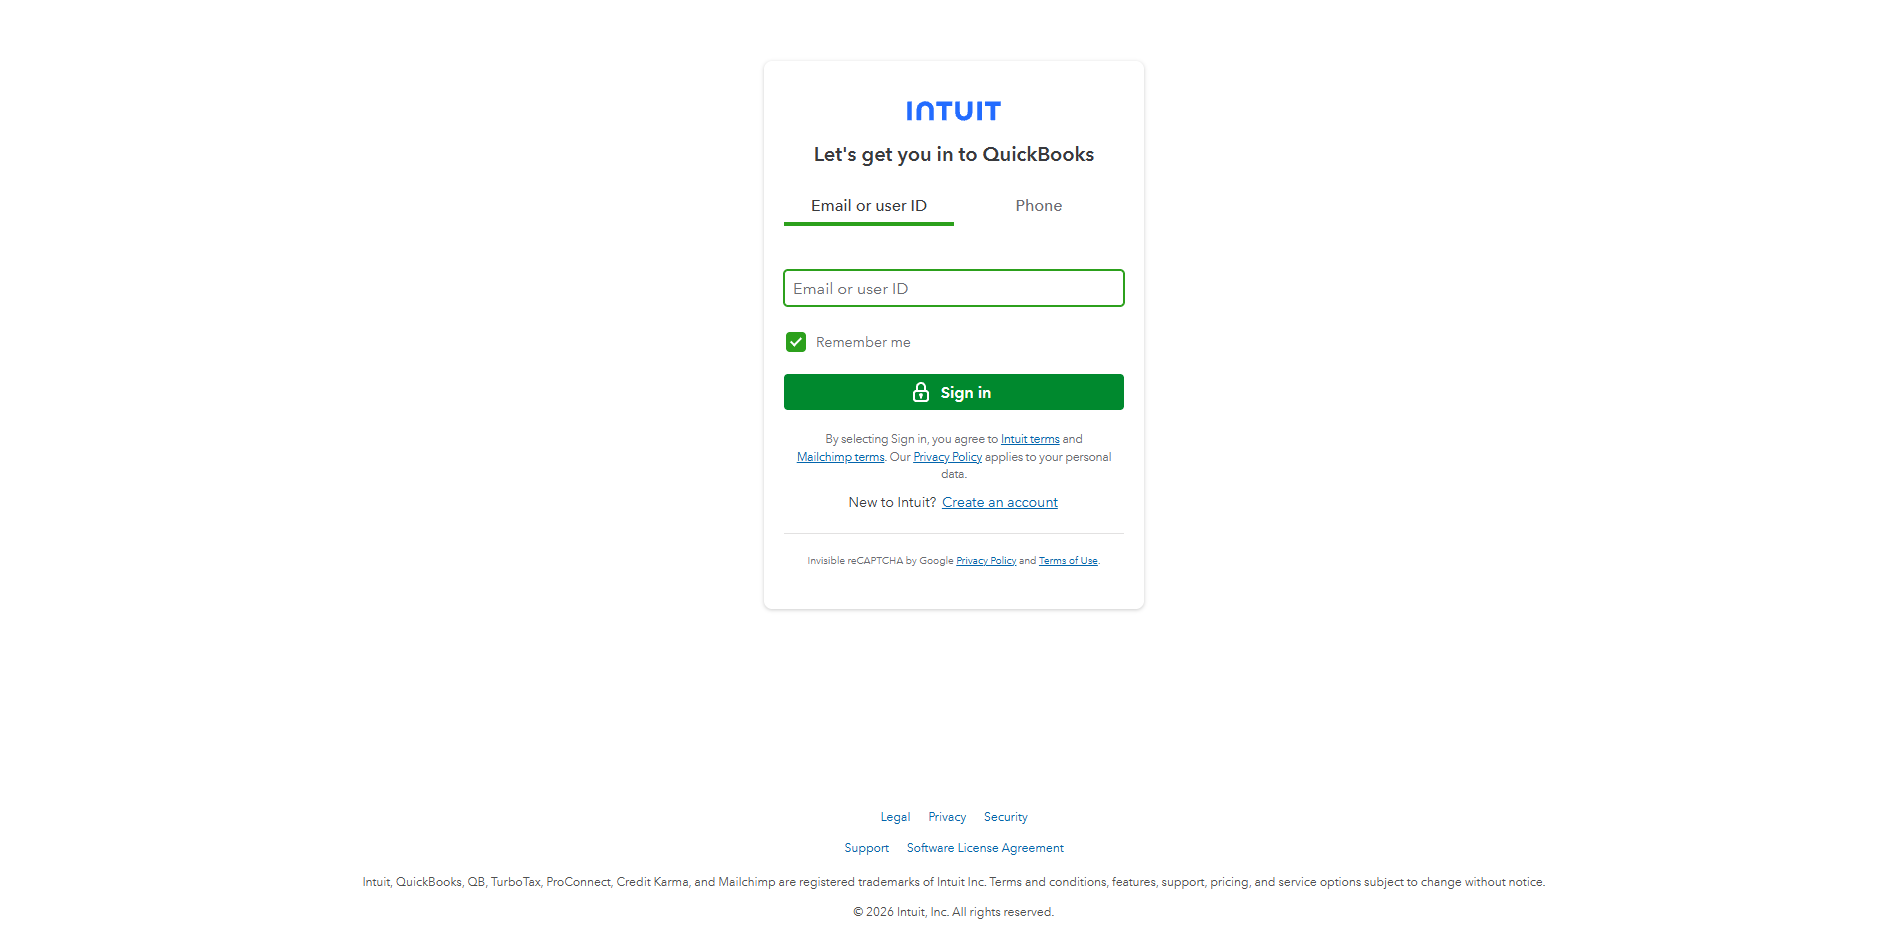
Step 2. Authorize Planir in QuickBooks
- Sign in to your Intuit account using your email or user ID (if you aren't signed in already).
- Choose the QuickBooks company you want to connect.
- Click Connect to grant Planir permission to read your financial data.
Planir uses read-only access. Nothing is ever written back to QuickBooks.
Planir syncs automatically every 24 hours unless you trigger a manual refresh. The sync will begin automatically once you authorize Planir to access your financial data.
Step 3. Wait for the Initial Sync to Complete
Your sync may take several minutes depending on:
- Size of your QuickBooks company
- Number of accounts and transactions
- Amount of historical data selected
You can navigate away as the sync runs in the background.
During the sync, Planir imports and translates your QuickBooks data into financial statements, your chart of accounts, KPIs, and dashboard tiles.
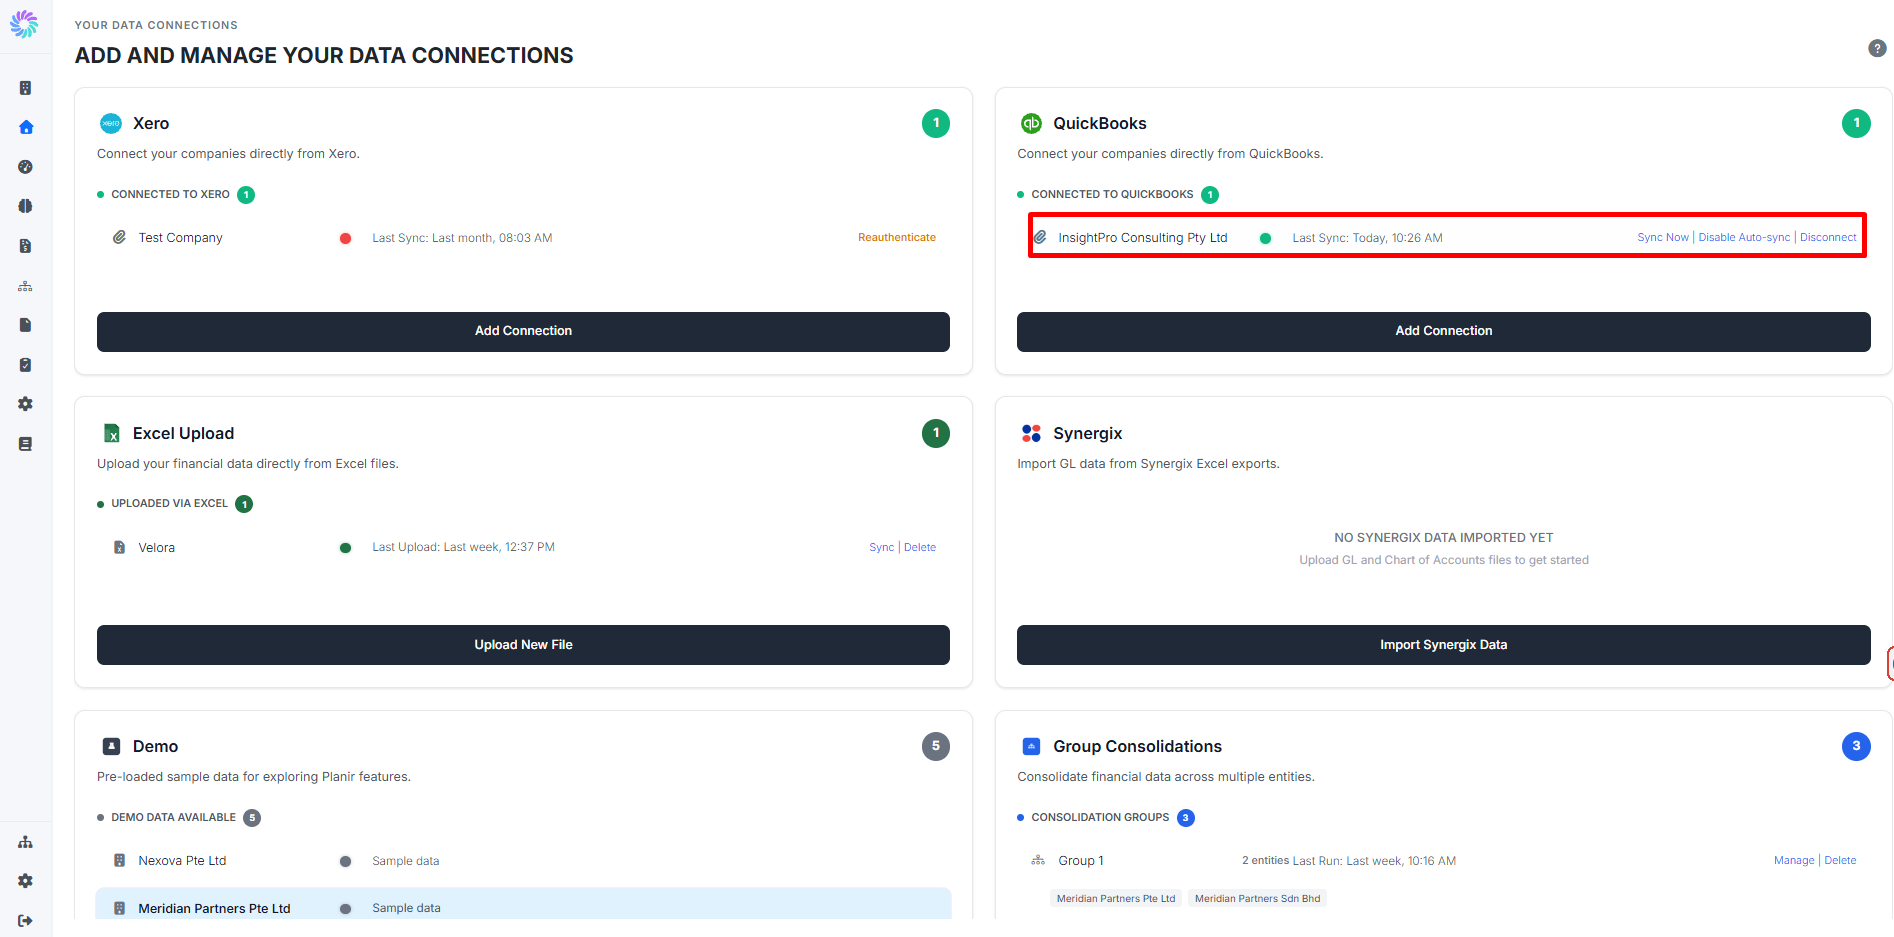
Step 4. Review Your Connected Company
Once the sync finishes, your connected entity appears under the QuickBooks card with a green status dot and the most recent sync timestamp. From here you can manage the connection directly:
- Sync Now — pull the latest data immediately
- Disable Auto-sync — pause the daily automatic refresh
- Disconnect — remove the QuickBooks connection from this workspace
Then review your:
✔ Financial Statements — verify Profit & Loss, Balance Sheet, and Cash Flow
✔ Chart of Accounts — check naming, groups, and structure
✔ Metrics — initial KPIs auto-populate based on your accounts
✔ Dashboards — the Insights Dashboard will display your first set of visuals
If anything looks off, click Sync Now to refresh your data.
Managing Your QuickBooks Connection
Sync Now
Click Sync Now on the connected company tile any time you want the latest data immediately, without waiting for the next automatic sync.
Disable Auto-sync
By default, Planir refreshes your QuickBooks data every 24 hours. Click Disable Auto-sync if you'd prefer to control refreshes manually. You can re-enable it the same way.
Reauthenticate
If your QuickBooks token expires, the company will display a red status dot and a Re-authenticate link. Click it and sign back in to Intuit to restore the connection.
Disconnect
Click Disconnect to remove the QuickBooks entity from your workspace. Your historical Planir data is retained, but no further data will be pulled from QuickBooks unless you reconnect.
Change Companies
To switch a connection to a different QuickBooks company, click Disconnect first, then click Add Connection again and choose the new company.
Planir Tip
If you're connecting multiple QuickBooks companies (e.g., multi-entity groups), repeat this process for each entity and map them separately inside your workspace.
Example Scenario
You've just onboarded a new client who uses QuickBooks Online.
- Open Home → Add and Manage Your Data Connections
- On the QuickBooks card, click Add Connection
- Sign in to Intuit and select the client's company
- Click Connect to authorize Planir
- Wait for the initial sync to complete
- Open the Insights Dashboard to review their first automated analysis
Your workspace is now live and populated.